How to Replace Heater Blower Motor with Fan Cage 1997-2002 Chevy Malibu
Created on: 2011-09-28
Check out this video on how to repair, install, fix, change or replace a broken, weak, noisy or screeching heater and air conditioning fan blower motor
-
step 1 :Remove the AC Blower Fan Motor
- Under the passenger side dash, pull out the push clips securing the plastic cover.
- Remove the 7 mm bolts with your socket and ratchet and set the plastic cover aside.
- Take the little bulb and unplug it and set it somewhere safe.
- Unclip the ECU and move to the side (take care not to unplug it or disconnect the wiring harness)
- Unbolt the 7/32 inch bolts anchoring the AC Blower Fan Motor and pull it down and out.
- Unplug the wiring harness.
-
step 2 :Install the new AC Blower Fan Motor
- Slide the AC Blower Fan Motor into place and bolt in with a 7/32 inch socket and ratchet.
- Plug in the wiring harness.
- Clip the ECU back into its bracket and plug the little bulb back in.
- Bolt the plastic cover back on with your 7 mm socket and replace the push clips.
Tools needed
-
7mm Socket
Ratchet
7/32 Inch Socket
Brought to you by 1AAuto.com; your source for quality replacement parts and the best service on the internet. Hi, I'm Mike Green. I'm one of the owners of 1A Auto. I want to help you save time and money repairing and maintaining your vehicle. I'm going to use my 20+ years experience restoring and repairing cars and truck like this to show you the correct way to install parts from 1AAuto.com. The right parts installed correctly, that's going to save you time and money. Thank you and enjoy the video.
In this video we're going to show how to replace the blower or the heater or A/C fan on this 2001 Chevy Malibu; same as any '97 to '03. The tools you'll need are a 7mm and 7/32 inch sockets with a ratchet and extension. You'll also want some type of flashlight or any kind of other portable light to give yourself some light up under the dash. Start underneath. On this side you have a little panel. You may not need to take this out, but I do it anyway to just give me some extra room. You want to pull down the center of this pin, pull it out and then this comes out. Now the two 7mm bolts, one there and then one right over here. We'll fast forward through removing those two 7mm bolts.
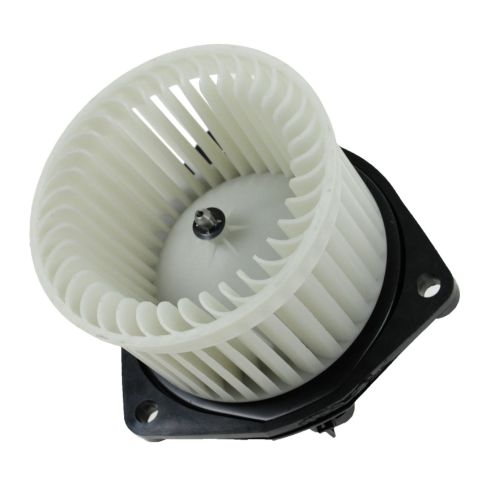
Then this pulls out, over and down. Then you're actually going to want to remove this light bulb. If your battery is still plugged in and that's lit it will be hot. Now you want to grab your computer here and slide it to the side and down. Now you can see your blower motor is right here. We'll fast forward a little bit. You want to use your 7/32 socket with your ratchet and extension and remove those three bolts. Comes down, here's your lead. Pull back on the tab, pull it out. Okay here's the motor that was in the car. A new motor from 1A Auto. I'm actually thinking that this motor was probably a replacement, because it's got a shorter fan cage on it. This motor will bolt in. It's got the correct connection and everything on it. This part of the motor that has an oblong edge, that goes towards the front of the car.
You can see here that the oblong edge, let's take our lead and pull it down out of the way. Oblong edge of the motor here put it up in. As it goes up in there rotate it. Now line it up. Start one bolt. We'll speed it up here again. You put the motor up in there. Get one of the bolts started and then start the other ones. Then use your socket, your ratchet and even your extension and tighten them up. When you tighten them you don't want to over tighten them because you could strip the plastic housing. You want to have them be nice and firm. Now this computer goes right up into that bracket here. We'll slide it into place. Put your bulb back in. This large one you want to put back up in there. Right here, right up in here in this corner, you want to push it up and in. Get that trim panel in place. Put it up in place and then start your bolt on the left side and then start the one on the right side. You want to tighten these. When you tighten them up, again just like anything in this repair make them firm but don't over tighten them.
We hope this helps you out. Brought to you by www.1AAuto.com; your source for quality replacement parts and the best service on the internet. Please feel free to call us toll free 888-844-3393. We're the company that's here for you on the internet and in person.
Shop Products
How to Replace Blower Motor with Fan Cage 1996-2013 GMC Savana
Follow along to learn how to replace the blower motor on your 96-13 GMC Savana or Chevy Express.
