How to Replace Headlights 2011-16 Volkswagen Jetta
Created on: 2017-09-29
Watch this video to learn how to replace the headlights in a 11-16 Volkswagen Jetta.
-
step 1 :Removing the Front Bumper
- Remove the T30 bolts from the headlight
- Pop the headlight bracket up and out
- Remove the four T25 bolts from the bumper
- Remove the T25 bolts beneath the bumper
- Remove the three T25 bolts in the wheel well
- Pry off the tape from the wheel lining
- Remove the T25 screw underneath
- Pry out the bumper from the side guides
- Evenly pull the front bumper out
- Turn the fog lights counterclockwise to remove them
-
step 2 :Removing the Headlight
- Hold the headlight and remove the T30 bolt from the headlight
- Press the clip and release the wiring harness
- Remove the headlight
-
step 3 :Installing the Headlight
- Insert the headlight into place
- Tighten the T30 bolt to the headlight
- Place the headlight bracket on top of the headlight
- Press the washers onto the bracket
- Loosely assemble the hardware
- Tighten the adjustor bolt
- Tighten the T30 bolts to the bracket
- Clip in the wiring harness
-
step 4 :Installing the Front Bumper
- Turn the fog light bulb clockwise
- Press the bumper into the car
- Lift the bumper into the brackets and press it in
- Tighten the T25 screws in the wheel well
- Press on the tape to the wheel lining
- Tighten the screws beneath the bumper
- Tighten the T25 screws on top of the bumper
-
step 5 :Adjusting the Headlights
- Locate the axis of the headlights, the center point of the headlight bulb
- Transfer the mark to a vertical wall
- Mark the wall at the height of the axis mark
- Back the vehicle up 25 feet
- Locate the adjusting screw
- Turn the headlights on
- Rotate the screw until the passenger beam is two inches below the mark on the wall
- Rotate the screw until the driver side beam is four inches below the mark
Tools needed
-
Socket Extensions
T30 Driver
Ratchet
Assistant
T25 Torx Driver
Hi, I’m Mike from 1A Auto. We’ve been selling auto parts for over 30 years!
To remove the headlight, we're going to remove these bolts. There's two there, two along the top of the headlight. One here and then there's one in the back, right here. And then there's also another one, which we'll get to, that is behind the grille. With your T30 socket, we're going to go ahead and start removing the headlight racket bolts and all of the bolts that are connected to the headlight on top here. You're going to remove this black upper bracket. These two plastic grommets are going to want to pop out of the top of the headlight. Just be careful that they don't fly out on you.
We're going to start by removing these four T25 bolts here and at the end. To get the front bumper off, you can see that plastic brackets are attached under here. You want to start by removing these T25 bolts from the bottom. Next, we're going to remove the T25 bolts that are located inside the fender well here, and there's also one way down here. A third one at the bottom here. We're going to do the same on the other side of the vehicle. Take off those three bolts on the inner fender well, the T25. Depending on which model you have, you may have these bumpers on your fender that go over the seam.
If you need to take off your front bumper, you are going to want to peel this back. It is double sided taped on there. If you intend of keeping it, you may or may not have to apply more double sided tape to this to get it to stick back. You can just let it hang here until you're ready to reapply. There is also a bolt facing down right here that you're going to have to get your T25 as well. When you need to remove the front bumper itself, there is a guide along the back of this bumper, so you're going to want to apply some pressure forward to get it out of the guide, and then it's all going to come straight out.
To finish removing the front bumper after you get the side guides out, you're going to want to pull forward. You may need a second person to assist in evenly pushing the front bumper out. It's clipped in. If your vehicle's equipped with fog lights, you want to grab this, simple twist and pop it out, and do the same on the other side. When you're removing this front bumper, there are a lot of clips on the inside directly in the center, and when you're pulling out where it doesn't involve a lot of force and a second person to pull the bumper outward to actually get these to disengage.
When you remove the front bumper and grille assembly, there is one last bolt here, a T30. We'll grab onto that and just take it off. You're going to want to release the harness under the headlight. As it's clipped down here, a screwdriver may help with this as they pull out tight, and it'll pop right out.
To reinstall the headlight, you're going to start by aligning it back into the body and putting in the first bolt on the inner side because the front bumper and grill are going to go over this. At the same time, to align this light properly, you're going to want to reassemble all of the hardware up here so this is properly aligned and you can tighten this down to the exact spot it needs to be in. Place your headlight bracket over top and align your headlight back into place. You have your washers here. Place them back into the headlight. Loosely assemble all your hardware. Assemble all this hardware loosely in the rear adjustable. Go back down to here. After you have your hardware loosely in place, you want to start to tighten down the headlight portion to hold it to the bracket while you get the bracket in the exact spot that you need.
The good way to get your headlights roughly in the same spot, you can see around the washers where they had sat previously and it's a good reference point, so it's easier to adjust your headlights once you have fully reassembled your vehicle. You'll have to get them adjusted afterwards.
After you have reinstalled your headlight, your adjuster is located down here. It has an Allen key head in it to place a socket in to adjust your headlight aim appropriately once the headlight has been replaced. Once you've installed your headlight, you're going to take your plug, you can plug that back in, so it snaps into place.
To place the bumper back in, you're going to want to have yourself and a helper. First, tilt the bottom down or up and place the initial clips back in their correct spots. You can leave the side off under the fender. You can leave it completely off, we just need to clip in the middle. When your bumper's still lightly connected by the center and the side is still disconnected, you're going to take your fog light bulb, place it in here, and twist it back into its locked position. Just like that.
You do the same for the other side. To place the bumper back onto their brackets, which have clips all along the top, make it sure it's aligned underneath the headlight. Press it back into place. There we go.
To reinstall the hardware into the bumper, you just want to start with this one up here, as the liner actually attaches to the other screws that go into the bumper. To attach the liner back to the bumper, there's three screws. There's one here, one here, and then one on the inside right down here, if you could see that right there. Same situation for the hardware on the other side.
There's the one up here, then you're going to want to get before the skirt. And then to put the liner back in. You're going to want to fold this over and then put your three T25 bolts back into place. To reconnect the shield back up to the car, you want to make sure first, when you put the bumper on that these actually slide over the skip plate, and these lock into place right here and here. You want to take your hardware, and then starting from one side, let's screw them over back into place. And the last step, you want to take the remainder of your T25 bolts and line up your grill on the top, and screw it down. You should be all set.
This is a basic tutorial on how to aim the headlights on your vehicle. Find the axis of your headlights. This is usually indicated with a small dot or the headlight bulb size on the lens. If not, it's the actually center point of your headlight bulb. Transfer this mark to a vertical wall, with a preferably dark color that'll allow you to back up 25 feet. Pull up and find the center line of your vehicle as well as the center line of your headlight access. Mark the wall with the height of the headlights and a straight line going across at that axis height.
Back your vehicle up 25 feet from the wall to the front edge of your vehicle's headlights. Turn your headlights on and locate the adjusting screw, usually on the backside of your headlights. You'll want to rotate this until the passenger hotspot of focus of the beam is approximately 2 inches below the line, and the driver's side is four inches below the line. We change the heights on each side so you can still get a good beam to the off side of the road on the passenger side, and have the driver's side low enough to not blind oncoming traffic.
Thanks for watching. Visit us at 1AAuto.com for quality auto parts, fast and free shipping, and the best customer service in the industry.
Shop Products
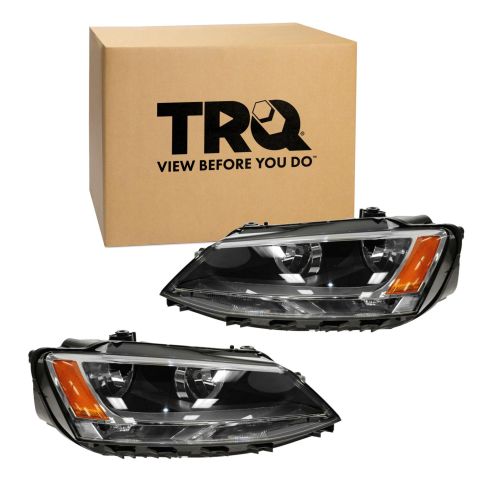
VW Jetta Driver & Passenger Side 2 Piece Headlight Set TRQ HLA88346
Part Details:
- 2 Piece
- PC (Polycarbonate)
- (1) Passenger Side Headlight Assembly
- Standard Replacement
- (1) Driver Side Headlight Assembly
- Assembly
- Halogen

How to Replace Headlights 2003-07 Honda Accord
Learn how to replace the hazy, cracked, or dim headlight assembly in your 03-07 Honda Accord by watching this video from 1A Auto.
