How to Replace Headlights 2007-11 Toyota FJ Cruiser
Created on: 2019-07-09
Check out this video from 1A Auto, and learn how to replace the headlight assembly on your 07-14 Toyota FJ Cruiser.
-
step 1 :Removing the Grille
- Remove the three lower push pin retainers
- Remove the two top push pin retainers
- Remove the two upper 10 mm screws
- Pry the retaining clip connecting to each headlight assembly
- Pry out the three inner panel clips
-
step 2 :Removing The Headlight Housing
- Push from the back side to remove the small trim panel below the headlight assembly housing
- Disconnect the headlight electrical connector
- Disconnect the corner light electrical connector, or twist counter-clockwise to remove the bulb socket
- Remove the three 10 mm screws securing the combination light housing
- Pull straight out to remove the headlight assembly
- Remove the three 8 mm nuts securing the corner light housing to the headlight housing
-
step 3 :Installing the Headlight Housing
- Remove the headlight bulb socket rubber boot from the original headlight assembly
- Release the headlight bulb spring retainer
- Remove the headlight bulb
- Insert the headlight bulb into the new headlight housing
- Secure the headlight bulb with the spring retainer
- Install the headlight bulb rubber boot on the new headlight housing
- Reassemble the corner light housing with the headlight housing
- Secure the corner light housing with the three 8 mm nuts
- Insert the corner light socket into the corner light assembly and twist it clockwise to lock it in place
- Insert the headlight assembly straight into position
- Secure the headlight assembly with the three 10 mm screws
- Reconnect the headlight electrical connector
- Test the lights
- Reinstall the lower trim piece
-
step 4 :Installing the Grille
- Reposition the three white panel clips into the grille
- Push the grill into position to lock the three panel clips and the two retaining clips at the headlight assemblies
- Reinstall the two upper 10 mm screws
- Reinstall the two upper push pin retainers
- Reinstall the three lower push pin retainers
-
step 5 :Aiming the Headlights
- Locate the axis of the headlights, the center point of the headlight bulb
- Transfer the mark to a vertical wall
- Mark the wall at the height of the axis mark
- Back the vehicle up 25 feet
- Locate the adjusting screw
- Turn the headlights on
- Rotate the screw until the passenger beam is two inches below the mark on the wall
- Rotate the screw until the driver side beam is four inches below the mark
Tools needed
-
Socket Extensions
Flat Blade Screwdriver
Plastic Fastener Remover
8mm Socket
10mm Socket
Ratchet
Hey friends, it's Len here at 1A Auto. Today, we're working on a 2007 Toyota FJ Cruiser. I'm going to show you how to do a headlamp assembly. It's going to be a fairly easy job. I want to be the guy that shows you how to do it. If you need this or any other part, you can always check us out at 1Aauto.com. Thanks.
So we're going to go ahead and take off the grill. There's a couple push clips. We've got one here, one located on this side, and then there's some located down in the bottom area there. Okay? So let's see if I can get my hand down, right here. So, all I'm gonna do is I'm gonna try and lift up the center area. Here we are. Grab it, lift it up out of there. That's what it looks like. When you go to lock it, you just press this in and it pushes these tabs out. Okay?
We'll set that aside. Might as well start on one end here. Here we are. Same as the first. I'm just going to come along. There's one in the center.
There's a little clip right here. This one, to get the grill off of here, we're just gonna slide it, but we won't worry about that yet. Come over here, lift that up. Another clip. Here we are. Cool. Okay. 10 millimeter, 10 millimeter. That's what it looks like. A little rusted, not worried about it.
Another one, same as the first. So, now we've got a little clip right here, and what you do for these, there's a little tab on the left side, you push that. Okay. And then push that. Here we are. Come along this way. Do the same thing for this one. Give that a little push. Okay. You're gonna need a little hooky-do, hooky tool. Right down there, there's a little white clip, little white clip, and then all the way over there, there's another little white clip. So, I'm just going to go ahead and stick it in here. Push that out. Let's see if I can get this one.
I'll show you what these clips look like. That's what they look like, right there. Nothing too special about them. I mean, they're very special. Hope I'm not offending any clips out there. There we are. Now, we've removed our grill assembly.
Okay, so we've got the grill out of the way now. So, we want to try to remove this whole unit right here. That'll be the easiest way to get any of it apart. So, to get behind here, what I'm going to do, I'm going to reach down this way, I'm going to try to push from the backside of this, just like that. And then, you can see right in there, there's a little clippy-do, so I'm going to try to take this tool, my little fork, stick it right in there. There we are. There's our clip. There's those, plug into there. And now, we have a clear view there, there, there.
Okay, let's disconnect the wiring. Right up here behind the headlamp, you have the wiring harness for that. All we're going to do is just give it a little pull, just like that. We'll take a look. It looks like somebody put on some nice grease on there, which is fine. You know, it just helps keep the corrosion and rust and everything out of there. So, I'm not too worried about that. We'll set that aside.
There's a bulb that goes right here, so there must also be wiring. That's right there. I'll pull it out for you. That's what that looks like. If you wanted to, you can squeeze that right there, pull this apart, check the connection there. I want to replace the bulb. Easy peasy. Just like that. Okay. We'll set this aside.
We'll get busy with these 10 millimeters. That's what it looks like. This one's going to be the hardest to do because it's behind the bumper. Let's see if I can get it, though. It's just the funky angle. Something to note is that you can use a Phillips head if you need to. I find that using a Phillips head sometimes will strip on me a little bit, and I'll get more aggravated with it than anything else. There we go. Bolt number three. Set all those aside.
Now we can just take our unit. We'll give it a little shake. Lift up right here. Okay. Down at the bottom, it's just kind of sticking in right there, so all I'm going to do is I'm going to put my little fork tool in there, and just try to separate the two. Here we are.
Everything seems like it's moving along pretty good at this point. Here we are. Here's our left-front assembly. Okay? Right back here, this is where we're going to separate the two. Eight millimeter, eight millimeter, should be an eight millimeter. We'll remove those, and these two pieces will separate.
So here we go, friends. Let's go ahead and remove these eight millimeters.
There we are. So, here we are, friends. A quick product comparison for you. Over here we have our old Toyota FJ headlamp assembly. We just removed it. It was fairly easy. Right over here, we have our brand new quality 1A Auto part. As you can tell, they're both the same exact shape. This lens is, of course, much clearer. You're going to have a lot better light emittance through it. That's what we're dealing with. Okay? I just want to show you, we have all of our mounting stuff all along here, got the same exact stuff on the other one. Mounting holes. Backside. There we are. We'll just swap over the bulb. We've got our adjustments. Everything looks like it's up to par.
I don't see any reason why this wouldn't be a quality part to install on our vehicle. So I'm going to go ahead and do it. So, if you need this or any other part can always check us out at 1Aauto.com. Thanks
So, right here, all we're going to do is take off this little boot right here. Give it a nice little tug. Okay? Here we are. The rubber was just sitting along the edge of the bulb. Now we've got this metal wire here. All you got to do for that, just squeeze it, pull it out of its little slot it's in. You can pull out your bulb. Take a look at it. The coily wires inside there is the filament, that's the part that heats up, and when electricity or current goes through it, it heats up, lights up, and that's what emits light.
The glass itself, you don't want to touch that. The oils from your fingers will get into the bulb, and it'll burn out sooner than later. So, we'll set this aside.
We'll grab our brand new quality 1A Auto part here. I'll just get this out. There we are. We've got our bulb. You can see which way it goes. It's got a little prong up there, prong up there. Or slots, I should say. Slot, slot, and slot down there. So, it's got three. You're just going to line them up with the prongs on your bulb. Slides right in there. I'm gonna hold it, slide that there. Get this one. There.
These little metal things should slide right up in there. Here we are. That's nice and tight. The bulb is nice and tight and won't move around. If your bulb moves around, then odds are your clips aren't in right. That's nice and secured. You can take this, I'm just gonna slide it back over your bulb, all along the base there, and then along the outer ring just like that. Here you are, it's your headlamp assembly.
So, here we go. I'm going to put our two assemblies together, just like that. This is much easier to do out of the vehicle. You can try to do one at a time in the vehicle if you want. It's really not that hard to just take them both out at the same time, even if you're only replacing one. Or maybe you're replacing both. Whatever you're doing. Right, just going to tighten these up. Here's one. Number two. And here we are. Let's get this installed.
Okay. Got our little bulb here. If you want to, you can check it. Looks like the film that's in there are pretty decent. Just line up the prongs with the holes. Turn it, lock it in. Go a little piton on there. That's its home. It's happy there. And we got this guy right here. That's his home. And then everybody else pretty much just bolts in. So, let's line those up, give it a little bonk. Love it. Okay. It looks like all the rest of our holes here are lined up, and we can move along.
Okay. Let's get these bolts started. We'll go with this one down here. It's the hardest to get to. Here we are. Not going to tighten it down yet until I get all the rest of them started. It's pretty basic. It's elementary. Here we are. Get this one down here. Okay. We're all started in. Okay, pretty tight. There we are. Of course, by the time we're done with this, we're gonna want to make sure that we align the headlights. Now we can move along to the next step.
When it comes time to aligning your headlamps, it's going to be fairly simple. All you're going to use is a Phillips head screwdriver. If we were looking at the backside of this right here, this would be the hole that I'm going to start explaining to you. You're going to come right down through this hole, right through this channel, and then right into that, right there. As you turn your screwdriver, it's going to turn this right here, and it's gonna turn that headlamp assembly. You have another one right over here, which is located right there. Those are your two alignments, so all you're gonna do is just turn those until your headlamps are lined up, up and down and side to side to where you need them to be. And off you go. Easy peasy.
So here we go. Let's get our head lamp connected back in. There we are. Let's give them a test. We're good. Left directional? All right.
Let's continue. So let's get this back on. Just a little clippy-do there. These slide right into there. Get everything lined up. Give it a little bonk. Bonk, bonk. All right, let's move along. We'll get our grill on here.
All right, so we've got our grill. We want to make sure all of our push clips are in. We've got one here. I've got two more. One goes right here. One goes over on this side. Cool. We'll get everything lined up. These long prongs go inside the bottom holes there, and then these little clippies go in the top one. Let's give it a little bonk. Bonk, bonk, bonk. Cool.
Okay. Two screws, just get them started. Awesome. We're got our push clips. We are okay. Get some down there, grab those ones in a minute. Come right up along the top here. Three clips left, three holes left. Get it lined up here. One. Two. If I can get my hand in here. Looks good. Okay, let's tighten these up. Perfect. We'll clean up our mess. Good to go.
This is a basic tutorial on how to aim the headlights on your vehicle. Find the axis of your headlights. This is usually indicated with a small dot or the headlight bulb size on the lens. If not, it's the actual center point of your headlight bulb.
Transfer this mark to a vertical wall with a preferably dark color that'll allow you to back up 25 feet. Pull up and find the center line of your vehicle as well as the center line of your headlight axis. Mark the wall with the height of the headlights and a straight line going across at that axis height.
Back your vehicle up 25 feet from the wall to the front edge of your vehicle's headlights, turn your headlights on and locate the adjusting screw, usually on the backside of your headlights. You'll want to rotate this until the passenger hotspot, or focus of the beam, is approximately two inches below the line, and the driver's side is four inches below the line.
We changed the heights on each side so you can still get a good beam to the offside of the road on the passenger's side and have the driver's side low enough to not blind oncoming traffic.
Thanks for watching. Visit 1Aauto.com, your place for DIY auto repairs, for great parts, great service, and more content.
Shop Products
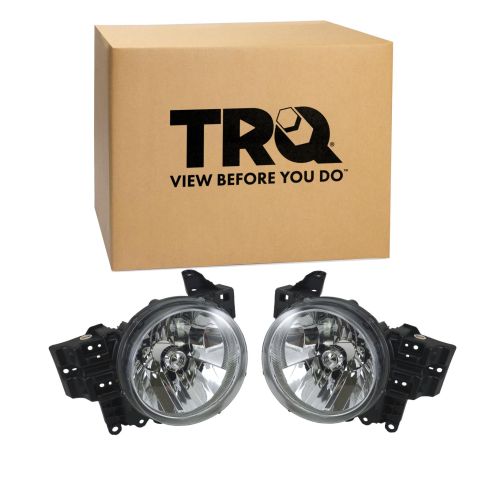
2007-14 Toyota FJ Cruiser Driver & Passenger Side 2 Piece Headlight Set TRQ HLA88569
Part Details:
- 2 Piece
- PC (Polycarbonate)
- Standard Replacement
- Assembly
- (1) Passenger Side Headlight Assembly
- (1) Driver Side Headlight Assembly
- Halogen

How to Replace Headlights 2011-16 Volkswagen Jetta
Watch this video to learn how to replace the headlights in a 11-16 Volkswagen Jetta.
