How to Replace Headlight High Low Beam Marker Bulbs 2005-11 Honda Civic
Created on: 2017-12-06
How to repair, install, fix, change or replace the broken, damaged, cracked, faded, cloudy, or chipped headlights on 2008 Honda Civic.
-
step 1 :Accessing the Headlight Outside Marker Light and Low Beam
- Pry out the three clips on the bottom of the bumper
- Pull down the splash shield
- Pop the splash shield out of the bumper cover
-
step 2 :Servicing the Outside Marker Light
- The outside marker light bulb is a P215w or 1157 dual filament
- Twist the bulb socket counterclockwise out of the light
- Push the bulb in the socket and turn it
- Pull the bulb out of the socket
- Push on the new bulb and turn it
- Twist the bulb clockwise into the light
-
step 3 :Servicing the Low Beam Bulb
- Push down on the lock
- Push the connectors together and then disconnect them
- Turn the bulb socket counterclockwise out of the light
- Pull the 9006 bulb out of the socket
- Press on the new bulb
- Turn the socket clockwise
- Connect the connector
- Press the splash shield into the bumper cover
- Press on the clips
-
step 4 :Servicing the High Beam Bulb
- Press the tab and disconnect the wiring harness
- Turn the socket counterclockwise
- Pull the 9005 bulb off with gloves on
- Press the new bulb on
- Turn the socket clockwise
- Connect the wiring harness
- For the passenger side, slide the windshield washer reservoir off the lift it out of the way
Tools needed
-
Gloves
Flat Blade Screwdriver
Trim Tool Set
Hi, I’m Mike from 1A Auto. We’ve been selling auto parts for over 30 years!
To get to the back of this headlight, I'm going to remove the clips that are on the bottom of the splash shield. It'll allow me to peel the splash shield back, and I can reach my hand in there and get to the back of the headlight. Just going to use a trim clip tool or a small flat blade screwdriver to pry those clips out. There's one there and one here and another one right here. Pull it down, pull the bumper out a little bit, and pop it out.
Splash shields are pretty soft. You can mess with them a bit. I'm also going to remove this clip up here. It'll give me a little more room to move. Push this down. You could do this with the vehicle on the ground, or you could jack it up and take the wheel off if that makes it easier, but you can reach up. This is our outside marker light bulb. Turn it counterclockwise to unlock it, pull it out, push it in, and turn.
This particular bulb that I took out is a P215W, but it's also the same as an 1157, which is a dual filament. It's got the two tabs and the offset pins, so to reinstall it, I'm going to put it in. It can actually only go in one way, so you'll feel it. If you go in the wrong way, it won't want to push in and turn. When it goes in the correct orientation, you can push it in and turn it clockwise to lock it. That's how you change that bulb.
Going to put it back into the housing. Find the locks, and then turn it clockwise. It's locked in place. You should wear gloves while you're doing this because when you go to remove the low beam bulb, you're probably going to touch the glass. It's just that it's a tight space to work in. It's hard to get to.
Before I take the bulb out of the housing, I'm going to pull it from the connector. That way the bulb is held in the housing because I can only get one hand in here, so I can't hold the bulb with the other hand to unplug it. I'm going to push down on the lock to open it up. You can actually feel it click open.
There might be some dirt in here. It might take a little force, but I'm going to try to push in on the lock. And then sometimes if you push the connectors together and then pull them off, it helps take them off. So I've got that free. I'm going to turn it counterclockwise to unlock it. Take the bulb out. This is a 9006 bulb. I'm going to reinstall it.
You can see in the housing there is an arrow right here, so what's going to happen is this top lug or key way is going to go towards that arrow, and then you turn it clockwise to lock it in. You'll feel it when the key ways line up. It'll sit right into the housing, and then we'll turn it clockwise. It'll lock it. Find the connector and plug it back in. This is the same for the driver's side. That's how you get to the hard to reach bulbs in the back of this headlight.
To reach the high beam bulb, we can go through the engine compartment. Before that we're going to put all this splash shield back in and then show you how to get to the high beam bulb. I'm just going to feed this back in to where it was. You can bend and push these splash shields around usually a little bit. Get it lined up. Pull the bumper out just a little bit. Push the splash shield in. Just going to get past the edge. Reinstall your push clips. Get this one lined up. And this last one is up behind.
To change the high beam bulb, go on the inside of the engine compartment. I'm going to unplug it first, push the lock in, eventually push it up, breaks it free, and then you can work it down. You get dirt stuck in them. Need to wiggle them off sometimes. Here it comes. Turn it counterclockwise to unlock it. Probably want to wear gloves while you do this because you might end up touching it. This high beam bulb is a 9005. This also has an arrow pointing right there. If you line up this top key way with that arrow, the bulb should slide right in. Push that out of the way. Slide it right in and turn it clockwise and it will lock in place. Reinstall our connector. That's how you replace the high beam bulb.
To remove the high beam it'd be the same as the passenger side. You'll just slide this reservoir off. It slides right off the bracket. Make sure the cap's on nice and tight so it doesn't spill, but you could lay it right on top of the battery, and then you can reach down and get to the high beam bulb. You could also reach the low beam bulb from here; however, if you want to get to that outside turn signal bulb, you're going to have to go through the fender liner like we did on the passenger side. Once you're done replacing the bulbs, slide your reservoir back onto the bracket. So it's got this little angled part. Just going to reach down and slide onto this bracket next to the battery tray. Going to be a little tricky.
Thanks for watching. Visit us at 1AAuto.com for quality auto parts, fast and free shipping, and the best customer service in the industry.
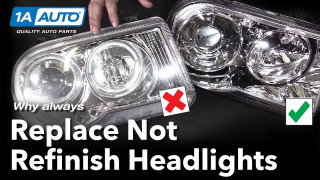
Why you Should Replace Not Restore Headlights
See why replacing your cloudy headlights with new ones is always better than refinishing them Why should you replace your headlights and not clean or refinish them? Three reasons: It's a simple fix, it increases visibility, and it enhances the overall look of your vehicle. Headlights are made from a polycarbonate plastic that can be damaged by UV rays from the sun or suffer pitting caused by road debris light salt and rocks. If you look closely at an old set of headlights, you'll see that the lens is full of micro-cracks. This is called crazing. This crazing, along with pinning, will turn your headlights from crystal clear to hazy yellow and it cuts the output in half, making it very difficult to see at night. It also makes your car look old and dated. With parts from 1AAuto.com and our how-to videos, you can make your vehicle look new and stay safe on the road. To get new headlights for your vehicle, visit 1AAuto.com and visit our YouTube page for do-it-yourself and how-to videos.
