How to Replace Headlight 1997-2003 Pontiac Grand Prix
Created on: 2011-10-07
Learn how to replace both the headlight bulbs and assembly on your 97-03 Pontiac Grand Prix with this video from 1A Auto.
-
step 1 :Remove the headlight assembly
- Pop the hood and secure it.
- Unbolt the two 10 mm bolts with your socket and ratchet.
- Slide your headlight assembly to the side and out.
- Disconnect the bulbs and wiring harness connections.
-
step 2 :Transfer the wiring harness and bulbs to the new assembly.
- Take the screw securing the parking light out of both assemblies.
- Remove the parking light and disconnect the wiring from the old assembly.
- Connect the bulbs and harness to the new assembly and replace the screw securing the new parking light to the new headlight.
-
step 3 :install the new headlight assembly
- Connect the wiring harness.
- Line up the tabs and bolt the headlight assembly in.
- Use your 10 mm socket and ratchet.
- Close the hood.
Tools needed
-
Phillips Head Screwdriver
10mm Socket
Ratchet
Needle nose pliers
Brought to you by 1AAuto.com your source for quality replacement parts and the best service on the internet. Hi, I'm Mike Green. I'm one of the owners of 1A Auto. I want to help you save time and money repairing and maintaining your vehicle. I'm going to use my 20 plus years experience restoring and repairing cars and trucks like this to show you the correct way to install parts from 1AAuto.com. The right parts installed correctly, that's going to save you time and money. Thank you and enjoy the video.
In this video we're going to show you headlight replacement on this 2002 Grand Prix same as any '97 to '03 Grand Prix. We're going to show you both just changing the bulbs as well as changing your entire assembly. The tools you'll need are a 10mm socket and ratchet or a wrench, a Phillips screw driver and a pair of pliers. Whether you're looking to change your bulb or you want to put a nice, new, clear headlight assembly on it like this from 1A Auto, what you want to do is start out by removing these two 10mm bolts on top with either a wrench or a socket with a ratchet extension like this will work. Now with those out of the way your assembly should just slide to the side. You want to slide it this way and then out. If you're just looking to replace the bulb hold it up and there's your bulb, disconnect, turn this ring counter clockwise and then pull the bulb out. The bulb does go in a specific way. Make sure this tab is pointing up, put your ring back on, clockwise to lock it and then reconnect it. If you're looking to change the whole assembly there's a connector right here, pull back on that tab and disconnect it. What we need to do is we need to transfer our harness from this light to the new one. On the bench we want to remove the screw that holds the parking light on, on both assemblies and then remove the parking lights. Press the tab here, twist this off and then twist this counter clockwise, set your old parking light aside, pull this harness back and then out. Disconnect here and then just use some pliers, squeeze this tab and the harness comes off. Set your old one aside.
Connect the harness; lock the connector there and then feed these guys into place. Then put that light right up into there. Go to put your parking light on, connect that light first, the tabs of the parking light go up into the bracket there and then the parking light goes on. Put the screw down in, see it down into the hole, push it in, tighten it up. The new light comes with the new gasket so you can take this gasket off, put the new gasket on. Put it in, turn it; the lights fit a little tighter just use a screwdriver, pry that locking tab over.
When we slide the light in the front tab goes right into this tab here and then the tab on the back that locks onto this here. Here's our new light, here's the tab that locks in behind the grill and then here's the other tab that locks in right here. We're going to put the light down on. We're going to connect the connector, put it into place, we're going to look this tab into place then slide it backwards. Bring it back to us a little bit, push it in and slide it over. Put in our 10mm bolts, tighten them up, take off our plastic. To aim the light you can use an E8 star bit or a Phillips screwdriver and turning it clockwise points it up, counter clockwise points it down and then there's another over here, clockwise shifts the light towards the center of the car, counter clockwise towards the outside. Basically what you want to do is you want to park your vehicle on a level surface with a wall 20 feet away. Twenty feet away the concentration of the beam for the low beam should be at the same height - actually it should be at one inch below the height of the headlight bulb and straight ahead. When you have your high beams on the concentration of the beam should be at the same height of the headlight bulb and aiming straight ahead.
We hope this helps you out, brought to you by www.1AAuto.com your source for quality replacement parts and the best service on the internet. Please feel free to call us toll free 888-844-3393. We're the company that's here for you on the internet and in person.
Shop Products


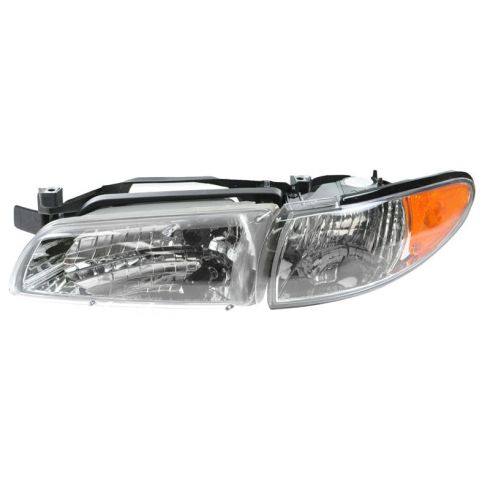
1997-03 Pontiac Grand Prix Driver Side Headlight Assembly TRQ HLA74027
Part Details:
- Yes
- PC (Polycarbonate)
- Yes
- Assembly
- Standard Replacement
- Halogen

How to Replace Headlights 2011-16 Volkswagen Jetta
Watch this video to learn how to replace the headlights in a 11-16 Volkswagen Jetta.
