How to Replace Headlight 2002-04 Nissan Altima Sedan
Created on: 2013-11-12
Watch this video to learn how to replace chipped, cloudy, or broken headlights. The experts at 1A Auto show you how to change the headlights on your 02-06 Nissan Altima.
-
step 1 :Removing the Headlight
- Remove the Phillips head screw underneath the inner fender
- Pull back the inner fender
- Remove the two 10mm bolts from behind the inner fender
- Pry off the plastic clips from the bumper cover with a flat blade screwdriver
- Remove the two 10mm bolts from the top of the headlight bracket
- Pull the bumper cover out
- Remove the 10mm bolt underneath the headlight
- Pull the headlight out
- Disconnect the headlight wiring harnesses
-
step 2 :Replacing the Bulbs
- This step is only necessary if you are replacing the headlight bulbs
- Turn the base of the bulbs counterclockwise
- Remove the old bulbs
- Insert the new bulbs
- Turn the new bulbs clockwise
- For the main bulb, turn the cover counterclockwise
- Disconnect the main bulb wiring clips
- Pull up the main bulb wire retainer
- Push the new main bulb in
- Reconnect the wiring retainer
- Reconnect the wiring clips
- Reconnect the cover, turning it clockwise
-
step 3 :Installing the New Headlight
- Remove the turn signal bulb from the old light
- Install the turn signal bulb in the new light
- Connect the headlight wiring harnesses
- Put the new headlight into place
- Insert and tighten the two 10mm bolts at the top of the headlight
- Pull back the bumper cover
- Insert and tighten the 10mm bolt at the bottom of the headlight
- Insert and tighten the 10mm bolt at the side of the headlight
- Push the bumper cover back into place
- Pull back the inner fender
- Insert and tighten the two 10mm bolts behind the inner fender
- Push the inner fender back into place
- Insert and tighten the Phillips screw for the inner fender
- Install the plastic clips for the bumper cover
Tools needed
-
Socket Extensions
Flat Blade Screwdriver
Phillips Head Screwdriver
10mm Socket
Ratchet
Brought to you by 1AAuto.com, your source for quality replacement parts and the best service on the Internet.
Hi, I'm Don from 1A Auto. I hope this how to video helps you out and the next time you need a part for your vehicle, think of 1aauto.com. Thanks.
In this video, we are going to show you both replacing the entire headlight assembly as well as just changing the bulb on this 2003 Nissan Altima. The process is basically the same for 2002 to 2006, although the headlights do differ from year to year.
You'll need new headlights from 1AAuto.com, 10mm socket and ratchet with extension, Phillips screwdriver, and a flat blade screwdriver.
Now you can see that our vehicle is jacked up. You don't actually have to do this; we just do it to make it easier for you to see and you want to just remove this Phillips screw right here and now you can pullback that inner fender and up here you'll see there is a 10mm bolt right here and straight back along the same rail there, there is actually another 10mm bolt and we'll just fast forward as Don removes both of those. Now, you have better access to get this 10mm bolt right here and again we'll fast forward as Don removes that.
Now, at the top of your bumper cover next to the headlight, there are these clips. You just want to use a flat blade screwdriver to pry up the center and then it will pull right out, but this one you can see it's broken, we'll use some wire cutters to get underneath it. You don't actually cut the clip, we just use it to help pry up the center and now you can just pull the clip right out.
Now at the top of the headlight, you see there are two 10mm bolts. Go ahead and remove both of those. Pull straight out on your bumper cover and that will release a clip right here and now you have better access to get to this 10mm bolt underneath the headlight right there and, again, we'll just fast forward as Don removes that. Now with those 10mm bolts out, you can pull the headlight right out. You'll need to pull back on the bumper cover a little bit and on the back of the headlight, you'll see this three harnesses and you just want to push in on the tab right there and just pull straight up on them. They come right off. If you are just looking to service you bulb for this one you just twist it counterclockwise, it pulls right out then you twist the new one clockwise. For your turn signal bulb, twist the socket out counter clockwise, pull the bulb straight out. You'd push your new one in and twist the bulb back in clockwise. For this bulb, you want to turn that cover counter clockwise and pull it back. You may have to push the wires thought it just a little bit and then you want to pull this little clips off of the little pegs and pull up on this little wire retainer and then your bulb will pull out and you'll just replace that. Push it back into place. You want to push that little retaining clip back down over it to hold it all together. And then just reconnect those wires to those pegs and twist that cover back on clockwise.
On the left is the original. On the right is the new light from 1A Auto, clear and bright. Make your car look better and you'll be able to see better at night, as well. Now you want to take the turn signal bulb from your old light and twist it into your new light from 1A Auto and reconnect the harnesses to your new headlight. Line your headlight up, push it into place and then we are going to fast forward as Don replaces those two 10mm bolts at the top of the headlight. Now the 10mm bolt on the side of the headlight and underneath the headlight.
Now push your bumper cover back into place and replace those two 10mm bolts that hold it up. Push the inner fender back into place and replace that Phillips screw. And all that's left is installing those two clips. Just push them in and push down the center to lock them.
On the passenger side is the new headlight. On the right is the old one and you can just see in this picture how much nicer the passenger side of the car looks. Not only does it make the car look newer, it also will help you see much farther at night.
We hope this helps you out. Brought to you by www.1AAuto.com, your source for quality replacement parts and the best service on the Internet. Please feel free to call us toll-free, 888-844-3393. We're the company that's here for you on the Internet and in person.

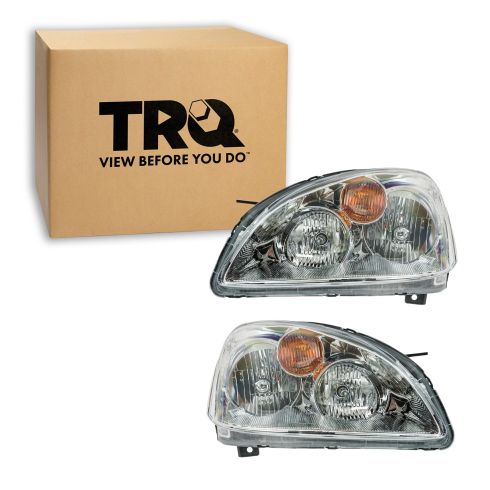
2002-04 Nissan Altima Driver & Passenger Side 2 Piece Headlight Set TRQ HLA79656
Part Details:
- 2 Piece
- (1) Passenger Side Headlight Assembly
- (1) Driver Side Headlight Assembly
- Halogen

How to Replace Headlight and Bulb 1997-99 Cadillac Deville
Watch this video to learn how to replace and service the headlight assembly and bulbs on your 97-99 Cadillac Deville.
