How to Replace Headlight 2000-01 Nissan Altima
Created on: 2012-06-21
Watch this video to learn how to replace and service the headlight assembly and bulbs on your 00-01 Nissan Altima.
-
Note: DO NOT TOUCH the bulbs- the oil from your fingers will burn into the light and foul your bulb. Clean with rubbing alcohol and a soft cloth if the bulbs do get touched.
step 1 :Remove the front bumper cover
- Remove the push clips
- There are four on the top of the fascia
- There should be about 8 under the fascia
- Unbolt the two 10 mm bolts, on each side of the bumper cover.
- Pull off the bumper cover and set aside
-
step 2 :Remove the headlight assembly
- Remove the three nuts fastening the headlight assembly
- Unplug the harness and bulbs
- Remove the headlight and set aside.
-
step 3 :Install the new headlight assembly
- Plug in the bulbs and harness
- Bolt in the headlight assembly using your socket and ratchet and extensions.
- Reinstall the bumper cover by clipping in all the push-clips and bolt in the two 10 mm bolts.
Tools needed
-
Socket Extensions
Flat Blade Screwdriver
Phillips Head Screwdriver
8mm Socket
10mm Socket
Ratchet
Brought to you by 1AAuto.com; your source for quality replacement parts and the best service on the Internet. Hi. I'm Mike from 1AAuto. I hope this how to video helps you out and next time you need parts for your vehicle, think of 1AAuto.com. Thanks.
In this video, we show you how to replace the headlights. You'll want to replace them if obviously, you have a broken headlight or replacing them is the best way to cure the faded and clouded headlights. You can try polishing them, but that usually ... It's usually only a coat of wax basically, and it last about a month. Tools you'll need are flat blade screw driver, Phillip's screw driver 8 and 10mm sockets with ratchet and you'll need some specific extensions for your socket and ratchet, one, three, and five inch extensions.
Here's a shot of our Altima before; fairly decent looking car, but you notice here after, new headlights. They really brighten up that front end. Make it look a lot fresher and newer. On our vehicle, our front bumper cover was just barely hanging on with two bolts, so we're going to give you an idea of how to get the bumper cover off, but the instructions may not be exact. Use them as a general guideline.
Start out by opening up the hood and they'll be some fasteners back in here. You can see, this car's been apart a couple times obviously and a lot of stuff's been lost, but most likely these are a style fastener that's plastic. You pull up the middle and pull the fastener out. The other possibility is that there are clips with bolts here. You want to remove these three fasteners. There may also be a fastener here as well.
Underneath, there'll be a series of fasteners. On this vehicle, they're Phillip's screws, but I really don't think that that's correct. It's probably 10mm bolts and you can actually see that this thing is ... They're not even holding on to anything. You would want to remove probably one, two, three, four, and five. Again, these aren't even holding on everything because everything's so broken on this vehicle. Six, seven, and eight. After you've gotten those done, looks like about the only thing holding the front bumper cover on this vehicle is these two bolts. There's a bolt here on this side, looks like about a 10mm. Again, I'm not sure if that's correct but it looks correct. There's a bolt there, 10mm and then over on the other side, you can see again this car's very ... Seen a rough life because there's no inner fender here. There's also a bolt here that's 10mm. I'll remove those. I'll fast forward it here.
As I use ... I'll use a quarter inch drive, ratchet and extension, and a 10mm socket and remove those bolts. Obviously, I have the car up on a lift; Not totally necessary, just makes it a lot easier to film and makes it a little easier to get apart. Then, life the bumper cover up and off and you have to tilt it up and foreword. That's just a piece of Styrofoam that fell out. We can install that later.
The headlights are held in by a series of fasteners. There's a bolt right here. Then, there's a nut right down there as well as another nut right up in there. Then, there's another nut right up in here. For the first bolt underneath, I used both the five and the three inch extensions. Make a long eight inch extension and that way you can go in from the fender wheel area. You have to push aside your fender and you can get that nut out. It's the easiest way. I'm going to try and coat those. The bolt... hit the back of the bolt and the nuts with some penetrating oil. This is a New England car, so actually two of the studs end up breaking off, which is okay because the new lights come with new studs and new hardware.
Obviously, the first bolt, pretty straight forward, right on top, 10 mm socket with your ratchet and extension. Remove that. It's possible this bolt could break. If it does, that's not the worst thing in the world. You can put the light back together with just the three nuts and It will hold secure. For the top nut on the inside, you need a one inch extension. On this vehicle, it just breaks right off. All ... Actually, they broke off on both sides and the lower ones broke off as well. On this lower nut, you basically want to take your AC hose, push it down out of the way, and then keep pressure on it. It gets in the way a little bit. Get the socket, ratchet, and extension on there. Again, this one ends up breaking, which it's not the worst thing in the world because the new lights come with new studs and nuts.
That breaks off. Pull the light out some. There's a tab right on top or you can twist this bulb counter clock wise. Pull it out some. Here's your headlight. Unplug that. Twist this one counter clock wise. Pull it out. Twist this one over here counter clock wise. Pull it out. Here's the new light from 1AAuto. It's a whole lot nicer than the old one. I'm going to peel back a little bit of this plastic and reinsert all our lights. Good time to check the bulbs; make sure they're all working correctly. Plug our headlight in. This light over here goes on the side. Look... These in there. That's going in the right place. Start this bolt on where it goes under here. We got two new M6 bolts in here. Carefully start those nuts on. You probably want to put them into the socket in the extension first, get them on, go by hand, and then tighten them up nice and firm. Repeat the process for the other side.
What I've done is I've put some clips on here. Most likely, what these things had was actually plastic pins that went down and locked in, but I don't have any of those available. What I did is I put some clips on that then you can bolt. They have a nut on the other side and then you can bolt a bolt into them and that's what I'll use to hold this on. There was nothing holding this on before, so that will be a whole lot better than it was.
I've put the Styrofoam back on using painter's tape to hold it in place. I put the bumper cover into place and then you have to get the grill. The grill... There's little ears on the sides of the grill that has to go under the headlights. What you actually do ... There's metal brackets. Bend those metal brackets down and then get the grill in behind. Then, you can pull the metal brackets back up. From there on out, start in the two bolts behind the grill and then the two bolts that are on each side. Then, use your tools; your socket and ratchet to tighten those up.
Make sure that your ... Push your under fender back in. On our vehicle, none of these fasteners make any difference, but make sure you put all the fasteners back in the bottom that you took out.
Once it's all back together, here's what a new set of lights can do for you. Here's the before and the after.
We hope this helps you out. Brought to you by www.1AAuto.com; your source for quality replacement parts and the beset service on the Internet. Please feel free to call us toll free 888-844-3393. We're the company that's here for you on the Internet and in person.

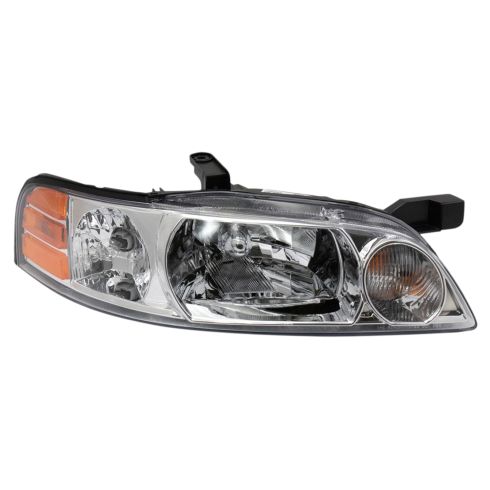
2000-01 Nissan Altima Passenger Side Headlight Assembly DIY Solutions LHT09874
Part Details:
- Features and Benefits
- PC (Polycarbonate)
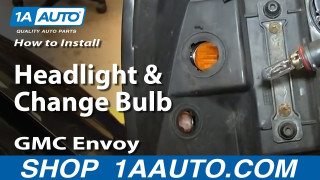
How to Replace Headlight 2002-06 GMC Envoy XL
Learn how to change the headlights or headlight bulbs on your 02-09 GMC Envoy by watching this 1A Auto video
