How to Replace Fuel Filter 2004-13 BMW 325 Ci
Created on: 2019-02-15
How to replace a clogged fuel filter on 04, 05, 06, 07, 08, 09, 10, 11, 12, 13 BMW 325Ci
Tools needed
-
Socket Extensions
10mm Socket
Ratchet
Hi. I'm Mike with A1 Auto. We've been selling auto parts for over 30 years.
Hi, everyone. Sue here from A1 Auto, and today on our '06 BMW 325Ci, we're going to be installing our fuel filter. If you need this part or any other part for your car, click on the link below, and head on over to 1AAuto.com.
The fuel filter is located on the undercarriage, right below the driver's seat, and there is a splash shield here that we need to take down. It's going to have an 8mm socket that holds these bolts on. There's two in the center, one in the rear, and then one up in the front, actually two up in the front. Okay, now that I've got all the mounting mechanism off, I'm going to grab the shield and pull that right down.
The new fuel filter does not come with the rubber hoses that are on the steel lines from the factory. This is all undercoating, and it looks wet, but it's not. It's just the shininess to it. Make sure you look at your lines, and it's not dry rotted and cracked. I'm going to use a flathead screwdriver and disconnect my three clamps for the inlets and the outlet hoses. I don't know if your car's going to have the undercoating on it, but it can be kind of more of a pain when it comes to working on it.
I am going to disconnect the hoses at the filter. I don't want to disconnect them down here and then transfer them around. The minimal movement on those, probably the better. Okay. Then there's one line in the front. Then there's the vent line right here. That may just pull right off.
Now that I have my fuel lines all clamped/unclamped, I'm going to take the holding bracket off, and that's a 10mm socket. I spray it with a little bit of a rust penetrant, because I don't want this to break. If I feel like it gets too tough, I'm going to go back the other way and work it. Unfortunately, the stud is part of the floor--I do believe. Yeah, it is. All right. Then I get a flathead screwdriver or a little pry bar. Pry down on this. There we go. It hooks in the back.
Now, I get a pair of long needle nose with a curve to it, and I'm going to try to break these rubber hoses free without damaging them. I'm not going to take them all the way off until I get a bucket, because fuel really will come out. Okay, let's get a bucket.
All right, my catch basin is underneath. Let's see what we get coming out, how much. Yup, it's under pressure. That's why I have glasses on. That's the return line. I'm going to move a little bit quick here, because I want to put the new filter in before too much gas comes out.
Okay. I'm going to connect these two back ones first. Then I'll connect the front one. Put my vent line on. Now I can take my flathead screwdriver and snug down the clamps. I'm using an adjustable pair of pliers to tighten these clamps. The style of this must be a European specialty tool. It's flat on two sides, and it's got a slot for a screwdriver to loose it, but you cannot tighten it with a screwdriver, because the middle side's missing to go clockwise. So, what I've been doing is I'm lining up my clamp, closing the adjustable pliers like this, and then just tightening it.
That actually worked out pretty good. It's not that hard. It's not a socket. I thought it was at first, but it's just two complete flat sides and then missing the middle for the cutout. I want to make sure this is tight. We are going to run it, and then before we put the shield on, I strongly recommend running it, then you'll raise it up or get underneath and look for leaks. Then you put the shield on.
I'm going to put the clamp on first. If you see on the back here, this piece of metal with some eyelets in it, you're going to line those up, and then push it right up into the stud. Then put the nut back on. That's a 10mm socket. We'll tighten that right down.
I've run it, and I let it run for a little bit, and shut it off, lifted it up. As you can see, everything is dry. I have no fuel leaks. I hope the same for you. Now, we're ready to put the shield back up. Just going to line the front two studs and then line up the back here. I'll put one in by hand, and then I can let go of the plate. With a 8mm socket, I'm going to tighten these right up. Okay.
Thanks for watching. Visit us at 1AAuto.com for quality auto parts, fast and free shipping, and the best customer service in the industry.
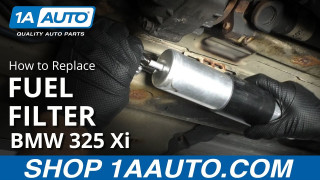
How to Replace Fuel Filter 1997-2006 BMW 325 Xi
Watch this video to learn how to replace the fuel filter in your 87-06 BMW 3 series. 1A Auto makes it easy with step by step instructions!
