How to Replace Front Window Regulator 2003-08 Toyota Matrix
Created on: 2020-08-24
This video shows you how to install a new window regulator on your 2003-2013 Toyota Matrix.
Tools needed
-
Socket Extensions
Socket Driver
Phillips Head Screwdriver
10mm Socket
Painter's Tape
Ratchet
Magnet - Extendable
Trim Tool Set
Pocket Screwdriver
Pick
Okay, friends. To start this job we need to be inside at the door panel. I'm gonna come right up here and you're gonna find a Phillips head screw to remove this little knob. Remove it. There it is, then grab that knob, pull it off at the same time, set it aside. Now, the next thing we need to do is remove this plastic piece of trim. I like to use one of these plastic trim tools. Try to pry it away, see if I can get it in there, just pop it right off. It's got a little push clip there and it's got a little hooky-do here. Go ahead and set that aside. The next thing we need to do is remove our two mounting screws. There's gonna be one located right behind this little trapdoor right here and then there's gonna be located right inside the door handle right there. Remove them both with a Phillips head screwdriver. To get this trapdoor open, you can either use a flathead screwdriver or of course a pick, whatever you need to do. There's the Phillips head. Let's do the same thing for the one on the door handle.
The next thing we need to do is get our window crank off of here. It's gonna be very hard to see what I'm gonna do, so once I get it off, you'll be able to see more clearly. I'm gonna use a nice plastic trim tool like this, come right in between and then right behind there, there's gonna be a metal clip. The metal clip is something that we need to remove. You can either use a pocket screwdriver or even a pick. I'm gonna go with a pick and give it a try. There's the clip. Now I'm just gonna draw this off of here. Grab this. Now, this metal clip, basically just kind of came in and went through those slots just like this. So, all you have to do really is just pop it on out of there, and then you can slide this off. Now we're gonna continue on with our plastic trim tool and we're gonna come along the edge of the door panel in between the panel and the door itself. Try to find a place you can get in. If you were to feel along the bottom here, you're gonna find that there's a little ridge, you could feel it with your fingers. Put in the trim tool and give it a nice little tug. There we are. Okay.
Lift this up, and then take it off. Okay. So we're getting to the point that we need to take off the vapor barrier, but what you're gonna notice is that you're gonna have this in the way and this is gonna be in the way. So, what we need to do is use a nice small pocket screwdriver, come right down along the backside of this white cable, and you should be able to pop this right out of there. Let's see if I can do it. Once you've done that, go ahead and draw it towards the rear of the vehicle and take it right off. You're gonna see there's a couple of little hooky-dos. We're gonna go ahead and pop these cables out of here. Let's go ahead and draw it off and then slide the cable out of the area it's in. Just try to remember that the green goes along the bottom for the handle and the white comes along the top for the lock. Do the same to this one. This one's gonna be a little bit harder to get out of there, just kind of twist it, it's got a little hook. Let's set this aside. Next, we're gonna remove these two 10-millimeter headed bolts.
There's one, and two. Set this aside as well. Now, let's move along to where the wiring connects into the speaker. Disconnect that as well. Push on the little tab, lift it up and out. I always check my connections to make sure there's no issues. This looks great, set it aside. We're gonna start peeling away the vapor barrier, you wanna be very careful because if you look behind it, you're gonna see this black goo. That's called butyl tape and it's very sticky and of course, it's going to mess up your clothing or anything else that you happen to get it on. We also wanna make sure that we don't tear the vapor barrier because obviously it's needed. Let's go ahead and remove this plate right here using a Phillips head screwdriver. There's one, two, and three. So, now looking down here, what you're gonna notice is you have a mounting bolt that holds your window regulator to your window. If you were to come right across, you're gonna notice that it doesn't line up. So, what we need to do is take our window crank without the clipping there, and then just go ahead and put it on here, bring this up so the bolt lines up with the hole right here.
Now that we have the window regulator lined up so that we can get to this bolt, let's go ahead and remove those 10-millimeter headed bolts. We're gonna take a nice magnet, come right in here so I don't drop it into the door. Here we are. Do the same to the other one here. Something that we wanna pay attention to at this point is that the window is not actually mounted to the regulator in any way. So, you wanna be very careful. But what we need to do is actually put this back on here, crank the window so it's in the fully up position, and now we're gonna tape it so it can't go anywhere. All right. So I've got strips of tape going up and down the forward and the rearward side of these windows. That's super important. It's always a lot cheaper to put on tape than it is to replace a window so use as much as you feel like you need. Once you're sure you have it safely taped up so the window cannot come down, we're gonna slowly lower the window regulator and just make sure that it's separates.
Okay. It's coming down without the window. This is perfect. We can go ahead and put it down like this, remove the handle, let's move along. All right. So next we're gonna remove these two mounting bolts right here. There's one, there we are. That just makes it so this shaft on the inside can move, get it out of the door there. Now we're gonna move along to this area right here. Just pay attention because these are gonna be the last three things that are holding the window regulator to the door panel. I'm gonna hold that regulator so it can't fall down. Let's break this free. There it is, friends. Friends, once you've confirmed that your new regulator matches up with your old regulator, we're gonna be ready for our install. Let's carefully slide this in here. Pretty much going in the opposite direction that we took it out. I'm gonna try to put that crankshaft right through this hole right here. Here we are, he's in there. Okay. So, now I'm just gonna try to line up one of these bolt holes. Now, let's start in those bolts.
Okay. We have all three of these started, now let's start in the ones that are supposed to be over here. Now let's go ahead and get this rod so it's lined up with the holes. There we are. Start in your two bolts, make sure it's tight. Perfect. So, now we're just gonna slowly bring this up and we're gonna try to make it so it connects in to where it's supposed to go with the window. So, just watch your fingers, don't go into any pinch points. Just try to bring it right up just like that. I'm gonna check the front as well. They should sit right in. There we are. Okay. Now at this point, you're gonna have to be very careful because what we're gonna do is we're gonna remove the tape. I wanna try to hold some pressure on the window at the same time as I crank this and bring it down a little bit. The whole reasoning for that is because I wanna be able to put in at least one of those bolts, so there's no way that this window can fall down on its own. All right. Let's let this down carefully. So I can see one of my spots right here, I wanna try to line that up.
I'm gonna put one of those bolts in right now, so there's absolutely no way that this can separate. I don't necessarily need to completely tighten it, but I definitely wanna make sure that it's connected. Okay, Let's bring this down some more so we can get to the other one. There it is. Now that we have both of those bolts started, let's go ahead and snug them up. Okay. Let's try the window, all the way down, all the way up, all the way back down. That looks great. If you notice that it's binding or it doesn't seem like it functions the proper way, just go back a couple of steps and see if it's sitting inside the channel the way that it needs to be. Let's go ahead and get this plate on here, start in all your screws before you tighten any of them up. Let's get the vapor barrier on here, try to line it up as best as possible. Now, it's gonna be time to get our bracket back on here. Take our two bolts that look like this, line it up, start them in, go ahead and tighten them up. Now, let's go ahead and put our handle back on there.
If you turn it over, you're gonna be able to see those hooky-dos. Don't forget about those because they're gonna go right here. But first, of course, we need to put these in. We're gonna put this through just like this. Bring it around, and now we're gonna latch it in. If it doesn't seem like this lines up, you probably just put the hook in from the wrong side and it'll be at an angle. If that's the case, take it back out, turn it around, clip it in. Let's go ahead and put this back in now, just kind of bend it, bring it around, and click it in. At this point, put in the to hooky-dos, slide it back, and then latch the rear in. Here we are. Make sure you wanna line up with the hole. Awesome. Give it a nice wiggle, make sure it's secure. Let's go ahead and grab one of these wires, pull it out, and around, of course, click it in. Now it's gonna be time to install our door panel. Something that I want to show you on the backside is you have all these push clips. The push clips need to line up with the holes on the door.
As we go to put this up on here, what you wanna do is you wanna come up high, put it over the top of this because there's a little bit of a lip, just like this at an angle. Slide it down, so it sits down as far as it can. Okay. It's all the way down. Give it a couple of loving bonks, pushing all those push clips. Give it a nice shake. That feels great. Now it's gonna be time to put in our little handle here. If you look, I still have my screws started in there, that's gonna make it much easier for me overall. Slide it down, start my screw. Make sure it's nice and tight. Give it a wiggle. Perfect. Put the screw in up here. Make sure you cover it. Now, it's gonna be time to put our handle on there. Before we go ahead and put it to the door though, let's put the clip in. Hold your handle like this and slide this straight on down. Should click right in. Perfect. Now we're gonna take this piece right here, slide it right on over there. Just take the handle, line it up. You're gonna have to give a little push to push it on there. All right. Let's give it a little try.
Now, the next thing we need to do is get this trim piece back on there. Remember about this little hooky-do, it needs to fit right in there. And then of course we have our push clip that's gonna go right there. Just gonna line that up. Okay. Line up push clip. Little loving bonk there. Make sure it's secure. It's definitely not falling off. That feels good. Let's grab the little handle, it goes on here with the screw. Let's get the handle on there. If you look at it, you're gonna be able to see that it has a cutout and it should match up with this, the way that you want it to aim. I can get this on here. Just like that so it's aiming back. Now we're gonna put in our little screw, make sure it's nice and tight. Make sure this doesn't wobble, and of course, we'll test the mirror itself. Now, that's great.
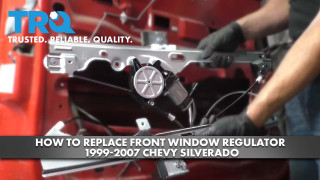
How to Replace Front Window Regulator 1999-2007 Chevy Silverado
This video shows you how to install a new window regulator on your 1999-07 Chevy Silverado.
