How to Replace Front Window Regulator 2000-06 GMC Yukon
Created on: 2020-03-31
Watch this video to learn how to install a new window regulator on your 2000-06 GMC Yukon.
Tools needed
-
Socket Extensions
Socket Driver
7mm Socket
Painter's Tape
Ratchet
T20 Socket
Trim Tool Set
Pocket Screwdriver
Before you start this job, make sure the window is up and it's always a good idea to leave a passenger window down so you don't lock the keys in the car. Take this panel off. I'm just gonna use a trim tool. Let's get behind here, pry it out, and then up there's a little clip right there, those two little pins. Take this cover off next. Just get under here and there's some clips. There should be a clip right there. It looks like it broke before, and then this slides out. Take this little cover off. You could use either this trim tool or even a small screwdriver. Now take the trim tool, get under here, and just push it out a little bit. Pry it and then it's going to slide towards the back. There's a pin right there, two little clips right there. And just use a trim tool to get under here and just pry this out. It's just a push pin just like that. Now we're going to take these two bolts out, just move this lock rod to the back. There's a bolt right here and a bolt right here. Use a seven-millimeter socket. Take that bolt out and this one. The lower one is the longer one, take this bolt out. Use a T-20 socket. Now just grab the door panel and you want to slide up and then come out slightly. You don't want to break any of those clips and it's going to be hard to see, but you have to reach to grab the wires, disconnect the wires for the window switch. And over here, push down. This is like a ratchet retainer. While this is in there, there's a little button right there you push and then you ratchet this down and that disconnects that and one more connector and these all have push pins or push retainers, push locks. Just push all those down. Over here, just pull this light socket out, just pull it towards the vehicle and carefully. There's a bulb right there, and pull the door panel off.
I'm going to tape up the window so that it doesn't fall. You should use some masking tape. Now I'm going to take this vapor barrier off here. Just slide it off. To get this off a little bit more, I am going to take this door handle off, use a pick, just pop that off. Pop that rod out. Take a 10-millimeter socket, remove this bolt right here, and then grab the latch, slide it towards the inside of the car. It's just clipped in. Now I can just pull this vapor barrier off, just pull it out of the way, get the light socket through this hole. And you don't have to take it off completely, just get it out of your way enough so you can access some of these bolts. Now I want to pull these two bolts out. There's one right here, this is holding the regulator to the glass. Also over here. Pull that bolt out. You don't have to pull it out completely, just loosen it up enough so that the glass is separated from the regulator. Use a 10-millimeter socket and just loosen it up pretty good and then the same on the other one. At this point, what we can do is hook the window switch back up to the connectors, turn the key on, lower the window regulator, that should separate that from the glass. Okay. With all those connected and the key is on, I'm just going to lower this down. You can see that lowered down there, it lowered on the front side as well. Now I can turn the key off, disconnect this connector to the window harness, to the window switch. Now at this point, we have to disconnect all these bolts. This bolt-down here, this one here. So three on this side. So on this side, you have this bolt right here, this one here and this one. Three on this side as well. Let's disconnect the connector for the motor. Pop that down. Use a 10-millimeter socket to take all these bolts out. Now just grab the regulator. You just want to slide it up just slightly. Now we're going to twist it. Twist the front side like this. Slide it up. Twist the backside the other way. Slide it out.
Now take the new window regulator, just slide it in the same way it came out. This part goes in first, and the part with the motor on it goes on this side. There's these little tabs that'll hold this in place, there's a little tab right there that'll hold that in place. That's good. Now put the bolts back in. Now let's tighten those all up. That's good. Now I'm going to connect the electrical connector. Now, this new motor just has the connector on a wire. It's still the same. Just plug it in, lock it in place. Now I'm going to have to hook up the window switch to raise these brackets that hold the window on and it seems like they're a little bit tight. I'm going to have to loosen the bracket up a little. So I'm going to raise this up a little, loosen up the bolt on the bracket and then put it all the way up. All right. Turn the key on and just raise this up a little. All right, I can loosen this one up here. To get that one, I'm going to have to lower that one a little bit. Just use a 10-millimeter socket, loosen that up a little bit and it goes down a little right there and just loosen this bolt as well. This is exactly how I did the other one. Loosen that up and just spread the bracket just like that. And now we're going to raise it and make sure it goes on the window. Just go slow. Now it looks good there. Just check the other side, make sure that looks good as well. That looks good. Raise it up all the way. Looks good. Shut the key off and tighten these up and do the same on this one, and we can torque these to nine foot-pounds. Take the tape off. And at this point, we can turn the key on and just test it out, make sure everything works good. Looks good. Disconnect the connector again for the window switch and take the vapor barrier. Make sure you feed the wires through. This rod has to go through as well and also the light just like that. And you can use some butyl tape to tape this back on if it's falling off or some type of adhesive and put the inside door handle back on, slide it in position. Put the rod through, lock it in place and get the bolt, line the bolt up, tighten it down, and snug it up. And connect the connectors. That's good.
Take this light, slide that back in position. That's good. All right. Line the door panel back up and you actually have to move this lock rod towards the outside of the door. With that all lined up, then you can push it down. Just make sure it's in all the way around. Put them screws back in. Get that started, tighten it up. And put the screw that goes right there. This is a smaller one. Get that one started and I'll get this longer one started. And tighten these up and push this push pin right back there. This cover is gonna go over here. Pop that back on. Pop this cover on, slide it over the handle. Put the front end first, down and push it in. This lock is gonna go, you have to move the locker out again, move it to the unlock. Slide this front end first, lock it in place, make sure it works. And this last piece of trim here, line it up, lock it in place.
Shop Products


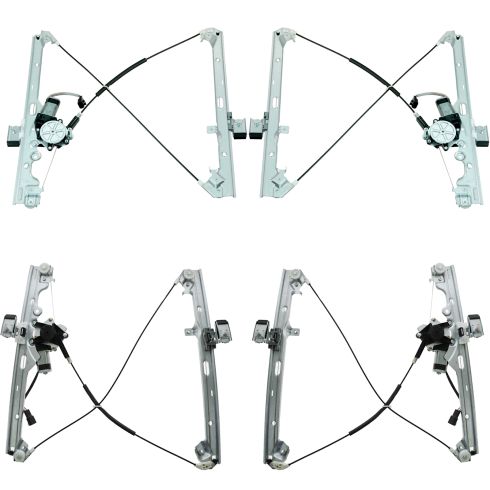
Chevrolet GMC Cadillac Front & Rear Power 4 Piece Power Window Motor & Regulator Assembly Set TRQ WRA52191
Part Details:
- Power
- 4 Piece
- (2) Front Power Window Motor & Regulator Assemblies
- (2) Rear Power Window Motor & Regulator Assemblies

How to Replace Front Window Regulator 2010-15 Cadillac SRX
How to repair, install, fix, change or replace a slow, stuck, cracked or damaged window regulator on 10, 11, 12, 13, 14, 15 Cadillac SRX
