How to Replace Front Wheel Bearings 2006-14 Volkswagen GTI
Created on: 2018-05-01
How to repair, install, fix, change or replace a worn out, vibrating or groaning wheel bearing hub on 06, 07, 08, 09, 10, 11, 12, 13, 14 Volkswagen GTI
Tools needed
-
Socket Extensions
Torque Wrench
Hammer
Channel-Lock Pliers
7mm Allen Wrench
Flat Blade Screwdriver
T30 Driver
Bungee Cord
Anti-Seize Grease
Ratchet
Needle nose pliers
1/2 Inch Breaker Bar
Complete Metric Socket Set
Hi, I'm Mike from 1AAuto. We've been selling auto parts for over 30 years.
All right, so we're gonna take the tire off. On most Volkswagens there's little caps that go over these lugs. The caps, you're gonna need the tool from the spare tire kit. You will put in and grab, it's like a hook and you'll pull the cap out. This vehicle does not have those on currently. So we're just going to loosen up the lugs with a 17 millimeter socket and a breaker bar one at a time just a little bit. When raising and jacking this vehicle, you're not gonna want to use a jack or jack stands on here on the control arms or on this aluminum because you may break the aluminum or there. Some places you can jack up from is over here where the pinch weld is.
On this Volkswagen you can see there is specific spots where you are supposed to jack the vehicle or support the vehicle. These little arrows indicate that and right on the pinch weld. It's the strongest part for jacking and supporting. Same over here. This side is a little arrow pointing down. This one it looks like it got smashed a little bit. So we're gonna take off the lugs. Volkswagen has lug bolts, not lug nuts or lug studs. You need to be careful when pulling off the wheel. Then you grab the wheel. It comes right down. Next, we're gonna take off this retainer that holds the caliper to the bracket. You can use needle nose or a straight screwdriver.
Pull that part out first. It comes right off. Now we're gonna pull off the caliper slide bolts, but before we do that there is these caps that go over. I believe this one has one missing but you could just take a small screwdriver, pry it out, and pull it off. Next we're gonna use a seven millimeter Allen and a ratchet to take out the caliper bolts. If it doesn't come out completely and that's okay. It just needs to be backed off so we can pull the caliper off. All right, on this vehicle on the driver's side sometimes they have pad sensors. This is the connector for the pad sensor so before you pull the caliper off on the driver's side you're gonna want to disconnect this one. This one is actually broken as you can see but to release it you just slide that out and you can put a little screwdriver in here straight.
Bend it back slightly. Be careful because the plastic might break. There we go. It clicked and that's good. Now we're gonna pull off the caliper. You're gonna pull straight back. Pull off the pad one at a time. This pad comes out straight like that because there's clips on it. There's the sensor. We're gonna hang our caliper with a bungee cord so it doesn't fall. You don't want to put any strain on the brake line. Next we're gonna take this caliper bracket off. We're gonna take off these two 21 millimeter bolts with a socket and a breaker bar. Work the two bolts loose. Once they're loose you can do it by hand. Pull them out. You're gonna take the bracket, slide it out towards the front of the car.
To get the center cap out, just gonna use this back of a screwdriver, push it through. I'm only gonna put three lug bolts in because we're not gonna be driving this down the road. We just need this to hold the rotor from spinning. Now I'm gonna take the 24 millimeter socket with a long breaker bar and break that free. Use your body weight as leverage. If you need to get a long pipe to add to the breaker bar. Now I'm gonna go with a ratchet. There's the bolt. We're gonna raise the vehicle back up to take the wheel off. We're gonna take the lug nuts off again. Hold the wheel so it does not fall. Now we're gonna want to separate our rotor from the hub. There is this little T30 screw. Gonna use a T30 bit that torques and a ratchet. We'll loosen it. Holding the rotor in case. This one's pretty solid so what we're gonna do is we're gonna put a lug nut in there.
All right, because the rust has built up on the hub it has caused the rotor to stick to the hub. What we're gonna do, we're gonna break that rust free. We're gonna use a hammer. We can hammer all around this area. If you are reusing your rotor you would not want to beat on the surface of the rotor. So sometimes they're harder than that. Worst case you use a bigger hammer or sometimes some rust penetrant. You can spray in the holes and let it sit for awhile. Pull off the rotor. This vehicle is very rusty. You can see that the bolts are rusted and the knuckle area is rusty. We're gonna use some rust penetrating spray. When using the rust penetrant you're gonna want to let it soak for a little bit and that will help to break the bolts free. All right, next we're gonna separate the ball joint from the control arm. That's the easiest way to gain access to the wheel bearing. We're gonna use a 16 millimeter deep socket and extension and a ratchet.
Next we're gonna separate this, pull it out, then we should be able to move the ball joint away from it and pull the axle out. This one came out fairly easily. If it does not come out easily you can put the axle nut back in and tap it with a hammer or even use a socket. Next we're gonna use a triple square. A lot of Volkswagens use these. This one is an M12. We're gonna use it with a 13 millimeter socket and a ratchet. All right, if you move the axle out of the way I'm gonna put the ball joint back in just so that the knuckle won't move so I have more leverage.
See, then the knuckle didn't move when loosening up the bolts. Should be able to do it by hand depending on how rusted the bolts are. Okay, now we got all the bolts out that come from the back and the hub, you can try to pull it but it's pretty rusty on there. We're gonna try to hit it off with a hammer, bang on the back side here. I'm gonna support it while I keep tapping it. As you can see, this is our old bearing, this is our new 1AAuto.com bearing. If you look at it, it is machined the same. There is some slight differences like this channel in here but these surfaces are machined exactly the same. If you look at the bottom it's the same. This is your ABS reluctor on the back side. So the sensor will pick that up as you're going. One way you can tell, this bearing is making noise. You can't hear it on the video but one way to tell if your wheel bearings are bad is when you're going down the road you're hearing almost like a loud groaning noise. It may change pitch when you're going side to side. What we're gonna want to do before we put our new wheel hub assembly on, we're gonna want to clean up this area right here where the hub goes into the knuckle. I'm gonna use a little brake cleaner to clean it off.
All right, I'm gonna use a little bit of anti-seize just in case we ever have to do this again. Just put it, just a light coat. Now we're gonna put our new hub on. There is no up and down. You don't want to go that way but it doesn't matter whether it's top or bottom. It slides right in nice and easy. On the bolts I'm just gonna put a little bit of that anti-seize just in case you ever have to do it again. Now we're gonna put the bolts in. Now we're gonna use wrench. The torque spec is in Newton meters which is 70 Newton meters. This torque wrench is a foot-pounds torque wrench so we converted it to about 50 foot-pounds.
Now I'm gonna separate the control arm again to put the axle back in. I can pull it out of my way. You can put some anti-seize on those spines if you need want but this one slides in really good. We can put our ball joint back in. Put the nuts on. All right, we're gonna use a torque wrench and these nuts are to be torqued to 16 Newton meters. Take our little torque bolt, screw that in. We're gonna put our axle bolt in. It's recommended that you replace this when doing this job but for the sake of the video we are reusing it. Snug it down by hand. Right, we're gonna install the wheel with the center cap off so that we can torque our axle bolt.
Now we're gonna drop the car down again so the tire is just touching the ground. All right, we're gonna tighten down the axle nut. We're gonna tighten it to 52 foot-pounds. We're gonna reinstall our caliper bracket, slide it over the rotor. We're now gonna install our caliper bracket bolts. Now we're gonna torque our caliper bracket bolts. They're to 155 Newton meters on this vehicle. Now we're gonna use some channel locks to compress the piston. I'm gonna do this very gently. You don't want to squeeze too hard. As we're squeezing this, we didn't have to go very far. Normally if your brakes were really bad this piston would be out further. When you compress this, this is pushing brake fluid back into your master cylinder reservoir.
When doing this job, because we're not cracking any lines or taking off any components that have to do with that system we do not have to bleed the brakes after finishing this job. All right, we're gonna take our new brake pads. Stick them in the caliper. These brackets go right into the hold of the piston like so. We're gonna take our other brake pad, put it in the caliper bracket. We're gonna take our caliper keeping the pad sensor out of the way. We're gonna slide on our caliper. You're gonna take your caliper connector. It's the warning when the brakes get thin it will break the connection and it'll tell you your brakes are thin. You plug that into there until it clicks. It'll slide right back onto the bracket.
We're gonna put the caliper slide bolts in. What we want to do is take a little bit of brake grease, grease them up. We're gonna insert our caliper slide bolt. We're gonna use our ratchet and our seven millimeter Allen socket. We're gonna torque these slide bolts to 15 Newton meters. We're gonna install this dust cap. It goes over where the caliper bolt goes in. Next we're gonna put this retainer that goes on the outside of the caliper, keeps the caliper down where it's supposed to be on the pads. What I like to do is push down into the hole using needle nose. That seems to work best. Get it in that hole and you can push the spring.
Make sure you push it down. Now I'm gonna install the tire. Line it up with the holes and hold it. We'll use our 17 millimeter socket to put our lug studs on or lug bolts, whatever you want to call it. Put our center cap on. Now we're gonna torque the lug studs to 120 Newton meters in a star pattern. When you do it in a star pattern it makes the wheel go flush to the brake rotor properly. Whenever you change front end components or remove front end components and reinstall them you always want to go to a local garage and have an alignment performed because you are gonna change the geometry of the wheel and tire going down the road. You do not want premature wear on your tires. You want to make sure you do that and you'll be all set.
Thanks for watching. Visit us at 1AAuto.com for quality auto parts, fast and free shipping, and the best customer service in the industry.
Shop Products


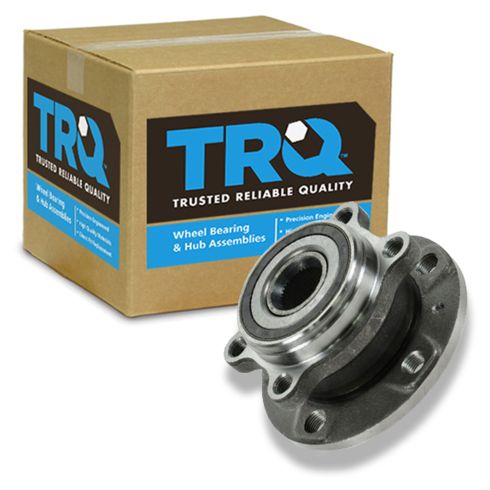
VW Audi Wheel Bearing & Hub Assembly TRQ BHA53993
Part Details:
- 112 mm
- 5.39 in
- No
- 4
- 65 mm
- 2.56 in
- 137 mm
- 36
- 4.41 in
- No
- Square/Modified
- No
- 2.24 in
- 57 mm
- Ball
- Gen 3
How to Replace Rear Bearings 2001-05 Honda Civic
New Wheel Bearing & Hub Assembly from 1AAuto.com
