How to Replace Front Wheel Bearing Hub Assembly 2010-15 Chevy Camaro
Created on: 2017-03-22
How to repair, install, fix, change or replace a worn out, vibrating or groaning front wheel bearing hub on 10, 11 Chevy Camaro.
-
step 1 :Removing the Wheel
- Loosen the lug nuts with the vehicle on the ground
- Raise the vehicle with a floor jack
- Secure the vehicle on jack stands
- Remove the lug nuts
- Pull off the wheel
-
step 2 :Removing the Brakes
- Remove the two 18mm bolts from the caliper bracket
- Pull off the brake caliper
- Hang the caliper aside with a bungee cord
- Put a 17mm wrench on one lug stud to counter-hold the rotor
- Remove the T30 Torx bolt from the brake rotor
- Strike the rotor with a hammer if necessary
- Pull off the rotor
-
step 3 :Removing the Hub
- Spray rust penetrant on the bolts that hold the hub to the wheel knuckle
- Loosen the three 16mm bolts from the hub
- Place an impact socket on one of the bolts
- Tap the socket with a hammer to separate the hub from the knuckle
- Remove the three 16mm bolts from the hub
- Tap the hub off the spindle with a hammer
-
step 4 :Installing the Hub
- Clean the wheel knuckle with sandpaper
- Put the hub onto the wheel knuckle
- Start the three 16mm bolts into the hub
- Tighten the three bolts evenly
- Tighten the three bolts to 79 foot-pounds of torque
-
step 5 :Installing the Brakes
- Line up the rotor with the bolt hole on the hub
- Slide on the rotor
- Insert the T30 Torx screw into the rotor
- Put a 17mm wrench on one lug stud to counter-hold the rotor
- Tighten the T30 screw to 89 inch-pounds
- Release the brake caliper from the bungee cord
- Put the caliper and bracket into place
-
step 6 :Reattaching the Wheel
- Slide the wheel into place
- Start the lug nuts by hand
- Tighten the lug nuts preliminarily
- Lower the vehicle to the ground
- Tighten the lug nuts to 140 foot-pounds in a crossing or star pattern
Tools needed
-
Socket Extensions
Torque Wrench
16mm Wrench
Hammer
Rust Penetrant
16mm Socket
17mm Socket
Jack Stands
18mm Socket
3/8 Inch Drive Ratchet
Sandpaper
1/2 Inch Ratchet
Bungee Cord
Floor Jack
1/2 Inch Breaker Bar
22mm Socket
Hi, I'm Mike from 1A Auto. We've been selling auto parts for over 30 years. We're dedicated to delivering quality auto parts, expert customer service, fast and free shipping, all backed by our 100% satisfaction guarantee. Visit us at 1AAuto.com, your trusted source for quality auto parts.
Before jacking up your car, you're going to want to loosen all your lug nuts with a 22-millimeter socket and a breaker bar. Now you're going to want to raise up the vehicle off the ground. We're going to use a lift to make the video a little bit easier, but you can easily do this on a driveway with a jack and jack stands. With all the lug nuts loose, you should be able to essentially spin them off by hand now that it's in the air.
We're going to remove the caliper and caliper bracket as one unit, and on the backside, there's an 18-millimeter bolt on the top, and an 18-millimeter on the bottom that we're going to remove. The caliper bracket bolts are a one-time use bolt, so if you take the bolts out of the caliper, then you need to replace the bolts themselves. Once the bolts are out, you can pull the caliper right off, and you never want to hang a caliper from the brake line, you always want to hang it from like a bungee cord or something similar.
What I like to do is put a wrench over the wheel lugs and that allows you to prevent the rotor from spinning as you remove the T30 bolt from the rotor. Now if you're lucky, the bolt comes right out. In this case, we are.
The rotor, because we live in New England and things are rusty, it ends up rusting all around the hub where it meets the rotor, and then the rotor gets stuck on the vehicle. The way to loosen this is to take a hammer and hit it right in between each lug, and this should loosen right up.
To make your life a little easier, you're going to want to spray some rust penetrant on the backside of each of these bolts, there's three of them, one here, one here, and then one on the bottom. On the backside of the hub, there's three 16-millimeter bolts that hold it to the knuckle. You're going to want to use – they're pretty tight, so you're going to want to use a breaker bar, or a very long 1/2-inch ratchet to get it, and maybe even some impact sockets if you have them. Once you have them cracked loose, you can switch to a more manageable size ratchet, like a 3/8" drive, and take the bolts all the way out.
Because the hub itself is steel, and the knuckle is aluminum, the steel hub is going to be stuck in the aluminum, especially if you live anywhere where there's rust. So a trick to doing this is you take an impact socket that's the same size as the bolt, and once you've cracked the bolt loose, there's a little bit of space in between the bolt and the knuckle, so you might be able to put the impact socket on there, and tap it with a hammer. Try it with each one, and by doing that, it knocks the hub out of the knuckle. And once you see that it's cracked loose, you can actually just pull the rest of the bolts out, and you'll be able to tap the hub out with a hammer.
As you can see, the hub that we have here, the new hub from 1A Auto, is exactly like the original one. It has the hole for the Torx bolt, the holes on the rotor. On the backside, again it looks identical, it mounts exactly the same as the original, and it should get your hub problems all fixed up right.
Inside here, where the hub was stuck in the knuckle, you're going to find some rust and some corrosion, so it's always good to get some of that corrosion out of there with a, some sort of abrasive pad or sandpaper. You’ve just got to watch out for your ABS sensor, as that does live inside there and it's very delicate. Once you've got that cleaned up, you can get the new hub into place, and then you can install your three hub bolts from the back side.
When you're tightening up the bolts, you want to make sure you tighten them evenly so the hub pulls squarely into the knuckle. So just do a few threads at a time on each bolt. The three hub bolts are going to be torqued to 79 ft-lbs.
Once the hub is on, you can place your rotor on. You have to make sure that you line up the bolt here with the hole on the rotor. You can screw in the T30 Torx screw, and it's going to be torqued to 89 in-lbs, and when you're torquing it, again I like to put a wrench here, because that allows me to hold the rotor still as you put pressure on the actual bolt.
After the brake rotor's in place, time to put the caliper bracket and caliper back on. Install your two 18-millimeter bolts. Remember that these bolts are torque-to-yield bolts which means they are one-time use only, so you have to replace them every time you remove them. Because the caliper bracket bolts are a one-time use bolt, they have an interesting tightening procedure where you tighten them to 44 ft-lbs, like so, and then you turn each one 90 degrees.
If you still have a bungee cord or something that was holding your caliper, you're going to want to remove that, and then you can throw your wheel back on. Tighten all of the lug nuts by hand first, and then once they're tightened by hand, we can lower it back down to the ground and torque them to the appropriate torque. The torque on the wheel is supposed to be 140 ft-lbs, so set your torque wrench and use all the muscle you can find. Obviously you're going to want to tighten the wheel in a cross-pattern, so that the wheel goes on evenly as well.
Thanks for watching. Visit us at 1AAuto.com for quality auto parts, fast and free shipping, and the best customer service in the industry.

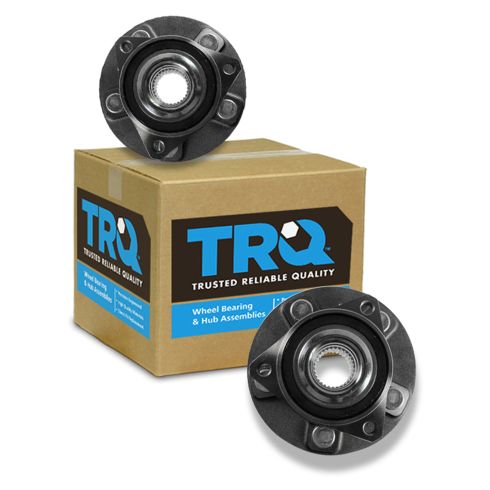
Chevrolet Cadillac Driver & Passenger Side 2 Piece Wheel Bearing & Hub Assembly Set TRQ BHA53674
Part Details:
- 2 Piece
- Ball
- (1) Driver Side Wheel Bearing & Hub Assembly
- (1) Passenger Side Wheel Bearing & Hub Assembly
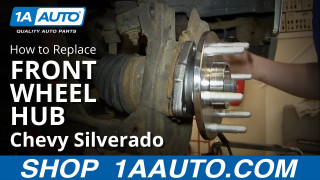
How To Install Front Hub Wheel Bearing Assembly 2000-06 Chevy Silverado
Watch this video to learn how to replace the front wheel hub on your 00-06 Chevy Silverado!
