How to Replace Front Wheel Bearing 2007-13 Nissan Altima
Created on: 2019-05-09
Learn how to access and replace the wheel bearing and wheel hub assembly if yours is noisy or vibrating. Our experts will show you how to fix it yourself
-
step 1 :Removing the Wheel
- Loosen the 21mm lug nuts with the vehicle on the ground
- Remove the hub cap
- Raise the vehicle with a floor jack
- Secure the vehicle on jack stands
- Remove the lug nuts
- Pull off the wheel
-
step 2 :Inspecting the Brakes
- Turn the rotor by hand or turn the steering wheel to turn the rotor
- Check the thickness of the brake pads
- Check the brake pad wear indicator
- Check for gouges on both sides of the rotor
-
step 3 :Removing the Front Brakes
- Pry off the u-clip from the brake line with a flat blade screwdriver
- Remove 14mm bolts from the brake caliper
- Remove the brake caliper
- Have a drain pan and bleeder hose ready
- Remove the rubber boot from the bleeder screw
- Loosen the bleeder screw with a 10mm wrench and confirm fluid drips out
- Compress the caliper piston with a clamp
- Tighten the bleeder screw
- Pry the brake pads off with a flat blade screwdriver
- Remove 22mm bolts from the brake caliper bracket
- Pull off the brake caliper bracket
- Pull the rotor off
-
step 4 :Removing the Wheel Hub and Bearing Assembly
- Straighten and remove the cotter pin with pliers
- Remove the 32mm axle nut while securing the hub with a pry bar
- Remove the cotter pin from the ball joint nut
- Remove the 19mm ball joint castle nut
- Tap the knuckle with a hammer and free the ball joint from the knuckle
- Remove the 10mm bolt from the ABS wire
- Remove the body fender pin
- Disconnect the ABS wire electrical connector
- Secure the ABS wire to the side
- Remove the wheel hub bolts with a 17mm socket and a swivel, leaving one threaded on loosely
- Tap the wheel hub with a hammer and pry bar to loosen it
- Remove the wheel hub assembly and bolt
-
step 5 :Installing the Wheel Hub and Bearing Assembly
- Clean off any corrosion from the mating surface in the knuckle with a chisel, brake parts cleaner, and wire brush
- Apply copper anti-seize to the mating surface in the knuckle
- Insert the dust shield into place
- Align the notch on the wheel hub assembly with the ABS sensor slot in the knuckle
- Tighten the 17mm bolts to the wheel hub assembly
- Torque the 17mm bolts to 65 foot-pounds
- Slide the ABS sensor into place and tighten the 10mm bolt
- Connect the ABS wire electrical connector
- Press on the body fender pin
-
step 6 :Installing the Front Brakes
- Slide the rotor on
- Put the caliper bracket back into place
- Start the 22mm bolts by hand
- Tighten the bolts to 98 foot-pounds of torque
- Install the new brake pads into the bracket
- Put the caliper on
- Thread 14mm bolts by hand
- Tighten bolts to 20 foot-pounds
- Press the u-clip to the brake hose
-
step 7 :Reinstalling the Ball Joint and Axle Nut
- Insert the ball joint into the knuckle
- Tighten the 19mm ball joint castle nut
- Torque the ball joint nut to 25 foot-pounds
- Insert the cotter pin and bend the ends over
- Tighten the 32mm axle nut
- Torque the axle nut to 129 foot-pounds
- Insert the cotter pin and bend the ends over
-
step 8 :Reattaching the Wheel
- Slide the wheel into place
- Attach the hub cap
- Start the 21mm lug nuts by hand
- Tighten the lug nuts preliminarily
- Lower the vehicle partially to the ground
- Torque the lug nuts to 83 ft-lb in a crossing or star pattern
- Lower the vehicle completely
Tools needed
-
Socket Extensions
Torque Wrench
14mm Socket
Hammer
Pry Bar
17mm Socket
Jack Stands
19mm Socket
Brake Parts Cleaner
Safety Glasses
21mm Socket
32mm Socket
Side Cutters
Gloves
Flat Blade Screwdriver
Copper Anti-Seize
10mm Socket
Ratchet
Wire Brush
Floor Jack
1/2 Inch Breaker Bar
22mm Socket
Hey everyone. It's Len at 1A Auto. Today I'm going to be showing you how to do a wheel bearing on a 2010 Nissan Altima. It's a very simple job and I'm going to show you how to do it. If you happen to need this or any other quality part, you can always come down to 1AAuto.com.
We're going to be using our 21 millimeter socket to remove all five of these lug nuts. Really all we're going to do at this point though is just make sure that we have the majority of the weight of the vehicle off the wheel and off the ground with the wheel still on the ground and we're just going to loosen these up. Just a little bit and we're going to continue removing the rest of these lug nuts.
The second to last one, we'll just leave on a couple of threads. The reason for leaving this on a couple threads and so the wheel doesn't fall off and hurt anybody. Safety first is the number one concern here at 1A Auto. Now holding the wheel go ahead and take off the last one.
Sometimes they can be a little stiff. Here it is. Those off safely, can remove the center cover or cap, whatever you want to call it. Pull this off, put aside in a safe area. Now that we get the wheel off, we're going to inspect our braking system. I put a little bit of penetrant because I know the rotor is going to come off. I also put a little bit on the bleeder screw ups. I know I'm going to have to open that up.
What I'm going to want to do first is I'm going to make sure that we have plenty of slack for when we were moved this caliper. We can hang it but I'm going to remove this clip right here. Just a little U clip, making sure that we're wearing safety glasses. This piece can go flying off and it probably will.
We know where that went, down. Now I'm going to remove that, gives us plenty of slack for when I removed this caliper. Next I'm going to use a 14 millimeter socket on a ratchet. Can use an air gun. Can you use pretty much anything you want, but it's a 14. There's one. Get this one. See if I can get it.
All right. We'll just continue removing the rest of these bolts. There nice and loose. I could probably use my hand at this point. Now that I've got the caliper removed, we can inspect it. Make sure the boot isn't torn, the pistons not chipped or cracked. It looks fairly decent. Now that we know our calipers good, we're going to move on to the bracket.
You'll notice that the pads are in here. They're stuck in pretty good. What we can do is we can use a little pry bar as long as it has the punch end on it not plastic. Make sure you're wearing safety glasses. We're just going to tap that out.
You can go anywhere as long as you're getting rid of the pad. If you're keeping the pad. For some reason, I definitely wouldn't go up against the mid of the pad, but since we're replacing it, I'm not going to worry too much about it. You can also pry, use a pry bar, comes out fairly easily.
Next we're going to use a 22 millimeter socket on the back side. Turning to the left, break these free. Leave it a few threads in. Move on to the next bolt, which is up top. Do the same thing. Here we go. Now we can remove these completely. Now with a smaller more workable size ratchet.
I'm just going to finish turning these out, holding the bracket so it doesn't fall. Second bolt, and now we've got our caliper bracket off. Lastly in the removal process, we're going to go ahead and take the rotor off. We can take a quick peek. Look at the condition, now we're there it gives us something. Nope. When we're looking at our new quality 1A Auto part.
We can take a look at the hub while we have it off. As you can tell, it's a little rusted. It's going to need some cleaning in the backing plate. I'd say it's in fair to poor really conditioned. We'll go with poor, we'll skip the fair go right to poor. We'll just take a little wire brush. We'll try to clean this up, get off as much of the crud that we can, being very careful not to cut ourselves on anything.
Gloves are always great. Next what we're going to do, we're going to remove this cotter pin. Its basically just a safety nut, for this nut for in case it wasn't torqued down or tightened properly. Should come out fairly easily. You can set that aside in case you don't have any extras. Next what we're going to do is we're going remove this wheel bearing nut right here.
You're going to end up using a 32 millimeter socket and if you need it to, you can use a pry bar. This was closer to the ground. You could set it on the ground with your socket, your ratchet. You can break it free. For the purpose of this video, I'll save a little time. Going to use an air gun. Hopefully you're lucky enough to have one of these. Zips right off. Nice and easy. We'll set this aside because we're going to probably end up reusing it.
Next what I like to do so I can turn the wheel side to side to get to the wheel bearing bolts, is I'm going to take off this cotter pin, take off this nut. I'll tap on right here with a hammer. I say tap, but I'll probably end up waking it pretty good and that's just to break the outer tie rod free. Once that's free, I'll be able to maneuver the knuckle side to side so I can get access to the bolts with no problem.
First we're going to start by removing this cotter pin. Just use my cutters. See if I can get it wearing safety glasses.
Here we go. Remove that, now you can use a socket, see if we can figure out what size it is. 19 millimeter. You can use a ratchet, use an air gun, use a wrench. Whatever your preference is. For the purpose of this video, I'll just use this ratchet. You can take that right off. Once it's completely removed, we'll go ahead and hit that knuckle with a hammer, should break free.
Now I'm going to use my big fabulous hammer, I'm going to make sure I hit right here, not down here. I don't need to hit here. Especially not the boot. Pay very special attention not to hit those threads. It's going to cause an issue you'll probably have to replace the outer tire rod end.
Anyway, moving on, I'm going to hit right here a couple of times. Wearing our safety glasses. Can see that it broke free so I don't have to continue hitting even though I want to. I can lift that right up and out of the way. Now as I said, I can turn this to whichever direction I want to be able to get to those bolts. Next we're going to go ahead and remove this 10 millimeter head right here for the abs wire.
Let me see if I can wiggle it around. Sometimes they're stuck. We got that out. We're just going to come around, move it from all of its anchor points. Here's that. All right, now we're going to use our 17 millimeter socket. If you happen to have a wobble extension that might be helpful for you. If you don't, you can also use a universal socket.
You don't have much clearance. You can go ahead and push the axle in. Might be semi difficult. That would be a project for a different video and get to that point but this one broke free, nice and easy. I'm going to turn from my perspective to the right, but from your perspective it'll be to the left, counterclockwise.
Break that free. I'm going to go ahead and do the other three. There's four total, one here, one there, and then on the other side, same thing. Up top, down bottom. We'll break all those free and then we can move on to the next step. With our 17 millimeter on our last bolt, it feels pretty good.
That's the size of those bolts. What I like to do at this point though is I will actually put this one in. I'll try to go in a good five to six turns because when I'm removing this wheel bearing, I'm going to be hitting with a hammer. I don't want it to fly off, hit me on the foot, the shin, the knee, any part of me really. I'll just go ahead and I'll put that back in a little bit. Like I said, I'll give it a few turns.
You don't want to just leave it on one thread or even two threads or three. You want to get it on there a fair amount but not fully tight. I don't know if you can see it with your camera, but that's a decent amount. Now I'm going to go ahead and I'm going to take my big fabulous hammer and I'm going to go ahead and whack this wheel bearing. See if I can break it free from the knuckle. Being careful not to damage the backing plate anymore than it already is and we'll go from there.
All right, hammer time. I'm going to go ahead and whack right here. We're not reusing this wheel bearing. We're going to be replacing it with a new one so I can go ahead and whack away. Once again, I have my bolt in the back right here, so the wheel bearing can't come off and fall and hurt myself or anybody else or even damage the floor. I want to be careful not to hit the axle so I can push that in a little bit more if I want. It really just pops back out. It is what it is.
Now I'm going to go ahead and whack it, so watch your ears. Safety glasses. Number one, concern at 1A auto. I'm going to go ahead and whack it. Here we go. Couple more. There we are, seems like it broke free quite a bit. I can hit it with a little bit more penetrant spray and I'm going to knock it down a little bit and see if I can move it around.
Once it does move around freely, I'll go ahead and I'll remove that last bolt completely and it should come right off. I don't have to worry too much about these wheel studs. Normally I would, but right now we don't. That moving, it seems like it's a little firm, so I'm going to go ahead and whack it back and forth a little bit. Wearing my safety glasses.
Here we go. Knock the stud out just in case you want one of those for a key chain or something, little memento. Alright, I got it moving around pretty good. So what I'm going to do is I'm going to remove that last bolt and then I'm going to go ahead and see if I can pry this out with a pry bar so I can do it as safely as possible. I might need a longer pry bar. We'll see. Put a little pressure.
It feels like it's coming loose. I'm going to hold the wheel bearing if I can. There we go. Come around here so you can see. Trying to go between the wheel bearing and the backing plate and or the knuckle.
It feels like it broke free. Here we go, we're at the finishing stages. It's going to be a fighter. As you can see the backing plates making it's way off too. Be careful you don't get hurt by that. Pull this right off. If you happen to have access to something like this. You might want to replace it, but here's our wheel bearing.
All right, so now we've got our wheel bearing out from our 2010 Nissan Altima. I just wanted to show you that they are the exact same made to manufacturer specifications. They both have five studs. That's one of it, was still in there. We have five as well. Very quality part. Good thing about this bearing is it also comes with the torque specs right on it for you or with it. So when you go to install it, you can torque it up just right. If you need this, or any other quality parts, you can always come to 1AAuto.com.
All right, something that I want to mention now that we've got the wheel bearing off is you'll notice there's a lot of corrosion in here. This is where the wheel bearing sits inside. There's also corrosion right here. This is where it mounts up against. What we want to do is try to clean that up. There's multiple tools you can use. These are my three go tools.
I like a nice big scraper going along here. I like something a little smaller. You can lift up the axle if you want. You can scrape all this off. As you can tell there's a lot. You want to try to get this as clean as possible. You want a good ground point for your wheel bearing. Any little corrosion like this, big chunks, small chunks, anything like that can cause the wheel bearing to sit so it's not flush, which could become an issue.
What I like to do is just make sure I get this as cleaned up as possible and once we're at that point, I'll show you how let go from there. You can use the nice big scraper if you happen to have one, making sure you're wearing your safety glasses. If you have a mask you could wear that as well. Try to keep this corrosion and stuff out of your face and out of your mouth. Out of your eyes and your beard if you have one.
As you can tell, nice big scraper seems to work pretty well. Just try to get as much of this corrosion off as possible. Then I'm going to come around the outside. It's quite a bit right here. I'm going to try to catch some of this. See If I can show you some of the flakes that we're talking about. Look at these. Holy Cow.
Oh, dropped it, but there's a pretty big one. Bigger ones are on the floor if you want to see some of those, you can get down there. Let's see if I can grab some more. Wow. Any of this stuff right here. This is all going to get between your bearing and your knuckle. That's going to cause issues.
Try to make sure you get as much of this off as possible. Try not to inhale it. Just going to keep on rolling around here. Wearing our safety glasses. All right, so now that I got most of this cleaned off, what am I going to do is I'm going to use a little bit of parts cleaner. I'm going to try to spray this down. I'm going to use my brush. Just get off whatever's left of this mess, making sure that I'm wearing safety glasses because this is a propelled brake cleaner.
Here we go. I don't want to spray it back to my face, I'm going to stand back a little bit. It looks pretty good for now. Go with my brush. Get the splines on the axle, make sure there's no rust or debris in there, or on the inside where the wheel bearing rides inside the knuckle. That looks good.
I'm just going to blast one more time with the parts cleaner, stand back. That looks good. Can use a little bit of anti-seize. I like to use copper anti-seize you can use whatever you like but pretty much anything's better than nothing because next time if you have to do this wheel bearing again some day it's going to help you out in the long run. Let's give it a little spritz.
You don't have to go to bad on it or too much on it. Around here. Get a little bit on the axle splines, be careful not to get it on here. We don't need to get it on the threads. We've got our four mounting bolts, they're all the same. They're just going to thread in from the backside of the knuckle right into here.
What do you want to pay attention to is where the ABS wire is going to come through or where the ABS sensor is going to come through. You want to make sure that that lines up with one of these holes. If I put this in this way, this is where the ABS is going to come through pretty much right here. That'll be bad news. I'm going to see if I can turn it over and I'm going to see if this lines up with where the ABS sensor is going to go through.
This worked in. Oh yes. That's the way it's going to go. I'm going to try to line this up with where the sensor is going to go. It's very important. That lines up. The next thing I'm going to do is I'm going to put the backing plate on. I'll go ahead and get this wheel bearing mounted on using these four bolts. If you want to use a little bit of thread locker, that's your preference. For the purposes of this video, I'm not going to worry about it.
Alright, now that we've got our backing plate all nice and cleaned up, I used a little wire brush, you can use whatever your preference is. I'm going to go ahead and hold it up, get my wheel bearing started onto the axle spindle there. It's okay if that spins because we're just going to spin it right back. It feels good, holding it carefully with my fingers not to cut myself.
I'm going to try to come around from the backside, see if I can get one of these bolts started. If it doesn't line up, you can always spin the wheel bearing a little bit. Once we get all four of these started in, we're going to go ahead and snug them up. Once we get to that point, we'll torque them. So don't tighten them up too much. I'm going to have to move the bearing around a little bit.
Now completing our criss-cross pattern, we're just going to snug these up. It doesn't need to be too tight. We're going to Torque it. Come up here, snug it down. Feels pretty good. Now we can go ahead with our torque wrench, torque's going to be 65 foot pounds on these. Get it on there. Criss-cross and go up to the top up here. Turn this. Hopefully it doesn't block the camera too much from you. A little bit more.
Feels good. Now if you want to, you can go back around. Just check it. Now that we've done the criss cross, we can just go right around. Feels good. You don't have to have the tie rod disconnected. That's for another job I'm doing on this vehicle, but it is helpful cause you can turn it. That feels great.
Now we're going to go ahead and install our ABS sensor. Just going to slide it in. Fits in there nice. There should be a slot right in that wheel bearing that it fits through. If for some reason it doesn't go in and easy, there might've been an accident where the wheel bearing was put in incorrectly or upside down. It's very possible, happens.
I'm going to go ahead and snug this up. It doesn't need to be very tight. Just give it a little tug. That feels pretty good. We'll come around. Put it in the little slot on the strap. Come around the front side, put it in the slot on the other side. Come around the back. I'll move this caliper out of the way so we can see.
Slide it into the body behind here. Let's see if I can pull it away enough to see. Here it is right here. We're going to listen for a click sound. We can slide it in, see if I can get it lined up. There's the click. Give it a little tug. Feels great. Now we can go ahead and put in our body fender pin. That's it for the ABS sensor on this.
Use a little bit of a copper never seize or whatever you got. I'm just going to go around, you don't have to go too crazy with it. Now we can go ahead and install our quality rotor from one 1AAuto.com. I'm just going to take one of these lug nuts and try to start it on here. The reason for this is to hold the rotor still, so no rust or flakes or anything really can fall behind it and so it won't fall off and smashed me in the foot.
Now it's time to go ahead and install this caliper bracket. We've got our two brake caliper mounting bolts, both the same. You don't have to worry about mixing those up. Wind this up. Start them both in before you tighten anything down. Now I'm just going to get these nice and snug. I'm not going to tighten them up too much because there is a torque and it's 98 foot pounds. 98 foot pounds with our 22 millimeter socket.
Here's one. I'm going to go ahead and hit him again. One more for the lower. Now we have the bracket mounted. We're going to go ahead and put in our pads. Something I wanted to note, is the little clip that you saw, that's going to inside here. They're just going to start it in. If you happen to forget to put the clip inside of your pad, you're going to hear a noise and it's going to remind you. Especially the outside one, that'll hit up against your rim and that's going to be fun.
You can't blame when I showed you. You put it in there, those fit in Nice and easy. You can take your caliper, bring it around. Put it right on here. It should slide on perfect. We're going to bolt these bolts in. They both have 14 millimeter heads. They're both the same size. Now I'm going to go ahead and turn them to the right or in this case to the left because I'm working from the opposite side, but righty tighty, lefty loosey.
Going to make sure we torque these down. Using our torque wrench, we're going to go ahead and torque these down to 20 foot pounds. One, two, let's hit them again. One, two. That's nice and torqued down. Now we're going to do our brake hose. We still have our little clip. Comes in from the backside lifts right up. Should see where it lines up.
We'll take our clip, put it in right like this so it's face up. You can see your little clip that's going to be facing you. That way when you go to take it back out someday or somebody does they can get it out. Making sure we don't forget to put that all the way in. A couple of little taps. Remove our brake hanger. Just double check everything. Make sure everything's nice and tight.
This all looks good. We definitely did those. Let's go ahead and put on this tire rod end. Just going to slide it through. Washer first, then the nut? There's a torque specification. It's 25 foot pounds. Tighten that up by hand here. It's pretty good. I had my torque wrench with a 19 millimeter socket. Set the 25 foot pounds.
There it is. We can go ahead and put our cotter pin through the hole. Should drive right through. Can you use some of these pliers. Can use whatever you have. I'm just going to bend this over. Can bend the other one over. Some people snip it off. It's your preference. Tire Rods in, torque down. It's got all the parts it needs all set to go.
Now we're going to go ahead and put on our spindle nut, it's 32 millimeter, same socket we used to take it off. We'll put it back on you. Finger tight here. Use a ratchet, use an air gun, whatever you got. Once we get this bottomed out a little bit, we're going to go ahead and torque it down. All right, so now we're going to go ahead and torque this down to 129 foot pounds.
An easy way to do this, you have access to the long handle pry bar and just set it like this. In between your studs being careful it's not angled because you don't want chisel up any of the threads. Flatter the better. Take our torque wrench or that 32 millimeter socket and listen for a click. Sounds good. Let's hit it one more. That sounds great. Lastly, what we're going to do is we're going to put back in our locking pin or cotter pin. For the purpose of this video, I'm just going to use the one that I pulled out
Put it through. Nice and bottomed out and you just pin it over. Bend it over. Here we go. Now we're going to get the wheel up on here. We have one lug nut in hand. Our hubcap is safe. We can get to it easily. I'm just going to grab this wheel. I'm going to roll it up my leg so I can use my ab muscles to lift it up and not my back. Save your back.
Go on right up. Started on there. Hold it tight. Grab your hubcap. You will notice that there's a hole right there for your valve stem. Should line up fairly easily. There we are. Holding pressure. We're just going to start one lug nut. Now we're just going to snug these up. Go around, we don't need to go to tight because we are going to be torquing these to 83 foot pounds.
We're using our 21 millimeter socket we used to remove the lug nuts. Now we're going to get this tire so it's on the ground, at least touching so it won't spin, and then we'll torque it. Now we're going to go ahead and torque these down to our 83 foot pounds. We're going to go on a crisscross pattern making a star on this particular wheel. You had six lug nuts. It might be a little different, or even seven might be difficult to figure out, but I'm sure we can do it.
I'm going to go around one more time. One, two, three, four five. Thanks for watching.
Visit 1AAuto.com for quality auto parts shipped to your door, the place for DIY auto repair. If you enjoyed this video, please click the subscribe button.
Shop Products


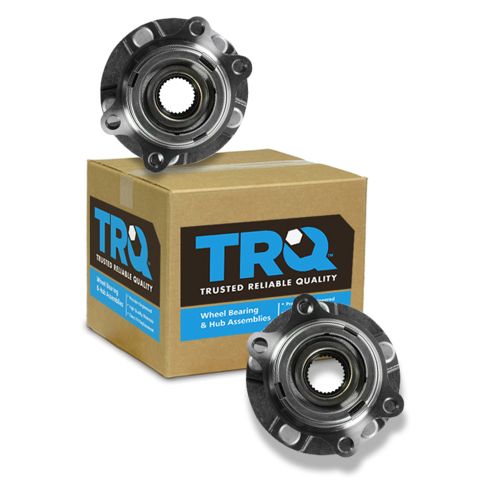
Nissan Altima Front Driver & Passenger Side 2 Piece Wheel Bearing & Hub Assembly Set TRQ BHA53599
Part Details:
- 2 Piece
- (1) Front Driver Side Wheel Bearing & Hub Assembly
- (1) Front Passenger Side Wheel Bearing & Hub Assembly
- Ball
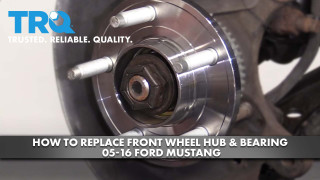
How to Replace Front Wheel Hub Bearing 2005-16 Ford Mustang
Watch this video to learn how to install a new engineered to fit TRQ front wheel hub and bearing on your 2005-14 Ford Mustang.
