How to Replace Front Upper Control Arms 1988-2002 GMC Sierra 1500
Created on: 2020-04-29
Watch this video to learn how to install a new upper control arm on your 1988 to 2002 GMC Yukon.
Tools needed
-
Hammer
Rust Penetrant
Pry Bar
Block of Wood
Pliers
Pocket Screwdriver
21mm Socket
3/8 Inch Allen Wrench
Pickle Fork
21mm wrench
Flat Blade Screwdriver
Copper Anti-Seize
Brake Grease
22mm Socket
Safely raise and support your vehicle on the frame so your suspension can hang. Now that we've safely raised the vehicle, let's remove this by using a small pry bar right in this little slot. Now you can see your 22-millimeter lug nuts, remove those. Now, with the wheels off, we have a clear view of where our upper ball joint nut is right here above the axle, go ahead and get that cotter pin out of there. It might not want to necessarily come out, you might have to cut it and then punch it through and try to grab on to it. Ooh. So, I sprayed that down again. Now, I'm gonna use my wrench. I'm gonna try to get this off of here. That right off of there. Now, we're gonna get the ABS wire off of the upper control arm. There's a bolt that comes through from the bottom to the top, hold the bottom, take off the top nut. Let's get this off of here.
Now we're gonna carefully push back the caliper piston. If you look right here, that's the piston. We want that to go all the way back as far as it can go. Some people would choose to open up their bleeder screw. If yours is in poor condition like ours is, it's probably going to break off. In which case, just push it back nice and slow. Now, we have a steel piston here, it's not ceramic. So, it's okay to go ahead and try to pry up against it. You can test it with a magnet. If the magnet holds, you know it's steel. Let's use a three-eighths Allen socket and remove these slider pins. Let's grab the caliper off of here and set that aside. Let's go ahead and get this rotor off of here.
Now that we have the caliper hanging, not from the flex hose, we have it hanging from a nice cord here, that way there it's not putting any pressure on that flex hose, we're gonna go ahead and take the upper ball joint nut, we're gonna put it on just a couple threads here. The reason for starting this on a couple threads is because the next thing we're gonna do is take a pickle fork and we're gonna try to separate these two. Once it separates, we wanna make sure that the knuckle doesn't come flying down and potentially rip the axle apart. Take your pickle fork and your little hammer, separate the two.
Now that we've got this separated, let's go ahead and take the nut off. Just be careful as you take it off because this is going to swing down and you don't wanna separate this area of the axle. There we are. Carefully let's bring this down. The next thing we're gonna do, you can either remove this by removing all these push clips or just flip it up. Once you've done that, you can see the nut that we're gonna remove. And on the other side is where the bolt is gonna come through. I'm gonna hold that bolt with a 21-millimeter. Now, we're gonna remove this nut using a 21-millimeter as well. You can see it's starting to come out, and you can also see this right here. You wanna make sure that you don't lose those. If you drop one, just go ahead and grab it. It should just slide up the bolt just like that. We're gonna use a punch, we'll push this out the rest of the way. And then we're gonna do the same to the other side.
We just wanna remember that this was facing down. Let's do the same to this one. As you can tell, you can roll this up so you have a better view. That's always nice. Here it is, friends. So, now we're gonna take our two mounting bolts here. I like to use a little bit of grease. You could also use some copper Never-Seez. You do you, boo-boo. Go right along this shanked area. That's gonna help make sure these come out nice and easy down the line.
Now it's time to put in the upper control arm. It's important to make sure that your control arm matches up with the one you took out because if you have the one for the other side of the vehicle, it's gonna cause a big issue. Another good way to tell if you're not sure because the curves are about the same, you could just look at where the bolt hole is missing. If you have the one for the other side, the bolt hole is gonna be missing over here. This looks great. Let's install.
Here we are. Just gonna leave this sitting for a second. Grab my bolt. I remember it came through from the inside through, and that this was facing down. It's nice and lubricated, so that's good. Getting all over my hands. That one is through. Let's do the same to the other side, and then we'll continue on. Let's get these on there. Put it on there. If you wanna use a little thread locker, we'll call it your prerogative, but these nuts should be locking nuts.
Now, before we tighten them down, it's important to make sure that you don't have your control arm hanging down like this. Of course, it's gonna put strain on the bushings. Once you go ahead and put this on the ground, it's gonna start stretching them. So, you wanna make sure you have it at approximately ground level. If you have the vehicle in the ground, this would be about where the vehicle is sitting. So, that looks good. I'm gonna find a way to hold this like this, and then we'll go ahead and continue. Now that I shim this with a nice piece of wood, I have it so this is approximately level with the ground. That's gonna be great. We're gonna go ahead and hold on to the bolt side and tighten up the nut side. I'm just gonna snug it and then we're gonna torque it to manufacturer's specifications. Let's go ahead and torque these upper bolts to 140 foot-pounds. Torqued.
Next, we're gonna take a nice, big pry bar. We're gonna come right across the top of the control arm underneath the frame. We're gonna grab our nut and have that ready. Now, let's tighten this up. The torque spec for it should be 74 foot-pounds. Something to keep in mind is it might be a little difficult to torque where you have the axle in the way. So, make it nice and tight. Once you're sure you've got it as tight as possible with the wrench, of course, I would try to make sure that you line up the castle nut slot with the hole that goes through the ball joint, and then go ahead and put in your cotter pin. Once you have the cotter pin through, make sure that you peen it over, that way there it'll stay locked. Beautiful. Let's take our grease fitting, start it in here. Make sure you snug it up. Perfect. Let's move along to this right here. You wanna make sure that you have your ABS cable secured. You don't want it to be rubbing against the rotor if it can move around.
So, now we're gonna take a bolt and the nut that came with the kit, put it through. Start the nut on the bottom there. The nut is a 12-millimeter and the top is a 13. We're gonna grab these little clips. They should slide right over the control arm and then they're gonna hold your ABS wire nice and secure. Just slide that one up quite a bit. Put that wire in. Do the same thing to the other one. Perfect. That's gonna protect this from getting damaged. Let's grease up this ball joint. Pay special attention to the boot under there. Make sure that it expands, but it doesn't necessarily keep expanding to the point that it blows open and squirts grease all over the place. Awesome. Let's get that new rotor on there. Make sure you take one of your lug nuts and tighten this down that way they're the rotor can't move around. Get the caliper on. We've got our two bolts. If you need to clean up the threads, now is the time to do it. But these look fine.
Now that they're both started in, we're gonna snug them up and then we'll torque them to manufacturer's specifications. Torque your slider bolts to 38 foot-pounds. Torqued. Let's get this off of here. We'll get our wheels back on. We're gonna put on all the lug nuts. We're gonna snug them up in a criss-cross manner. Torque these to 120 foot-pounds. It's torqued. We'll get our cover on here. Awesome.
Shop Products


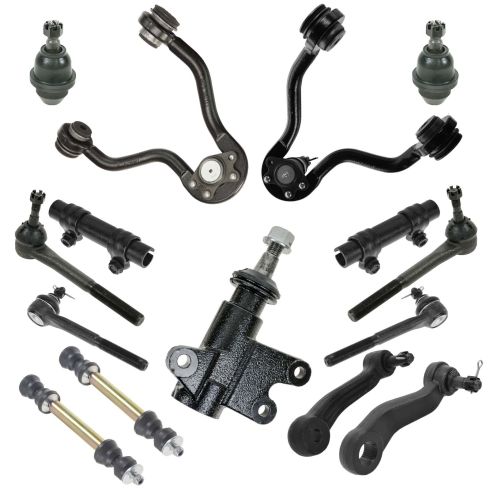
Chevrolet GMC Front 15 Piece Steering & Suspension Kit TRQ PSA60584
Part Details:
- (2) Front Lower Ball Joints
- 15 Piece
- (1) Idler Arm
- (2) Front Upper Control Arms with Ball Joints
- (1) Pitman Arm
- (2) Front Tie Rod Adjusting Sleeves
- (1) Front Heavy Duty Sway Bar Link Set
- (1) Idler Arm Bracket
- (2) Front Outer Tie Rods
- (2) Front Inner Tie Rods
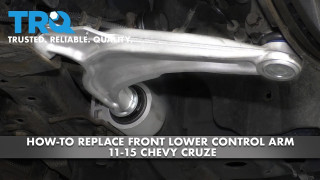
How to Replace Front Lower Control Arm 2011-15 Chevy Cruze
Control arms are a crucial part of the suspension system of your vehicle. They carry the load of the vehicle to the wheel and maintain its alignment. Control arms are large and strong. They contain rubber bushings for smoother rides at the cost of eventual wear. How to install a new quality TRQ lower control arm in your 2011-15 Chevy Cruze.
