How to Replace Front Upper Control Arm 2006-10 Ford Explorer
Created on: 2017-05-19
How to repair, install, fix, change or replace failing, rusted, rotted, or damaged upper control arms on 06, 07, 08, 09, 10 Ford Explorer
-
We recommend an alignment after finishing this repair
step 1 :Removing the Wheel
- Loosen the lug nuts with the vehicle on the ground
- Raise the vehicle with a floor jack
- Secure the vehicle on jack stands
- Remove the lug nuts
- Pull off the wheel
-
step 2 :Removing the Control Arm
- Loosen the 18mm castle nut from the control arm
- Place a pick fork between the knuckle and the control arm
- Separate the ball joint from the steering knuckle with a hammer
- Spray the ends of the bolts on the top of the control arm
- Remove the 18mm bolts from the control arm
- Stick an 8mm wrench to the bottom of the castle nut
- Loosen the nut
- Lock onto the stud with slip jaw pliers
- Remove the castle nut
- Pull the control arm out of the steering knuckle
- Place a bungee cord around the strut and the knuckle
- Remove the control arm
-
step 3 :Installing the Control Arm
- Insert the control arm into place and insert the 18mm bolts to the control arm
- Remove the bungee cord
- Insert the stub into the steering knuckle
- Tighten the back 18mm bolts so that the washer is touching the control arm
- Raise underneath the strut with a jack to simulate the ride height
- Tighten the 18mm castle nut
- Torque the two back bolts to 111 foot-pounds
- Tighten the 18mm castle nut to 41 foot-pounds
-
step 4 :Reattaching the Wheel
- Slide the wheel into place
- Start the lug nuts by hand
- Tighten the lug nuts preliminarily
- Lower the vehicle to the ground
- Tighten the lug nuts to 100 foot-pounds in a crossing or star pattern
Tools needed
-
Pickle Fork
Gloves
Hammer
Rust Penetrant
Pry Bar
Jack Stands
Complete Metric Wrench Set
Ratchet
Floor Jack
1/2 Inch Breaker Bar
Safety Glasses
Complete Metric Socket Set
Hi, I'm Mike from 1AAuto. We've been selling auto parts for over 30 years! We're dedicated to delivering quality auto parts, expert customer service, and fast and free shipping, all backed by our 100% satisfaction guarantee. We've created thousands of videos to help you install our parts with confidence. That saves you time and money, so visit us at 1AAuto.com, your trusted source for quality auto parts.
In this video, we're going to show you how to replace the front upper control arm. This is a 2006 Ford Explorer. It’s basically the same for 2006 to 2010. We show you on the passenger side, but the driver's side is the same procedure.
Please click Subscribe to see all our other videos for Explorer, as well as other Fords and other makes and models. To get the part in this video, click the link down in the description and go to 1AAuto.com for thousands of parts for all your needs.
Use your lug wrench or a 19mm socket with a big ratchet or breaker bar, and loosen your lug nuts while the vehicle is on the ground. We’re using a lift, but a jack and jack stands can be used as well. Remove the lug nuts the rest of the way, and then remove your wheel and tire.
With the vehicle supported on jack stands, or on the lift, you want to just put a floor jack underneath and raise up the suspension just to take a little bit of the load off. You need an 18mm and you need a deeper socket to clear the whole stud. Use a nice big breaker bar for some extra leverage and pull. Mine's coming apart pretty easy. Once it gets easy, just go with a wrench, and you want to make sure that this stud isn't spinning. Usually it's not. Leave the nut in place here and use a ball joint fork and a large hammer to separate the ball joint from the steering knuckle.
We're going to spray the ends of the bolts that are at the top of the control arm with rust penetrant. These two bolts are 18mm. The nuts should have a tab that locks into the control arm, so you don't have to hold the nut side. Nice big breaker bar, 18 mm socket on the front one fits in nicely. You can loosen it up. On this side, we'll use a 3/8 because it's just a little smaller. Let’s get in there. The only problem is, it doesn't give us as much leverage. You can see the nut spinning around right now, but in a moment it's going to get caught on the control arm and it'll come apart. If need be, you can use a piece of pipe, put over your ratchet. Just be careful not to overload the ratchet, and apply pressure gently for more leverage. Remove the bolts, just make sure that the nuts don't fall down too far, like that.
Then the bottom of this is an 8mm. The wrench fits on, so if you need to you can hold it. Remove the nut, and once it gets to a certain point, you may have to lock onto the stud with some slip-jaw pliers. Hold it there to remove it the rest of the way. Take the nut out, and lift this up and out. Have a bungee cord ready, put it around to hold the knuckle in place, and then you can pull your broken control arm out.
On the left, you can see the original part out of our 2006 Ford Explorer. On the right, the new part from 1AAuto.com. It's going to install and function just the same as the original. The only differences are very minor and cosmetic. The beauty of these is that they come with the ball joint, so either if your ball joint is bad or your bushings are worn out, installation of a new control arm from 1A Auto is going to fix your problem.
New control arm from 1A Auto, I'm just going to take the new locking nut off. I have one of our bolts ready. Slide it into place, hold the end and through just for now to hold it in place. Same thing down here. Make sure you get your bolts in first. Then our caged nuts in place. Start the bolts on. With those in place, carefully take off your bungee, or whatever's holding the spindle. Just put that down in for now and start the nut. Now, we're going to tighten up for the bolts. We'll tighten them up enough so that the control arm can still move. Once you get it to a certain point, you can push it in and you can see where your washer use to be, so we'll just move right to there and we'll tighten up preliminarily.
This will give you a preliminary alignment, and we do suggest that you get your vehicle realigned after you complete the repair. Once you've done the rear, do the same thing for the front. Before we put the knuckle together, or torque anything, we're going to raise the suspension up to its ride position. So, there should be no weight on your jack stand, or a little bit of space between your jack stand and your frame, and then that usually holds the stud pretty well here. We'll tighten this up.
Now we'll torque our two bolts to 111 foot-pounds. Do a final check and make sure they're lined up where they were originally if it's for a preliminary alignment. Again, torque them to 111 foot-pounds. Tighten this nut to 41 foot-pounds. After everything's tightened up, let your jack down. Again, we do recommend a front wheel alignment after this repair.
Reinstall your wheel and tire. Start all your lug nuts by hand first; make sure they don't cross-thread. Use your lug wrench, socket and ratchet, or whatever and tighten them up preliminarily. Lower the vehicle onto the ground. Tighten your lug nuts to 100 foot pounds using a star pattern to tighten them.
Thanks for watching. Visit us at 1AAuto.com for quality auto parts, fast and free shipping, and the best customer service in the industry.
Shop Products


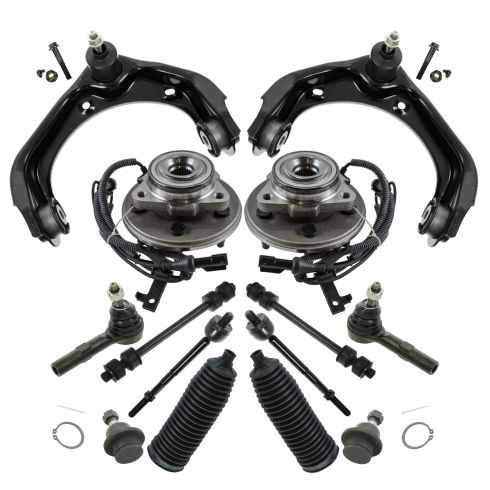
Ford Mercury Front 14 Piece Steering, Suspension, & Drivetrain Kit TRQ PSA43290
Part Details:
- (2) Front Sway Bar Links
- (2) Front Lower Ball Joints
- (2) Front Upper Control Arms with Ball Joints
- 14 Piece
- (2) Front Steering Rack & Pinion Bellows
- (2) Front Wheel Bearing & Hub Assemblies
- (2) Front Outer Tie Rods
- (2) Front Inner Tie Rods
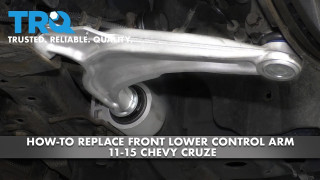
How to Replace Front Lower Control Arm 2011-15 Chevy Cruze
Control arms are a crucial part of the suspension system of your vehicle. They carry the load of the vehicle to the wheel and maintain its alignment. Control arms are large and strong. They contain rubber bushings for smoother rides at the cost of eventual wear. How to install a new quality TRQ lower control arm in your 2011-15 Chevy Cruze.
