How to Replace Front Sway Bar Links 1980-2003 Ford F-150
Created on: 2017-06-20
How to remove, replace, and install a sway bar end link on 80, 81, 82, 83, 84, 85, 86, 87, 88, 89, 90, 91, 92, 93, 94, 95, 96, 97, 98, 99, 00, 01, 02, 03
-
step 1 :Removing the Wheel
- Loosen the five 19mm lug nuts
- Raise and support the vehicle
- Remove the lug nuts
- Slide the wheel off the hub
-
step 2 :Removing the Sway Bar Link
- Apply rust penetrant to the sway bar link
- Attach a 14mm wrench to the top sway bar link nut
- Brace the wrench against the vehicle frame
- Turn the 14mm bolt at the bottom of the sway bar link to loosen the nut
- Remove the 14mm nut
- Tap the top of the bolt with a hammer
- Remove the sway bar link bolt
- Remove the sway bar link bushings, washers, and sleeve
-
step 3 :Installing the Sway Bar Link
- Slide a washer (dish up) onto the sway bar link bolt
- Slide a bushing onto the sway bar link bolt
- Slide the sway bar link bolt through the control arm
- Slide a bushing onto the sway bar link bolt
- Slide a washer (dish down) onto the sway bar link bolt
- Slide the sleeve onto the sway bar link bolt
- Slide a washer (dish up) onto the sway bar link bolt
- Slide a bushing onto the sway bar link bolt
- Insert the sway bar link bolt into the sway bar
- Slide a bushing onto the sway bar link bolt
- Slide a washer (dish down) onto the sway bar link bolt
- Thread the nut onto the sway bar link
- Attach a 14mm wrench to the top sway bar link nut
- Counterhold the sway bar link nut with the wrench
- Tighten the sway bar link bolt with a 14mm socket and ratchet
-
step 4 :Installing the Wheel
- Slide the wheel onto the hub
- Start the lug nuts
- Lower the vehicle to the ground
- Tighten the lug nuts to between 83 and 112 foot-pounds of torque in a star pattern
Tools needed
-
14mm Wrench
Hammer
14mm Socket
Hi, I'm Mike from 1A Auto. We've been selling auto parts for over 30 years. We're dedicated to delivering quality auto parts, expert customer service, fast and free shipping, all backed by our 100% satisfaction guarantee. Visit us at 1AAuto.com, your trusted source for quality auto parts.
So, when we're going to start this project, we're going to go ahead and loosen the lug nuts on the wheel. We're going to use a breaker bar with a 19 mm socket. Next, we're going to go ahead and raise and support your vehicle. You can use a jack and jack stands. In this case, here, we're using a lift to make it a little bit easier. We just go ahead and remove the lug nuts here, just by using that socket, because we already loosened those. With the lug nuts removed, we can now go ahead and remove the wheel and tire.
Right about here, we have your sway bar or anti-sway bar end link, here. Here's your sway bar. In most cases, here, you'll find these sway bar end links broken. What we're going to do is we're going to show you how to go ahead and remove this and do an installation for you. This component, here, can actually be removed and replaced with the tire still on the vehicle. We just happened to have the vehicle up in the air with the tire off so it just made it a little bit easier. This is something you can do with the tire still on there.
All right, so we're going to use a 14 mm on the head of the bolt down below, and we're going to use a 14 mm on the top. It may vary on your application. I'm going to go ahead and remove this nut here. Now, this does come off in stages. You have your main washer. You have your rubber of poly bushing. Then, obviously, you have the sway bar link here, or the sway bar itself, anti-sway bar. I'm going to try and just tap this down. This bolt will slide out through the bottom. What we don't want to lose is all these components in the middle here. We're going to show you what those do. Before we pull this out, we're going to go ahead and start pulling apart the internal pieces here.
Here is your complete anti-sway bar end link. You can actually see it just starts off with just a basic bolt. Then you have your metal collar here. You want to make sure that that slides on so that the dish part is facing upward. Then you're going to take your component here. Your bushing could be a poly or rubber bushing. Slide that down. Now, this is going to go up inside the control arm. What you want to do is sleeve the components together. What's going to happen next is your next bushing is going to go on, followed by your next dish. Now this is going to go the opposite way, so it's going to compress and squeeze against its matching component. This here is simply just a sleeve. It's not threaded. Slips right down. Your next component is that there. Slide this on, and once again we're going to sleeve the other component, which is your sway bar, your anti-sway bar. That'll slip on followed by that, and followed by the nut. That there is your complete unit. Our vehicle doesn't actually need replacement, but this is just your R & R process.
Here's the reinstallation. Going to slide this up through the bottom, and go ahead and slide your bushing down, followed by that spacer and that washer. We're going to now go ahead and put the sleeve on. It's going to be the next bushing. I'm sorry, it's actually your spacer, here, first, then the bushing. Now, you have the slide this up underneath like so. You want to push that up, push that bolt up through the middle. Now, you can see the base bolt is in.
You have your bushing, collar, sleeve, collar, bushing. The bushing and the collar right there. The last component is the nut. We're going to go ahead and get the threaded on. We're going to go ahead and tighten this up with a 14 mm. As you're tightening this here, you may be wondering, "How tight do I tighten this here?" Well, basically you want to get it so that the rubber bushing expands out to roughly the diameter of the metal washers there.
I'm going to go ahead and reinstall the tire. I'm going to go ahead and reinstall the lug nuts, here. You want to get a few threads caught on all of these, here. These lug nuts are a 19 mm. We're just going to snug these, bottom it out, bottom the wheel out to the rotor. We're going to lower the vehicle down onto its own weight, and then do a final torque. With the vehicle on the ground, we're going to do its final torque of the wheel, which is between 83 and 112 foot pounds. We're going to do it in a star pattern. I'll just double check the first one. She's all set.
Thanks for watching. Visit us at 1AAuto.com for quality auto parts, fast and free shipping, and the best customer service in the industry.
Shop Products


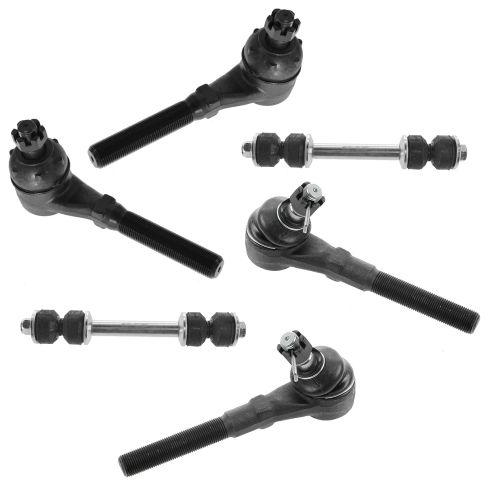
Ford Lincoln Front 6 Piece Steering & Suspension Kit TRQ PSA59168
Part Details:
- (2) Front Sway Bar Links
- 6 Piece
- (2) Front Outer Tie Rods
- (2) Front Inner Tie Rods

How to Replace Sway Bar Link 2001-06 Hyundai Elantra
If the sway bar link is rattling or broken, this video will show what steps and tools are needed to replace it
