How to Replace Front Sway Bar Links 2010-15 Toyota Prius
Created on: 2018-04-12
How to remove, replace, and install a sway bar end link on 10, 11, 12, 13, 14, 15 Toyota Prius.
-
step 1 :Removing the Wheel
- Pry off the wheel cover with a flat blade screwdriver
- Loosen the 21mm lug nuts with the vehicle on the ground
- Raise the vehicle with a floor jack
- Secure the vehicle on jack stands
- Remove the lug nuts
- Pull off the wheel
-
step 2 :Removing the Front Sway Bar Links
- Loosen the upper sway bar link bolt with a 6mm allen key bit and breaker bar and a 14mm wrench, or vise grip pliers and a 17mm wrench
- Remove the upper portion of the sway bar link
- Insert the upper portion and gently tighten the nut
- Loosen the lower sway bar link bolt with a 6mm allen key bit and breaker bar and a 14mm wrench, or vise grip pliers and a 17mm wrench
-
step 3 :Installing the Front Sway Bar Links
- Insert the upper portion of the sway bar link in place
- Insert the lower portion of the sway bar link in place
- Counter hold the upper portion with an 18mm wrench
- Tighten the upper nut with an 18mm socket and ratchet
- Repeat for the lower portion
- Tighten the nuts 55 foot-pounds of torque
-
step 4 :Reattaching the Wheel
- Slide the wheel into place
- Start the lug nuts by hand
- Tighten the lug nuts preliminarily
- Lower the vehicle to the ground
- Tighten the lug nuts to 76 foot-pounds in a crossing or star pattern
Tools needed
-
21mm wrench
6mm Allen Wrench
Flat Blade Screwdriver
Torque Wrench
17mm Wrench
17mm Socket
Jack Stands
Ratchet
Floor Jack
1/2 Inch Breaker Bar
Hi, I’m Mike from 1A Auto. We’ve been selling auto parts for over 30 years!
You can use a small pry bar, or you can use a large flat-bladed screwdriver. We're going to pop the wheel cover off. Going to use a 21 millimeter socket, a large breaker bar. Loosen the lug nuts with the vehicle on the ground, so the wheel doesn't turn. Raise this sporty vehicle with a jack and jack stands, or we're going to use our two post lift. The vehicle in the air, the lug nuts are loose, I'm going to use the socket to finish taking the wheel and tire off.
Remove the sway bar link. Spray some rust penetrant on the top nut. It's a 17 millimeter nut. Try to break it free first. It might want to spin on the ball joint part. There is a way to counterhold it. Typically, before I try to counterhold it, I like to try to break it free a little bit. It started to move, and then, now it's spinning on the ball joint part, but I did free it up a bit.
We're going to take a 6 millimeter hex drive on the breaker bar. Put it in here to counterhold it. Now, loosen the nut. It's possible that these could be so rusted together that you may have to cut the sway bar links off. If you're replacing the strut, you should have a new sway bar link on hand, in case you destroy it while you're removing it. This one came off really nicely. Pull it right out.
Spray some rust penetrant on the lower sway bar link nut. Wipe it so it doesn't drip all over the floor. Using the 17 millimeter wrench, break it free first. There you go. This one, I actually got lucky, I didn't have to counterhold it like the top one, and it spun right off.
Here's the original sway bar link we pulled from the vehicle, and the brand new one from 1AAuto.com. Comes with new hardware. Similar in design, this will work great and fit great in your vehicle. This can be installed in either direction. They're reversible. I'm going to start with the bottom one. Put it through. Use the new nut that was included. It is a locking nut, so it's going to get to a point and then stop. Take the one off here, and we'll install it here. Bend it a little bit. Nut installed here.
Now, we'll work on tightening the bottom one first. Nuts that come on this new one were 18 millimeter. Hold the bolt in place and tighten them up. It's starting to turn the ball joint. The stud's turning with it, so now I'm going to have to counterhold this. Use our 6 millimeter hex drive with our breaker bar. I can counterhold it and tighten it up. Get it tightened down, come back and torque it. Torque the sway bar link upper nut and lower nut to 55 foot-pounds. Once it clicks, you're all set. Do the same for both.
Reinstall the wheel. Start the lug nuts by hand. These lug nuts do have a shoulder on them. The opening in the wheel is a little bit bigger, so you might have to line it up, and just fiddle with the wheel a little bit while you're tightening these down. Just going to use the socket to snug these down. When I'm done, we'll lower the vehicle to the ground and torque them to spec. Torque the lug nuts in a cross pattern to 76 foot-pounds. To reinstall the wheel cover, line up the hole for the valve stem, and then snap it in place.
Thanks for watching. Visit us at 1AAuto.com for quality auto parts, fast and free shipping, and the best customer service in the industry.
Shop Products


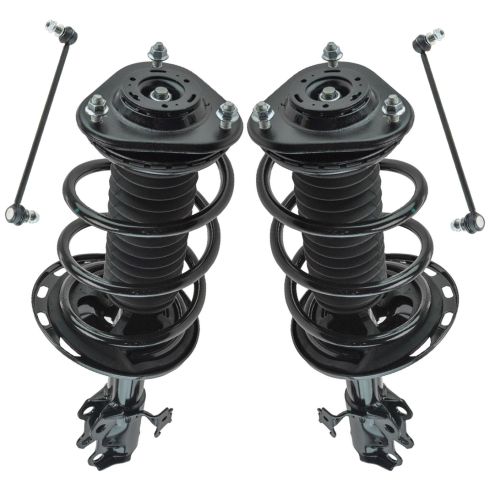
Toyota Rav4 Front Driver & Passenger Side 4 Piece Suspension Kit TRQ SCA66226
Part Details:
- 4 Piece
- (2) Front Sway Bar Links
- (2) Front Strut & Spring Assemblies

How to Replace Sway Bar Link 2001-06 Hyundai Elantra
If the sway bar link is rattling or broken, this video will show what steps and tools are needed to replace it
