How to Replace Front Sway Bar Links 2007-14 Volkswagen GTI
Created on: 2018-05-03
How to remove, replace, and install a sway bar end link on 07, 08, 09, 10, 11, 12, 13, 14 Volkswagen GTI
-
step 1 :Removing the Wheel
- Loosen the lug nut covers with the supplied lug nut tool
- Loosen the 17mm lug nuts with the vehicle on the ground
- Raise the vehicle with a floor jack
- Secure the vehicle on jack stands
- Remove the lug nuts
- Pull off the wheel
-
step 2 :Removing the Front Sway Bar Link
- Loosen the upper sway bar link bolt an M6 triple square bit and an 18mm wrench, or vise grip pliers and an 18mm socket and ratchet
- Remove the upper portion of the sway bar link
- Insert the upper portion and gently tighten the nut
- Loosen the lower sway bar link bolt with an M6 triple square bit and an 18mm wrench, or vise grip pliers and an 18mm socket and ratchet
-
step 3 :Installing the Front Sway Bar Link
- Insert the upper portion of the sway bar link in place
- Insert the lower portion of the sway bar link in place
- Remove the Phillips clips from the splash shield/wheel well if needed
- Remove the splash shield/wheel well
- Tighten the upper sway bar link bolt an M6 triple square bit and an 18mm wrench, or vise grip pliers and an 18mm socket and ratchet
- Repeat for the lower portion
- Tighten the nuts 55 foot-pounds of torque
- Reinstall the splash shield/wheel well
- Reinstall the Phillips clips from the splash shield/wheel well if needed
-
step 4 :Reattaching the Wheel
- Slide the wheel into place
- Start the lug nuts by hand
- Tighten the lug nuts preliminarily
- Lower the vehicle to the ground
- Tighten the lug nuts to 120 Newton meters in a crossing or star pattern
- Tighten the lug nut covers
Tools needed
-
5mm Hex Wrench
Socket Extensions
Flat Blade Screwdriver
Torque Wrench
Rust Penetrant
18mm Wrench
17mm Socket
Phillips Bit in a Ratchet
18mm Socket
Ratchet
1/2 Inch Breaker Bar
T25 Torx Socket
Hi, I’m Mike from 1A Auto. We’ve been selling auto parts for over 30 years!
All right, so we're going to take the tire off. On most Volkswagens, there's little caps that go over these lugs. For the caps, you're going to need the tool from the spare tire kit. You'll put in and grab. It's like a hook, and you'll pull the cap out, but this vehicle does not have those on currently. We're just going to loosen up the lugs with a 17 millimeter socket and a breaker bar one at a time, just a little bit. We're going to take off the lugs. Volkswagen has lug bolts, not lug nuts. When we pull the last one off, you have to support the wheel. Otherwise, the wheel will fall. Then you grab the wheel. It comes right down.
Your sway bar link is here, back side of the strut. These nuts come off very hard sometimes, and if they're rusty, so you want to use a little bit of penetrant on that before you start. It'll make it easier to take the nuts off. We're going to use an 18 millimeter socket and ratchet and break it free. The whole stud was spinning on the back side. The first thing we're going to try, we're going to try to lock it with some locking pliers and then use a socket and ratchet to get it off.
Nope, it's still spinning. Another way to do this is on the outside of the stud, there is a triple square bit where you can put a bit. You're going to use a wrench, 18 millimeter wrench, and use an M6 triple square. Along with the locking pliers, you can hold the stud while you take them out slowly. Come off by hand, and then you're good. You pull it out. Get the locking pliers off.
Now we're going to do the lower. I'm going to put the locking pliers back on. Because it's tight in here, we're going to use a wrench. Look like this one's breaking free easier than the top. Let's loosen this. Then you can do it by hand, and it comes right out.
Here's our old part, our old link. Here's our new link from 1AAuto.com. As you can see, they're both the same size. They both have the same stud arrangement. They come with new nuts. There is a difference. If you look, this has a triple square on the old one. The new one has an Allen to hold it, which Allens are a little more easier attainable than triple squares. These are both the same, interchangeable right to left, driver's to passenger. It's the same. This will get you back on the road, and you'll be good to rock and roll.
Now we're going to reinstall our link. It doesn't matter whether you go up or down. They're both the same. For the driver's side, the stud is going to go towards the back of the vehicle. If you're on the passenger side, it will go the other way around. Insert it in the bottom one first. Install our nut. Before we tighten down, we're going to insert into the top. You might have to pull the stud up a little bit to get the right angle. There we go.
All right, we're going to tighten this nut down, but we want to hold that stud from turning. We're going to use a 5 millimeter Allen and a ratchet and our 18 millimeter wrench. We're going to put the ratchet on reverse. We're going to tighten with the wrench. There we go.
To get to the stud on this one with the Allen, this panel's in my way, so I'm going to take this panel out. We've got these T25 Torx. We're going to have to take those all out. When taking it apart, if that gets in your way, you may have to take this off, also. It's just a T25 socket extension and a small ratchet.
Now we're going to put our 18 and then our Allen. Just tighten it down. Now we're going to tighten it down. Once it's snug, then you go another almost quarter turn. There we go. We're going to reinstall this panel. Now we're going to install the tire. Line them up with the holes and hold it. We'll use a 17 millimeter socket to put our lug studs on, or lug bolts, whatever you want to call it. Now we're going to torque the lug studs to 120 newton-meters in a star pattern. When you do it in a star pattern, it makes the wheel go flush to the brake rotor properly.
Thanks for watching. Visit us at 1AAuto.com for quality auto parts, fast and free shipping, and the best customer service in the industry.
Shop Products
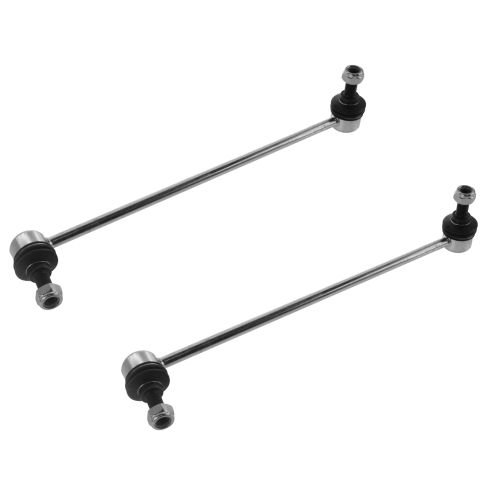
VW Audi Front Driver & Passenger Side 2 Piece Sway Bar Link Set TRQ PSA55822
Part Details:
- 2 Piece
- (1) Front Passenger Side Sway Bar Link
- (1) Front Driver Side Sway Bar Link

How to Replace Front Sway Bar Links 2012-17 Toyota Camry
This video shows you how to install new TRQ sway bar links on your 2012-17 Toyota Camry.
