How to Replace Front Sway Bar Link 2005-12 Ford Escape
Created on: 2019-04-18
How to remove, replace, and install a sway bar end link on 05, 06, 07, 08, 09, 10, 11, 12, Ford Escape
-
step 1 :Removing the Front Sway Bar Link
- Remove the wheel
- Remove the upper 15 mm nut while holding the sway bar link stud with a 5 mm Allen wrench
- Disconnect the top sway bar link on the opposite side
- Rotate the sway bar to access the lower sway bar link
- Remove the lower 15 mm nut while holding the sway bar link stud with a 17 mm wrench
-
step 2 :Installing the Front Sway Bar Link
- Replace the sway bar link in the sway bar
- Replace the 15 mm nut while holding the sway bar stud in place with a 4 mm Allen wrench
- Rotate the sway bar forward to replace the sway bar link in the strut mount
- Replace the 15 mm nut while holding the sway bar link stud with a 4 mm Allen wrench
- Replace the wheel
- Torque lug nuts to 100 ft-lb
- Torque the 15 mm nut to 46 ft-lb
Tools needed
-
5mm Hex Wrench
15mm Wrench
Torque Wrench
15mm Socket
17mm Wrench
Rust Penetrant
4mm Hex Wrench
What's up, guys? I'm Andy from 1A Auto. In this video I'm going to show you how to replace the front sway bar links on this 2012 Ford Escape. If you need this part or other parts for your vehicle, click the link in the description and head over to 1AAuto.com.
All right. Before I take this nut off, I'm going to use a little bit of rust penetrant, because it'll just make it easier taking it off. Let that soak for a little bit. All right. With a 15 mm wrench, I'm going to slide that over the nut, and then I can hold the stud with a 5 mm Allen socket and a ratchet. Just put the ratchet on tightened, and I'm going to loosen this. Loosen that up. Get the nut off like this.
On the back side here, I can just take a 17 mm wrench. Hold the stud from spinning while I loosen up the nut. All right. Pull that nut off, and slide that out. Okay, for the bottom nut to take the sway bar off, it's actually a lot easier if you disconnect the top on the opposite side, because when the sway bar is in there, if you look down there, the nut is very close to the control arm. It's almost impossible to even get a wrench on that, so we just disconnect it from the other side.
Okay, so with this up, and we're going to take that nut off. All right, so I'm going to use a 17 mm wrench. Slide that on the back side of the sway bar link right there. That's going to keep the stud from spinning, and then I'll take a 15 mm wrench and take the nut off. To make it a little quicker, I'm going to use a ratchet wrench. At this point it's loose enough. I can grab it and take it right off, and pull the link out.
Here's the old sway bar link. Here's the new, front sway bar link from 1AAuto.com. Although the design looks a little bit different, it still functions the same. Comes with new sway bar link nuts, and the center of the stud has the Allen so that the stud won't spin on you. Get yours at 1AAuto.com, and you'll be ready to rock and roll.
All right, now we're going to take the link. Take the nuts off, and slide this position like that. Install the nut. Then we're going to take a 4 mm Allen wrench. Slide it into the end of the link. Actually I take my ratchet wrench first. Slide the 15 mm ratchet wrench over the nut, and then slide the 4 mm Allen key in the end of the stud. I'm going to tighten this nut up.
Now I'm going to tighten this pretty tight. It's going to be hard to get a torque wrench in here, but if you could get a torque wrench in here, you're going to want to tighten that nut to 46 foot pounds. Now I'm going to slide the Allen out. Slide the ratchet wrench off. At this time, if you're replacing the other side, you'd want to replace that now before you tighten up the top.
Now slide this in position--top. You might have to move this stud down a little bit. Just grab it. Slide it down, just like that. Then you can line that up. Take the 15 mm nut. I'm going to use my 15 mm ratchet wrench and this short Allen, this 4 mm Allen wrench. Now snug that up. Take that off.
Now I'm going to take a 15 mm socket on a torque wrench, and you tighten this nut down to 46 foot-pounds. At this time, you'd want to reinstall the other side. Do the same procedure. At this point we would put the tire on, put the lug nuts on, lower the vehicle, and torque the wheels.
Thanks for watching. If you want the parts to do it yourself, check out 1AAuto.com, the place for DIY auto repair.
Shop Products
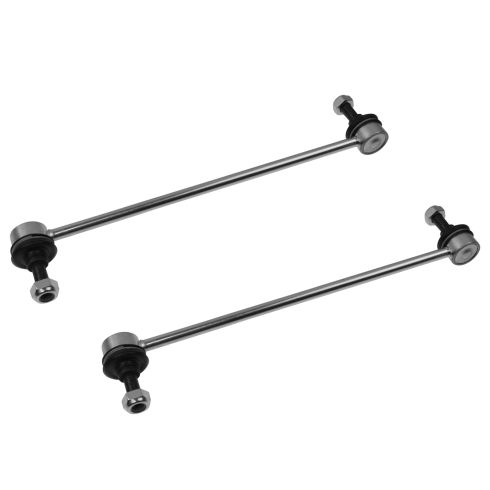
Front Driver & Passenger Side 2 Piece Sway Bar Link Set TRQ PSA55625
Part Details:
- 2 Piece
- (1) Front Passenger Side Sway Bar Link
- (1) Front Driver Side Sway Bar Link

How to Replace Front Sway Bar Link 2009-17 Nissan Murano
How to remove, replace, and install a sway bar end link on 09, 10, 11, 12, 13, 14, 15, 16, 17 Nissan Murano New Sway Bar Link from 1AAuto.com.
