How to Replace Front Sway Bar Link 2006-17 Toyota RAV4
Created on: 2019-09-23
Watch this video to learn how to replace the front sway bar links on your 06-17 Toyota RAV4. It might be easier than you think!
Tools needed
-
21mm Socket
Hammer
Socket Extensions
5.5mm Hex Wrench
Torque Wrench
Locking Pliers
Rust Penetrant
18mm Wrench
6mm Hex Socket
17mm Socket
18mm Socket
Ratchet
What's up guys? I'm Andy from 1 A Auto. In this video I'm going to show you how to replace the front sway bar links on this 2010 Toyota Rav4. If you need this part or other parts for your vehicle, click the link in the description and head over to 1Aauto.com.
All right, I raised and supported the vehicle. I'm going to remove the wheel and I'm using a 21 millimeter socket and an air gun. If you don't have an air gun, you can use a breaker bar. Just crack the lug nuts free while the vehicle is still on the ground. All right, now I want to take the tire off. This one's stuck on there pretty good. So I'm going to put one lug nut on and just hit it on the backside of the tire with a hammer. Break it free, reason you leave the lug nut is so the tire doesn't go flying.
Now take the lug nut off, pull the tire off. I'm just going to take a little rust penetrant. Spray this sway bar link nut. It's a little bit rusty, so let that soak for a little bit. So there's a couple ways you can take this nut off. One, you could take a 7/32 hex key or a 5.5, it's pretty close as well. And then a 17 millimeter wrench and try to loosen it up that way. But I find it takes forever if you do that. So what I'm going to do is take some walking pliers, get behind here on the back side. This is going to prevent the stud from spinning. Just lock those in place. Take a 17 millimeter socket and an air gun and just take it off. Generally if you just bump it a couple of times like that, it'll loosen up. But I got to readjust the locking pliers. Make them a little tighter. Let's give this a try.
There we go. Got it off. Now we can slide this out and then you can see how this was on here. Now if you weren't replacing the sway bar link, then you probably don't want to do it this way. You probably want to do it with taking the wrench and the hex key. It just takes a lot longer.
Take the locking pliers off. I'm just going to use a little rough penetrant on this nut. Let that soak a little bit. Before I take this nut off, I don't want the stud to spin while I'm taking that off, so I'm going to use some locking pliers right here. Should be able to lock this stud or we could do similar to what I said up top, you could use a hex socket in the center there and then use a 17 millimeter wrench. It just takes a lot longer. 17 millimeter socket and an air gun and there we go. Nice and easy. Here's the old part. Here's the new sway bar link from 1Aauto.com. As you can see, the length of the parts are the same, they're machined the same way, the ball and socket ends are the same. They come with new nuts. Get yours at 1Aauto.com and you'll be ready to rock and roll.
Take the sway bar link, slide the stud through the sway bar and then put the nut on. Now as far as tightening it down, I don't have the ability to use locking pliers right here because I don't want to mess the boot up. So what I'm going to do is just use a ratchet wrench and a hex key. This nut is a different size, so I'm going to use an 18 millimeter ratchet wrench and the center for the stud to hold that, I'm going to use a hex bit with a six millimeter hex socket.
Tighten this up. I got that snugged. Now I'm going to use an 18 millimeter socket and a torque wrench and I'm going to torque this to 55 foot pounds. Just makes sure the stud isn't spinning when you do that. It's good. Now, align the link up into the bracket on the strip. Put the nut on.
I need an 18 millimeter ratchet wrench and a six millimeter hex key on a ratchet. So then I'm going to just tighten this up. And then the same as the bottom. I'm going to use an 18 millimeter ratchet wrench and a six millimeter hex key in a ratchet. Tighten this up. All right, I'm going to snug that up real tight. Then I'm going to use an 18 millimeter socket and a torque wrench and torque this to 55 foot pounds. Now install the tire. Take the lug nuts, install the lug nuts. Now I load the vehicle down to the ground so that the tire's just touching the ground and I'm going to torque these with a 21 millimeter socket and a torque wrench to 76 foot pounds, and I'm going to do this in a star pattern. The reason you do it in a star pattern is so that the wheel gets tightened down evenly. And then I always like to go around again just to double check and you're good to go.
Thanks for watching. If you want the parts to do it yourself, check out 1Aauto.com. The place for DIY auto repair.
Shop Products
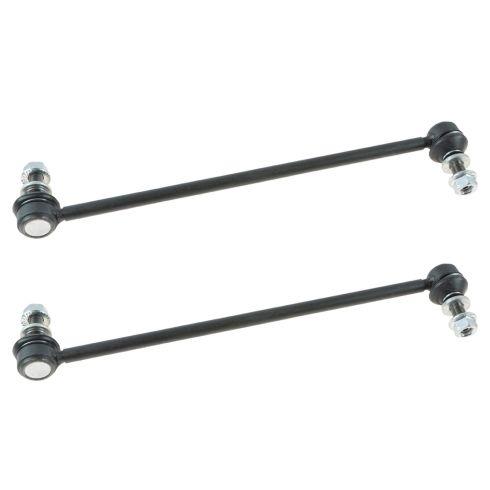
Toyota Lexus Scion Front Driver & Passenger Side 2 Piece Sway Bar Link Set TRQ PSA55895
Part Details:
- 2 Piece
- (1) Front Passenger Side Sway Bar Link
- (1) Front Driver Side Sway Bar Link

How to Replace Front Sway Bar Bushings 2002-09 Audi A4
How to remove, replace, and install a sway bar bushings on 02, 03, 04, 05, 06, 07, 08, 09 Audi A4
