How to Replace Front Struts 1996-98 Volkswagen Jetta
Created on: 2013-03-26
Struts may need replacing if you hear a bumping noise. Learn how to replace the ones on your 96-98 Volkswagen Jetta in this 1A Auto video.
-
step 1 :Remove the top of the strut
- Pop the hood and secure it.
- Apply penetrating oil to the 21 mm nut at the top of the strut.
- Use a 7 mm Allen wrench to secure the bolt and use your 21 socket and ratchet to remove the nut.
-
step 2 :Remove the wheel
- Loosen the lug nuts
- Raise and secure the vehicle
- Remove the lug nuts and wheel.
-
step 3 :Remove the bottom of the strut
- Use a breaker bar and penetrating oil to unbolt the 18 mm strut bolts on the bottom
- Remove the ABS bracket with your 10 mm socket and ratchet
- Pull the strut down and out.
-
step 4 :Install the new strut
- Bolt the strut back in, torquing your 14 mm bolts to 35-45 ft lbs
- Insert your spindle to the lower end of the strut and raise your control arm until the bolt holes line up.
- Torque the bottom 18 mm nut to 85 ft lbs
- Replace your ABS bracket with your 10 mm socket and ratchet.
-
step 5 :Replace the wheel
- Put the wheel on and hand tighten the lug nuts.
- Lower the vehicle and torque the lug nuts to 100 ft lbs using a star pattern.
Tools needed
-
20mm Socket
Pry Bar
Jack Stands
10mm Wrench
7mm Allen Wrench
Pipe Wrench
Ratchet
Floor Jack
11mm Wrench
12mm Wrench
13mm Wrench
14mm Wrench
15mm Wrench
Torque Wrench
16mm Wrench
17mm Wrench
Rust Penetrant
18mm Wrench
18mm Socket
19mm Socket
21mm Socket
Flat Blade Screwdriver
Lug Wrench
1/2 Inch Breaker Bar
22mm Socket
Brought to you by 1AAuto.com, your source for quality replacement parts and the best service on the internet. Hi, I'm Mike from 1A Auto. I hope this how-to video helps you out, and next time you need parts for your vehicle think of 1AAuto.com. Thanks.
In this video we're going to show you front strut replacement on this '97 VW Jetta. This procedure is pretty much the same for any '93 to '98 Golf as well as the Jetta. We're going to show you the passenger side. The driver's side is the same and we do always recommend you replace these in pairs. Tools you'll need are a jack and jack stands. You'll need a lug wrench, 18-22mm sockets. You'll need a ratchet and then you'll also need a breaker bar or a piece of pipe for some extra leverage for a few of those bolts, a pipe wrench, 7mm Allen key or wrench, 10-18mm wrenches, a flat blade screwdriver, penetrating oil, and after you replace your struts it is recommended that you have your vehicle aligned.
On top here, it's just a single nut and we're going to spray it down with a little penetrating fluid. It's a 22mm nut in there and then you hold the shaft with a 7mm Allen wrench. I'm going to take my 22mm socket put it on there, then my Allen wrench and I put it in. Make sure it's down in there. Now I'm going to grab onto my Allen wrench with a larger wrench that gives me more leverage. Now I'm grabbing onto my socket. I'm going to grab onto my socket with a pipe wrench. I'm actually just going to let this, press that wrench against the car here. Now I can get that nut to start going. I'm just going to fast forward here as I remove the nut the rest of the way. Again, I've got the socket on the nut, the Allen wrench down through the center of the socket. You'll need a 1/2 inch drive socket in order to do this, and then I have the wrench hooked onto the end of the Allen wrench to give it a better ability to hold it and then just grabbing hold of the socket, the top of the socket with the pipe wrench and turning it counterclockwise to remove the nut. I'll actually get the nut loosened all the way up and just keep it threaded right on the top just for right now.
Start by raising and supporting your Jetta or Golf. You want to remove the wheel. You may need to loosen the lugs first then raise and support the vehicle. As you'll see in the next few shots, I actually had the video, I mean, sorry. I have the car up on the lift, but then I have a jack underneath the front suspension on the side I'm working on to support it. This is how you want to have it set up here. You want to have the jack stand back where that yellow arm is reaching under the vehicle supporting the vehicle, and then have a floor jack underneath the suspension to support it. Here's the strut tower, and I let it down. You can see that the strut starts falling down into the tower here. We're just going to leave it right there for now, and now we're going to concentrate down here. We're going to undo then nuts on these strut mounts, and these are 18mm nuts on the back side. So put it on there. The more leverage you can get, the better. Now, I got this to move, but I'm not sure ... Now I'm going to watch my bolt there. It's like a kind of did a little bit of both. I moved it as well as got the bolt off a little bit. Now this is moving.
Here I'm fitting my ratchet with another 18mm socket. You could use a ratchet or wrench, and putting force on both and getting them going, and from there it's just a matter of backing the nut off. I back it all the way off until I get the nut off by hand, but then just leave the nut on so the bolt stays in place right for now. For my brake hoses right there, I'm going to use an 18mm wrench hold onto here, and just to provide myself some extra leverage. I'm going to fast forward here again. Like I said, on that lower bolt, it's a little harder to get the ratchet on there because the brake line is in the way so I just used a wrench. Just makes it a little bit more difficult, but once you go at it and get it, you're all set. Before I take those bolts all the way out, I'm just going to get a screwdriver here and force this all the way out. Now we're going to let the suspension all the way down, take the bolt out, and our strut comes down nice and easy. New strut from 1AAuto, you can see, it's the exact same as the old strut. The other thing is we will have to grab this bracket from the old one and put it on the new one. That's not a big deal, but this is going to go in there exactly the same. It has this spring attached. This is one of our loaded struts, and installation is the reverse of the procedure.
Just put it up in place, bring this over and I'm going to take one of my bolts and slip it right through; my other bolt and push this through. And when you do this, you're always going to need to take these after you replace your struts, if you do it on your own, you will need to take it to a shop and have it aligned unless you happen to have an alignment rack in your garage; but not a lot of people do including myself. We'll bolt this in place and get it over and get it aligned. I'm just going to take the floor jack and raise the strut up just a little bit. The new strut from 1AAuto comes with the upper mount and bolt and everything. Put it down in. Put that right on and usually since everything is nice and new, you can just tighten it right up. You don't have to worry about that shaft spinning at all. I'm just going to fast forward as I use a pipe wrench and the socket and tighten it up and it should be tightened up to about 45 to 50 foot pounds. I'll continue the fast forwarding as I work on the two lower bolts and these two again just using my different wrenches and breaker bars and I'll torque those up in a minute. I'll tighten these nuts up to 85 foot pounds.
This little bracket comes off easily enough with a 10mm wrench or a socket and ratchet. These ears just bent a little bit too low. I'm just going to bend it out here a little bit. This allows me to mount this bracket correctly. Now I'll just fast forward here again as I tighten up that 10 mm bolt that holds that bracket on and then make sure that the brake hose is clipped back into it. I'll keep the fast forward going, remove the jack, put up my wheel, and tighten it preliminarily and then you want to torque your lug nuts to between 95 and 100 foot pounds. Then you should be all set.
We hope this helps you out. Brought to you by www.1AAuto.com, your source for quality replacement parts and the best service on the internet. Please feel free to call us toll free, 888-844-3393. We're the company that's here for you on the internet and in person.

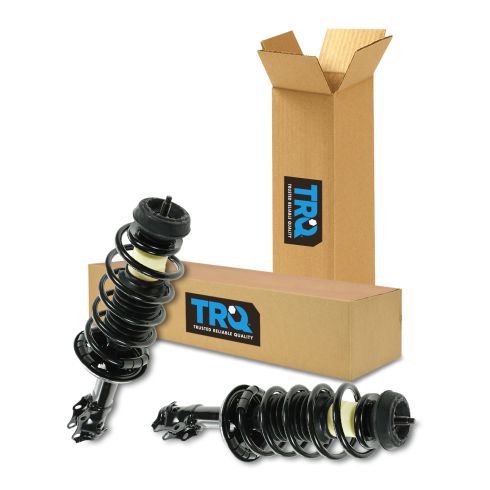
1996-98 VW Golf Jetta Front Driver & Passenger Side 2 Piece Strut & Spring Assembly Set TRQ SCA56959
Part Details:
- 2 Piece
- (1) Front Passenger Side Strut & Spring Assembly
- (1) Front Driver Side Strut & Spring Assembly
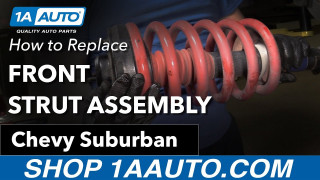
How to Replace Front Strut Assembly 2007-13 Chevy Suburban
If the front strut assembly is worn or failing and needs to be replaced, check out this how-to video and follow the steps to DIY
