How To Replace Front Struts 1990-99 Buick Lesabre
Created on: 2013-07-02
Check out this video to learn how to replace the front struts on your 97-01 Toyota Camry. 1A Auto will show you step by step instructions for this repair.
-
step 1 :Remove the wheel
- Loosen the lug nuts
- Raise and secure the vehicle
- Remove the lug nuts and wheel.
-
step 2 :Remove the bottom of the shock
- Unbolt the 10 mm securing the ABS sensor to the strut.
- Unbolt the two bottom bolts securing the shock.
- Use a breaker bar and 24 and 21 mm sockets and some penetrating oil.
- You might need a hammer to work the bolts out once you have removed the nuts.
- Use a pry bar to pry the spindle free from the strut
-
step 3 :Remove the top of the strut
- Pop the hood and secure it.
- Use your 13 mm socket and ratchet and some penetrating oil to remove the three nuts on the 10 mm bolts securing the top of the strut.
- Pull the strut down and out.
-
step 4 :Install the new strut
- Work the strut into place and bolt in the top three 13 mm nuts
- Torque the three 13 mm nuts to 20-25 ft lbs
- Bolt in the bottom bolt and 24 mm nuts and torque to 120 ft lbs.
- Fasten the ABS sensor to the strut using your 10 mm socket and ratchet.
-
step 5 :Replace the wheel
- Put the wheel back on and hand tighten the lug nuts
- Lower the vehicle and torque the lug nuts to 100 ft lbs using a star pattern
Tools needed
-
24mm Socket
21mm Socket
13mm Socket
Socket Extensions
Pry Bar
19mm Socket
10mm Socket
Ratchet
Brought to you by: 1AAuto.com, your source for quality replacement parts and the best service on the Internet.
Hi, I'm Don from 1A Auto. I hope this how-to video helps you out, and the next time you need a part for your vehicle, think of 1AAuto.com. Thanks. In this video, we're going to show you how to replace front struts on this 1997 Buick LeSabre, and we show you the right side. Obviously, you want to do these in pairs. The left side is basically the same procedure. And this procedure's pretty much the same for all GM B and C bodies from '92 to '99, and that's the LeSabre, Park Avenue, Pontiac Bonneville, as well as Olds 88 and 98, and even the Cadillac de Ville.
And you'll need some new loaded struts from 1AAuto.com. The loaded struts are the style that have the spring in them already. Makes it nice and easy to replace them. Jack and jack stands. Lug wrench or a 19 millimeter socket and breaker bar. 10, 13, 21, and 24 millimeter sockets. A pipe or a large breaker bar for some extra leverage. Our vehicle was particularly rusty, so we had to use a really big hammer to get some of the bolts out. And you'll need some penetrating oil and a torque wrench.
Okay, start out by removing the wheel and tire. Use a screwdriver to pry off a cap. If you don't have the benefit of air tools, start with the vehicle on the ground. Loosen the lug nuts, raise and secure the vehicle, and take the lug nuts, wheel, and tire off the rest of the way. The 10 millimeter socket, or you could use a wrench, remove the bolt here on the lower part of the strut. That's going to hold your ABS sensor in place. And we'll fast-forward as we remove that. As you can see, it takes a little force to get going. Spraying it down with a little penetrating oil. This is a 24 millimeter nut on the back side, and I'm using a pipe here on my socket wrench for leverage.
And again, we'll fast-forward here. So you can see, use that pipe, get the nut going, and then you can just use your socket wrench the rest of the way, and we do the same thing for the lower nut. So, when I was taking off the 24 millimeter nut, I didn't have to hold the bolt that was staying in place, but if you do, it's 21 millimeter. We're going to spray the bolts down with some penetrating oil and let them sit. Okay, we're here just hitting the head end of the bolt. Just try and loosen them up in the spindle a little bit. Just use a good-size hammer. Make sure you put the nuts back on to the ends of the bolts before you hammer them on this side. That keeps the bolts from getting damaged. Turn your wheels so you can get better access to the ends of the bolts.
He's pretty seized up, so I'm going to remove this clip sensor and disconnect this sensor so I don't hit it with my hammer. And the bolts on our car are exceptionally seized up, so we bring out the big guns to knock them loose. Hopefully, you won't have to go to quite this level of extreme, but if you're from the Northeast like we are, you might want to be prepared for it. Okay, we're just using a impact wrench to get them out the rest of the way. Same thing. Works with a hand tool. Just a little faster for us. On the strut tower, there's three 13 millimeter nuts: one, two, and three. And we'll fast-forward as we remove those three nuts. And as we're taking off the last one, you can reach down and kind of just grab hold of your strut. Okay, and then as it comes off, reach down, and you kind of lift up, push your strut back towards the rear, and you can bring it down and out.
Got the old strut and the new strut from 1A Auto, and they're identical. Designed to go right back in. And remove the nuts that come with it. And it'll only go in one way and line up with the strut tower. So it's going to be these two towards the engine, this one towards the fender. Okay, and you lift the strut up into place, and you'll see we push down on the steering knuckle to let the strut go into place. Just kind of get it rough in place down there, and then line the bolts up, up top, and once you have those poking up through the body of the vehicle, then you can start the three nuts on them. And torque the top nuts, the three top nuts, to between 22 and 25 foot-pounds. And put the bottom of the strut back into the single. And now we'll push the spindle in, put the bolts through, and put some oil or penetrating oil on the bolts so they don't seize up again. Put the bolts through, and then put the nuts on.
Set your torque wrench for 120 foot-pounds. And bolt the bracket on that holds the ABS sensor. That's a 10 millimeter bolt. And then make you sure you reconnect the ABS sensor and clip it back in place. And then finish up. Put your wheel and tire back on, the lug nuts, kind of get them hand-tight first, then torque them to 100 foot-pounds each when you put the wheel back on the ground. And after you replace your struts, you'll need to take your car to have a front-end alignment done. We hope this helps you out.
Brought to you by www.1AAuto.com, your source for quality replacement parts and the best service on the Internet. Please feel free to call us toll free: 888-844-3393. We're the company that's here for you on the Internet and in person.
Shop Products


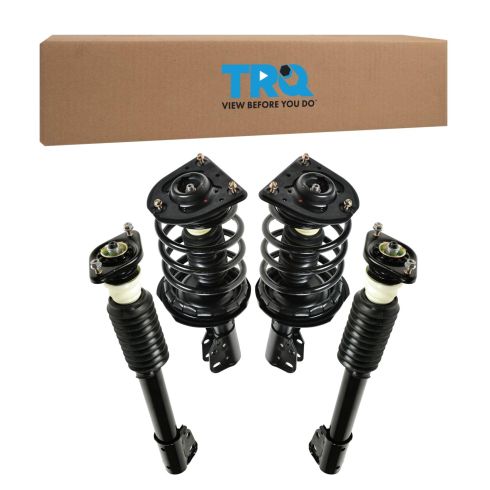
Buick Cadillac Pontiac Olds Front & Rear 4 Piece Strut Assembly Set TRQ SBA56753
Part Details:
- 4 Piece
- (2) Front Strut & Spring Assemblies
- (2) Rear Strut Assemblies
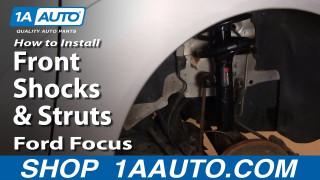
How to Replace Strut Assembly 2000-05 Ford Focus
Watch this video to learn how to fix a sagging or loose suspension. The experts at 1A Auto show how to replace the front shocks in your 00-05 Ford Focus.
