How to Replace Front Struts 2006-12 Nissan Altima
Created on: 2019-05-13
Learn how to replace the bouncy, noisy, or bent front struts on your 06-12 Nissan Altima, with help from 1A Auto's expert technicians!
-
It is important to replace suspension components in pairs. These instructions apply to both driver and passenger sides of the vehicle, even though only one side is shown in the video.
step 1 :Removing the Wheel
- Loosen the 21mm lug nuts with the vehicle on the ground
- Raise the vehicle with a floor jack
- Secure the vehicle on jack stands
- Remove the lug nuts
- Remove the hub cap
- Pull off the wheel
-
step 2 :Removing the Front Strut
- Remove two of the three 13 mm strut mounting bolts located inside the engine compartment, leaving the last one loose for safety
- Remove the sway bar link from the strut using a 19 mm wrench to hold the sway bar link and an 18 mm socket to remove the nut
- Pull the ABS wire retaining grommets from the retaining brackets on the strut
- Tap out the brake line bracket retaining clip with a hammer and pry bar
- Remove the brake line hose from the retaining bracket
- Remove the two lower 21 mm strut mounting bolts from the 21 mm nuts using a 21 mm wrench and socket with breaker bar
- Pull or tap the two lower bolts out
- Remove the last 13 mm mounting bolt from the top of the strut
- Remove the strut
-
step 3 :Installing the Strut
- Hold the strut in place and loosely replace the three 13 mm mounting bolts at the top
- Place the knuckle strut mount into the lower strut mounting bracket
- Replace the two 21 mm lower strut mounting bolts with the 21 mm nuts
- Replace the ABS wire mounting grommets into the mounting brackets
- Torque the two 21 mm nuts to 103 ft-lb
- Replace the brake line hose into the mounting bracket
- Replace the brake line hose retaining clip
- Replace the sway bar link with a 19 mm wrench or locking pliers and an 18 mm socket
- Compress the strut to ride height by either jacking up under the wheel knuckle or lowering the vehicle onto a jack stand placed under the knuckle
- Torque the three 13 mm top mounting bolts to 26 ft-lb
- Remove the jack or jack stand from under the wheel knuckle
-
step 4 :Replacing the Wheel
- Slide the wheel into place
- Attach the hub cap
- Start the 21mm lug nuts by hand
- Tighten the lug nuts preliminarily
- Lower the vehicle partially to the ground
- Torque the lug nuts to 83 ft-lb in a crossing or star pattern
- Lower the vehicle completely
Tools needed
-
13mm Socket
Socket Extensions
Torque Wrench
Hammer
Pry Bar
Jack Stands
19mm Wrench
18mm Socket
21mm Socket
21mm wrench
Floor Jack
1/2 Inch Breaker Bar
13mm Wrench
Hey friends, it's Len from 1A Auto. Today we're going to be doing front struts on a 2010 Nissan Altima. It's a very simple job and I'm going to instruct you how to do it. If you need this part or any other part you can always check in on 1aauto.com and we'll be sure to help you out.
o we're going to be using our 21 millimeter socket to remove all five of these lug nuts. Really all we're going to do at this point though is just make sure that we have the majority of the weight of the vehicle off the wheel and off the ground with the wheel still on the ground, and we're just going to loosen these up just a little bit.
Now we're going to continue removing the rest of these lug nuts. The second to last one we'll just leave on a couple threads. The reason for leaving this on a couple threads is so the wheel doesn't fall off and hurt anybody. Safety first is the number one concern here at 1A Auto. Now holding the wheel you can go ahead and take off the last one. Sometimes they can be a little stiff. There it is. Put those off center. Remove the center cover, hubcap, whatever you want to call it. Pull this off. Put it aside in a safe area.
To remove the upper strut mount from the body we're going to loosen these three 13 millimeter bolts. There's one here, one here, one here, paying special attention not to touch this with any wrench or tool or anything. We don't need to touch that for this application.
So I'm going to use a 13, give it a little tweak. Something you can think about is you can take two of these out but I would leave one of them in there pretty good. Now that I got that pretty loose I can go ahead and use a ratchet wrench. If you have access to something like this it's going to be great for you.
Got out second one out. Put it right up where we can find it. This third one I already loosened up. We'll just kind of leave it a few threads in. Now we're all clear to lift up the vehicle a little higher so we can get to work on the rest of it.
All right. So next we're going to use our 18 millimeter socket on the outside here, on this nut, and we're going to use a 19 millimeter socket on the back side of this. Your application may or may not have access for a 19 millimeter socket on the back. This looks like it's an after market sway bar link. If you need to, you could also use lock in pliers or pretty much anything else that you can think of that'll hold on to the backside.
We're going to put on our 18 and then we're going to take off this nut. We'll push the stud right out of the way and then we'll move on from there. It's almost all the way off. It'll just pop right out. Now we can go ahead and grab this ABS wire. We'll just pull all of these off of here. It should just slide out fairly easily. You want to make sure you have plenty of slack around this ABS wire for when we move this strut.
One other thing that I forgot to mention is we want to remove this brake line bracket right here. It's got a little locking... Almost like a little clip. It's like a U. It's just going to lock right in, so what we're going to do is make sure we're wearing safety glasses. You can use a little punch or long pry bar, whatever you've got, and just tap it off with a hammer. It will go flying. That's okay.
Next we're just going to pull this at a downward angle and then the hose should slide right out, being careful not to cut it on any sharp edges. It looks all right to me. Now using our 21 millimeter wrench on the backside of here, on the bolt side, and a 21 millimeter socket, we're going to go on the front side of the nut and put our socket on there, being careful of the ABS wire, make sure it's clear of any pinch points. Then you should be able to just break this free, and do the same thing for the lower.
All right, next we're just to push these through. That one comes out pretty good. This one could use a little extra, so what we could do is we can start our nut on there a couple threads, give it a couple taps. It should push through. If you need a little bit of penetrant, you can use that as well. So I'm going to go ahead and do that. This goes on here. Make sure our hose is out of the way, the ABS wire is completely out of the way.
Take that nut back off and grab either bolt you want, making sure that your ABS wire is completely clear of the strut. When it breaks free your nut bolt is going to want to come down, so we got plenty of slack. Now you can carefully... Watch your knuckle coming down, and there we are. Just set that aside, making sure there's no tension on your brake hose or your ABS wire.
We're going to hold this and then we're going to remove our last nut up here, our last bolt I should say. You might need a 13 millimeter wrench. Like I said, holding it up turn it counterclockwise. We'll make sure we put that right up with our other bolts.
Now we're going to watch that ABS wire, and now we've successfully removed our left front strut. Here you can see we have our old unit, this is the strut unit. You want to make sure that your brackets match up, which of course they do. This is on the same side. It's got your little ABS connectors on the new one as well, and the area where your front sway bar link connects into.
You'll all notice that the coil spring is the same. It comes up to the same height. It comes with your mount. It comes with the new mounting bolts. It has everything you need. It even has a little bumper for if you... I don't know, doing some off roading for some reason in your Nissan Altima and you bottom out that'll help protect your strut from collapsing too much and possibly breaking a spring.
This right here is a very... It's a quality part. It should last you a very long time, and of course it comes with our warranty. So if you need help with this or any other parts or instructional videos you can always contact us at 1aauto.com.
This is going to be on the left front. If you need to do the right front as well, which it's always a good idea to do them as a pair, it'll just be the same procedure, just for the other side of the vehicle.
So what you're going to notice is I'm going to have a little bit of a hard time lining up the holes from where the body is and where the strut is. You might say it takes me a little bit of a while and... Anyways, I'm going to come from underneath. I'm going to pay special attention to that ABS wire, as I keep mentioning.
I'm going to make sure that I'm wearing my safety glasses. Safety is key. I'm going to use my superhuman strength, hold this heavy duty quality strut up, see if I can get one of the bolts started. You can use a little bit of thread locker if you like. For this application I'm not going to worry about that, but that's completely your preference. Well, looks like I got one. Lucky Len. Do the next one. See if we can get them all started. We're not going to tighten any of these down completely at this point because we are going to find the torque spec and I'll let you know what that is.
All right. Now that we've got the front started in we're going to come back down to the bottom, keeping our ABS wire very clear of everything that might pinch it or rip it or anything really. Okay. Got both of our strut bolts in our hands. As you can tell, neither of them are oblongs. They're both the exact same. If you did have one that was oblong, that would be for adjusting your alignment, but we're not going to worry about that right now because that doesn't affect this application.
Coming in from the rear wonk it through. Go ahead and do the same thing for the bottom. It feels pretty good. Now we can go ahead and set up our ABS wire so we don't have to worry about it flopping around. Just going to push it into all the clips that you took it out of. It should go in fairly easily. Nice. We can leave this unattached for now because we're going to put on the nuts. If you want to use a little bit of thread locker that's up to you. I would personally, but for this application we're not going to worry about it.
Just start our 21 millimeter nut on them. Go in by hand here. Once it get snug enough, then we can use the ratchet. There is a torque specification so you don't have to go to crazy on it Hercules. Just get it snugged up. Do the same thing for the bottom. I'll get you that torque specification. There we go.
Do the same down here. Using our 21 millimeter wrench and our 21 millimeter socket I'm going to hold the bolt side. I'm going to use my 1/2" torque wrench and I'm going to torque it to 103 foot pounds. I'll go on the nut side with it. I have to go a couple times here. Like I said, we didn't tighten those nuts down very much, did we, at the beginning? We want to make sure that we're getting them down to torque. Getting close. I can feel it.
We're going to do the same thing for the upper bolt. Move our hose out of the way if it's in the way. That's why we left it off. All right. Now we can go ahead and put our hose up in there. It just comes in through like that and then up.
Now that we've got the hose lined up we'll take our little locking clip in there, just slide it right into the grooves, give it a little love tap like that. Now we can go ahead and put our sway bar link back in. There's no specified torque specification for that, so use your best judgment. You don't need to go too, too tight because we don't want to break it, but we also don't want it loose. So we'll go ahead and tighten that down.
Once we have that tight, we'll bring the vehicle back down to our working level so we can torque the top upper strut mount. All right. I've got my walking pliers on the back side there so it's easier for me to grab onto. Now I'm just going to go ahead and give this a little tweak, being very careful not to let it slip off and smash your face, wearing safety glasses as always. Give it a little bit more, and that's it for the sway bar link.
Next what I'm going to do... Is I can even use a jack, or if you have a jack stand just put that under here, right here underneath the ball joint area or anywhere on the control arm that it won't slip off. For this application I'm going to use the lower ball joint. I'm just going to give it a little upward pressure on that strut. Try to get the mount up against the body.
Now once I have it at that point I can go ahead and tighten up these last three bolts. So I'll just get them in finger tight and snug them. Now that we have these snugged, we can go ahead with the torquing application for this.
All right. To torque these down we're going to go with 26 foot pounds. See if you can get your torque wrench under there. A little bit more. There's one. Two. Last one. There we go. One more. All right. Let's go around one more time just for safe measures. One. Two. Three.
So now we're going to get the wheel up on here. We have one lug nut in hand. Our hubcap is safe. We can get to it easily. I'm just going to grab this wheel, I'm going to roll it up my leg so I can use my ab muscles to lift it up and not my back. Save your back. Lift it right on up. Start it on there. Hold it tight. Grab your hubcap.
You'll notice that there's a hole right there for your valve stem. It should like up fairly easily. There we are. Holding pressure we're just going to start one lug nut. So now we're just going to snug these up. Go around. We don't need to go too tight because we're going to be torquing these to 83 foot pounds. We're using our 21 millimeter socket we used to remove the lug nuts.
Now we're going to get this tire so it's on the ground, at least touching so it won't spin, and then we'll torque it. So now we're going to go ahead and torque these down to our 83 foot pounds. We're going to go on a crisscross pattern, making a star, on this particular wheel. If you had six lug nuts that might be a little different, or even seven might be difficult to figure out, but I'm sure we could do it. I'm going to go around one more time. One. Two. Three. Four. Five.
Thanks for watching. Visit 1aauto.com for quality auto parts shipped to your door, the place for DIY auto repair, and if you enjoyed this video please click the subscribe button.
Shop Products
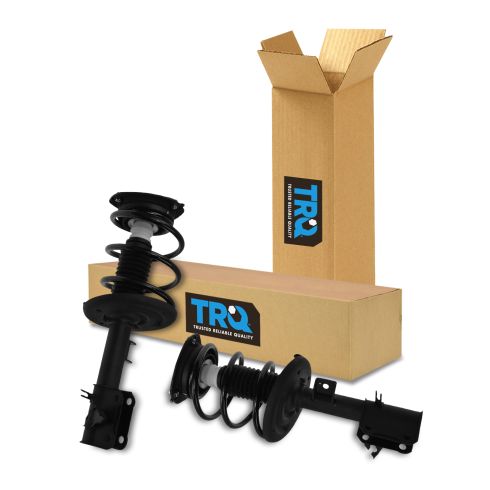
Nissan Altima Front Driver & Passenger Side 2 Piece Strut & Spring Assembly Set TRQ SCA57088
Part Details:
- 2 Piece
- (1) Front Passenger Side Strut & Spring Assembly
- (1) Front Driver Side Strut & Spring Assembly

How to Replace Rear Shocks 2007-10 Hyundai Elantra
Check out this video to learn how to replace the rear shock absorbers on your 07-10 Hyundai Elantra. 1A Auto shows you how to do it yourself!
