How to Replace Front Strut Spring Assembly 1995-99 Pontiac Sunfire
Created on: 2010-05-22
Learn how to replace the struts on your 95-05 Pontiac Sunfire or Chevy Cavalier
-
step 1 :Remove the wheel
- Loosen the lug nuts
- Raise and secure the vehicle
- Remove the lug nuts completely and pull the wheel off.
- Set the wheel aside, preferably under the car for added protection in the event of a jack stand failure.
-
step 2 :Remove the strut
- Spray penetrating oil on all the nuts and bolts.
- Remove the 21 mm bolts at the bottom of the strut.
- Jack up the control arm, underneath the ball joint.
- Remove the three 13 mm bolts at the top of the strut.
- Work the strut out and discard.
-
step 3 :Install the new strut from 1A Auto
- Finesse the strut into place and bolt in the 13 mm bolts at the top of the strut.
- Bolt in the bottom bolts, using a hammer to coerce the bolts in.
- Torque the bottom strut bolts to 95 ft lbs and the top ones to 35 ft lbs.
- Put the wheel back on and hand tighten the lug nuts.
- Lower the vehicle and torque the lug nuts to 75 ft lbs in a star pattern.
Tools needed
-
21mm Socket
13mm Socket
Torque Wrench
Rust Penetrant
Jack Stands
19mm Socket
Ratchet
Floor Jack
Brought to you by 1AAuto.com, your source for quality replacement parts and the best service on the Internet. Hi, I'm Mike Green. I'm one of the owners of 1A Auto. I want to help you save time and money repairing and maintaining your vehicle. I'm going to use my 20 plus years experiences restoring and repairing cars and trucks like this to show you the correct way to install parts from 1AAuto.com. The right parts installed correctly, that's going to save you time and money. Thank you and enjoy the video.
In this video we're going to show you how to replace a front strut on this 1997 Pontiac Sunfire. The process will be the same for any '95 to '05 Sunfire or Cavalier, and if you're looking at this with a different car, it's similar to really any front strut vehicle, just the size of the tools, and you might have a couple of clips or something attached to the strut you might have to remove. It's actually pretty amazing how easy this process is if I don't say so myself, as long as you but the loaded struts from 1A Auto. The tools you'll need are various millimeter sockets, plus jack and jack stands to raise and secure your car.
Okay, so the first step is to remove the wheel. Now you can see here I've raised it up on a lift and I have air tools. If you work with hand tools you want to have the car down on the ground and loosen everything up and then raise it and secure it with jack and jack stand, so now we'll take a wheel off. Okay, so next is you're going to loosen these two large bolts, okay. I'm going to show you both how to do it with hand tools and air tools. Okay, so I'm going to just use some penetrating oil and coat those bolts up real good.
Okay, so this is a 21 mm bolt and actually if you don't have metric sockets 13/16ths will just go on there. Ideally you want to have a nice big breaker bar like this. I'm going to show if you just have regular tools, if you just have a regular ratchet bar like this you can put it on there and pull away and see if that gets it loose. The other thing you can do is use a big regular wrench and put it on your ratchet bar. This actually gives you that much more leverage and then you pull nice and easy and get that bolt going and then you can just use your ratchet. Obviously the ideal way to do it is with the air tools.
Then there's two, there's one right here. Okay those are off. I've taken all the bolts off, now I've gotten a jack underneath the control arm, actually underneath the ball joint here. I'm supporting this. Now I'm going to spray these two studs here with some penetrating oil. These are 13 mm and it looks like I can just use a regular wrench and they'll come loose. Okay, but I'm going to use the magic of air tools. Okay, so we've got the bolts out. These are loose. I'm going to pound these bolts right out. Okay, here I've got my jack down and not really supporting the control arm anymore. That's the whole thing. That's the beauty of loaded struts. The whole strut comes out.
Okay, so here's our original strut and here's the new loaded strut from 1A Auto. You can see yes it's the same thing, just nice and shiny new. That's the beauty of these loaded struts. It's five bolts. Take the old one out. Put the new one in and bolt it back in. You don't have to compress any springs. You don't have to do any of that. You pay a little more for the strut but it's just an easy job. Okay, so we're going to put this back in. Now you might be wondering why aren't you putting that nice new strut in, well; because, actually these struts aren't bad, so we're not going to be a new strut in the car, but I'm going to show you how to put them in anyways.
Okay, so basically put it back up in just like you brought it out. Okay, then start the nut on top to hold it and you want the two studs towards the inside of the care. Okay and then back down here you take the strut and you push the steering linkage and strut back in. You take one of your big bolts, but you start from the back side of the car and you basically have to kind of shift things around a little bit to get things started. Okay, you're going to tap the back side with a hammer to get it seated, okay. You put the big bolts back on. Okay and then up here put your other nut on and then what you want to do, I'm going to jack up the whole assembly so that it pushes it up into place and I can put this last bolt in.
Okay, now I'm going to tighten the top ones up. Okay, now you want to use a torque wrench. These top ones you want to set to 35 foot pounds. After I got the top all bolted together and torqued down. I'm going to tighten these up a little bit with the torque wrench, I mean with the air wrench. Okay, now I've got my torque wrench set to 95 foot pounds. Okay and there you go. Now we can put the tire back on and we're all done. It's a good possibility depending on where you are with your car, you may want to get an alignment after you replace the struts; because, the replacement could knock the car out of alignment a little bit. Okay, so my lug nuts of there and tightened up a little bit. Now I'm going to tighten them to 75 foot pounds and I use a star pattern. I put the lug nut covers on and just use my socket and by hand just tighten them up.
We hope this helps you out. Brought to you by www.1AAuto.com your source for quality replacement parts and the best service on the Internet. Please feel free to call us toll free 888-844-3393. We're the company that's with you on the Internet and in person.
Shop Products


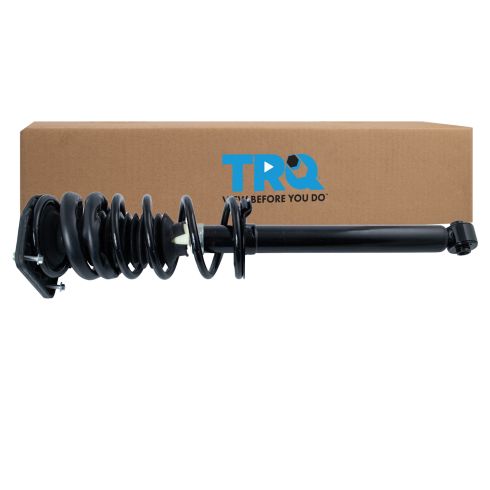
1995-05 Chevrolet Cavalier Pontiac Sunfire Rear Shock & Spring Assembly TRQ SCA70126
Part Details:
- No specialty tools required
- Easy install - Pre-assembled, loaded struts
- Threaded Stud
- Eyelet
How to Replace Rear Shocks 2000-04 Nissan Frontier and XTerra
Check out this video and learn how to replace the rear shocks on your 00-04 Hyundai Elantra. 1A Auto shows you step by step!
