
How to Replace Front Strut Assembly 2007-11 Toyota Camry
Created on: 2017-11-01
If it's time to replace the front struts, this video will show you what the right steps and torque specs are to replace it yourself
-
step 1 :Removing the Wheel
- Pry off the hub cap with a pry bar
- Loosen the lug nuts with the vehicle on the ground
- Raise and support the vehicle
- Remove the lug nuts
- Pull the wheel off the hub
-
step 2 :Removing the Sway Bar Link
- Remove the 12mm bolt from the ABS brake line
- Pry off the plastic clip from the strut
- Move the caliper and ABS line out of the way
- Spray rust penetrant on the upper sway bar link nut
- Clean the upper sway bar link nut with a wire brush
- Hold the upper sway bar link nut with a 6mm hex socket and breaker bar
- Loosen the nut with a 17mm wrench
- If the nut is stuck, hold the sway bar link ball joint with locking pliers if necessary
- Remove the 17mm nut
- Move the sway bar out of the strut
-
step 3 :Removing the Front Strut
- Remove the two lower 22mm strut nuts
- Remove the bottom bolt and leave the top bolt in
- Loosen the three outer 14mm nuts from the top of the strut evenly
- Remove the nuts
- Lift the strut up and remove the bottom bolt
- Remove the strut
-
step 4 :Installing the Front Strut
- Insert the strut into the strut tower
- Hand-tighten the top 14mm bolts
- Lift the knuckle into the strut
- Insert the two bottom 22mm bolts
- Hand-tighten the bottom nuts
- Tighten the 15mm nuts on the top of the strut evenly
- Torque the upper nuts to 63 foot-pounds evenly
- Tighten the bottom bolts
- Torque both bolts to 155 foot-pounds while counter-holding
-
step 5 :Installing the Sway Bar Link
- Slide the sway bar link where it attaches to the strut
- Tighten the nuts with an 18mm socket and ratchet
- Torque the 18mm nuts to 55 foot-pounds
- Tighten the 12mm bolt to the ABS line
- Clip in the lines to the knuckle
-
step 6 :Installing the Wheel
- Slide the wheel onto the hub
- Start the lug nuts by hand, with the tapered side facing the wheel
- Tighten the lug nuts preliminarily
- Lower the vehicle to the ground
- Torque the lug nuts to 76 foot-pounds in a star pattern
- Line up the hub cap with the valve stem
- Push the hub cap onto the wheel
Tools needed
-
Socket Extensions
Torque Wrench
14mm Socket
15mm Socket
Rust Penetrant
17mm Socket
Jack Stands
Brake Parts Cleaner
22mm Wrench
Ratchet
Floor Jack
1/2 Inch Breaker Bar
22mm Socket
Hi, I’m Mike from 1A Auto. We’ve been selling auto parts for over 30 years!
Use a large pry bar or a flat bladed screw driver to remove the wheel cover. Just kind of slide it between the wheel and the plastic and pop it off. These lug nuts are a 21 millimeter socket. I'm going to use that and a breaker bar to loosen them while the vehicle's on the ground. Raise this part of the vehicle. We're using a two post lift, but you can use a jack and jack stands. The lug nuts are loose. I’m going to take my socket and finish removing them. I’m just going to hold onto the wheel and take the last lug nut off. It's going to be loose. You don't want to drop it. You can drop the lug nut. That's okay. You just don't want the wheel to fall.
After removing your wheel and raising and supporting the vehicle, we're going to remove the bolt that is holding on the brake line and the ABS wire from the strut. Bolt goes all the way through. It's a threaded nut, so I'm just going to spray some rust penetrant on the back side. A little bit up here. This is a 12 millimeter bolt. Push the brake caliper line down, and then this ABS line just pulls out of the bracket and can go aside. It's also clipped with a piece of plastic to the strut. You just pull these two tabs apart it pops out of the holes, so that will be loose from the strut now. Just push those aside.
Next thing to remove would be the upper sway bar link. We've already replaced this one. We had to cut ours off. Most likely you will have to cut yours off too before you do the strut. You can get new sway bar links from 1AAuto.com. On the one that we have, the replacement it is an 18-millimeter nut and then an 18 millimeter. There's a socket. Sort of like a six point on the back, so you can counter-hold it to remove it. Our originals did not have that. It made it very difficult to remove them, and we had to cut them off. If these get bound up a little bit you can take a small hammer and just tap them out.
Next, I'm going to remove the two lower strut bolts that are mounting it to the knuckle. Start with some rust penetrant on here. A little bit between there. These are 22 millimeter. They're very, very big, so I'm going to counter-hold on the end of the bolt and I'm going to loosen at the nut. I'm going to use a 12-point 22 millimeter so I can get a better angle. I'm just going to push it down to free that one up. Work on the bottom one. Worst case, I can go under here. Once they're initially broken free, you can switch to a socket and a ratchet and finish removing them.
With the nuts removed, I'm going to take a small ball-peen hammer, and I'm going to tap out the lower bolts. If you need to, you can push on the knuckle a little bit to free it up. I'm going to leave the top one in for now because I want to loosen the three nuts that are holding the strut to the strut tower, and if this bolt is out and I loosen them the strut could fall, so it's just going to help me keep the strut where I need it to be right now.
I'm going to spray some rust penetrant on the top of these studs and nuts that are holding the strut in. Do not need to loosen the center nut. That is what's holding the strut together and the spring under compression, so don't touch this nut. Just these three outer ones. These are 14 millimeter. I'm just going to start by loosening them all evenly. It did drop down, but since I had it bolted to this knuckle, it didn't fall out on me. You can actually lift up on it. Pull this bolt out. Wiggle it. It's going to come off the knuckle. Pull it right out.
Here's our old strut assembly and a brand new assembled strut from 1AAuto.com. That means you don't have swap over the spring, and you don't have to swap over the mount. It's all ready to go and bolt right into the car. These right and left specific, so just like the OEM one it's got a little R here. On our new one from 1A Auto, it's got an R there, so that's going go on the passenger's side front.
Right-hand side of the car. It has the same mounting holes for the strut, same mount setup for the sway bar link, and of course, where I was pointing out the R, it's the same mount for the brake line and ABS line. At the top, we have the same style strut top. There's actually a warning sticker here. It's telling you not to undo this nut, so we can peel that off before we install it. This one came with three new locking nuts. I'm going to take them off before I install it, but this should fit in your car and work great for you.
We're going to take our new strut and put it up into the strut tower and line up the holes. I'm just going to capture some of these nuts. We can let it hang like that, that's fine. I'm going to one of our bolts and make it lined up into the knuckle. You might have to actually lift it up. If you need to you can put a jack under here. I'm going to get the other bolt in. I'm just going to thread in on these nuts for now. Now I'm going to go to the top of the strut and I can start tightening down. These new lock nuts are 15 millimeter. I'm going to start tightening them down just evenly bringing the strut up. The torque on these is 63-foot-pounds. I'm just going to go evenly. Just going to take our socket and snug these down before I torque them to the final spec. I'm going to torque these to 155-foot-pounds. Make sure you counter-hold the bolt. Do the same for both bolts. I'm going to reinstall the sway bar link. Counter-hold the sway bar link. Tighten it, so with the upper sway bar link to 55-foot-pounds.
Reinstall the ABS wire bracket because tabs where it slides into the hole. That's where it fits over. This is a little tight. I'm just going to tap it into place. Put the brake fluid line back up here. The bolt line up. Clip the ABS retainer right back onto here.
Reinstall your wheel. Lower your vehicle to the ground and torque it. The strut is replaced. Reinstall our wheel. Important to note, these lug nuts have a taper. Taper meets the wheel, matches the inside of the wheel. Don't install them the flat side like this. That is incorrect. Install them with the taper to the wheel. It helps locate the wheel on the lug nut stud. I'm just using a socket and ratchet to bring these down snug before I put the car on the ground. Torque the lug nuts to 76-foot-pounds. I'm going at a cross pattern. Reinstall the hubcap. You've got to line up the opening to the valve stem with the valve stem on the wheel. Just push it in place.
Thanks for watching. Visit us at 1AAuto.com for quality auto parts, fast and free shipping, and the best customer service in the industry.
Shop Products


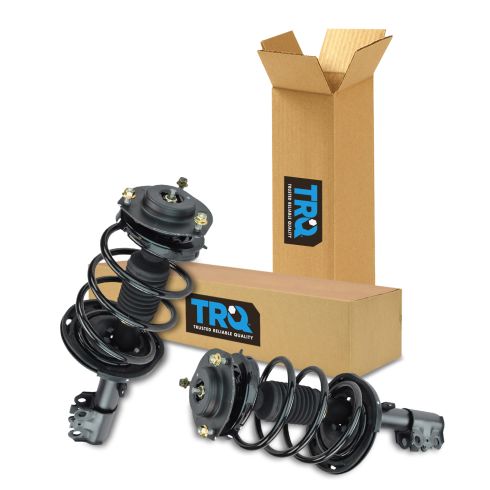
Toyota Avalon Camry Lexus ES350 Front Driver & Passenger Side 2 Piece Strut & Spring Assembly Set TRQ SCA57034
- 2 Piece
- (1) Front Passenger Side Strut & Spring Assembly
- (1) Front Driver Side Strut & Spring Assembly

How to Replace Strut Assembly 2005-10 Chevy Cobalt
Follow along to learn how to replace a front strut assembly on your 05-10 Chevy Cobalt.

