How to Replace Front Shocks Dodge RAM 1500
Created on: 2019-09-23
Learn how to replace front shock absorbers on your 94-02 Dodge Ram!
Tools needed
-
21mm Socket
Hammer
Socket Extensions
Torque Wrench
15mm Socket
Rust Penetrant
Pry Bar
Ratchet
Wire Brush
1/2 Inch Breaker Bar
Pliers
Hey friends, it's Len here at 1A Auto. Today we're going to be working on our 1996 Dodge Ram 1500, and we're going to be replacing the front shocks. It's going to be super easy. I can do it, and you can do it too. As always, if you need this or any other part, come check us out at 1AAuto.com. Thanks.
Woo! Yeah, woo! Whoa. Thing keeps going. Whoa. Surf's up, dude.
Okay, friends. So to take out the shock, we're going to come down here. This is where the lower mounting bolt is. I'm going to use a 21 swivel socket with an extension and my air gun. You can use whatever you want, but the bolt itself is a 21 millimeter head. Here we go. There's our bolt.
Up top here, we've got three nuts that hold this mount on. Okay. You've got one here, one there, and then one all the way on the other side of the shock, which we'll get from inside the engine compartment. I'm just going to take my 15 millimeter socket, and I'm just going to try to tap it on here, just because the nuts on here are pretty rusted. Of course, I already sprayed everything down with some penetrant, which is a good idea, especially when they look like this. I might even need to add a little bit of heat.
Okay. That's starting to look like it's going to grip pretty good. Now, when it's rusted like this, you want to just try to go slow, that way there hopefully we don't break the stud that's coming up from here because that'll be a real pain in the butt. I'd much rather avoid it. Let's do the other two.
Okay. This is starting to lift up and move around. I want to be careful for any pinch points just in case anything happen here. There we go. I'm just going to twist this. I'm just going to turn this so you can get it out. All right, I'm going to grab a pry bar, grab it from the bottom and pry it out of the area it's stuck in down there. Right in there is where it's stuck. I'm just going to try to pry it out of its area that it's been in for a long, long time, about 23 years. If we can get it to come up and out of there. We might need a hammer, but essentially you've just got to get it out of there.
That's a handy little light 1A Auto offers. I'm just going to try to give this a couple loving bonks and see if I can get it out of here. Looks like it's moving. Awesome. Thanks, light. Just grab this puppy, pull it right on out. Here's our front shock. This is our mount. We're going to take the mount off of the shock and replace the shock.
We're just going to take off this nut right here. Washer. There's our mount. There's our front shock.
Here we are, friends, a quick product comparison for you. Right here we have our front shock out of our 1996 Dodge Ram 1500, and over here we have our brand new quality 1A Auto part. These parts are created the same length, which is super important. If you noticed that maybe you've got a shock that's much smaller, well maybe you haven't compressed it a couple of times to make sure that it's fully expanded and gassed up, or maybe it's just the wrong shock. If you got one for a two wheel drive vehicle and you're working on four wheel drive, it's going to make a big difference. Okay, so pay attention to the length. That's super important.
You've got your mounting area along the bottom here. That's where the bolt goes through. Easy peasy. Then right over here you have the upper mounting. This is where it goes through the body, right? You've get your rubber bushing there. We've got one here. We've got one for the top as well and a brand new nut and washer. With that said, I don't see any reason why this wouldn't be a quality part to install into the vehicle, so I'm going to go ahead and do it. If you need this or any other part, you can always check us out at 1AAuto.com. Thanks.
Okay, so let's piece this together real quick. We've got a little bag of goodies. Came with a washer, came with this bushing. Now we've got our mount. If you want to clean it up, you could. For the purpose of this video, I'm not going to worry about it. We'll put that right on there. We're going to take our second bushing. You'll notice that it's concave right here, and it is also there, but not as much. You want to take the side that's deeply carved out, slide it right over this one. It's going to fit in there perfect. They're happy there. Take our other washer, put it right on top there. We have our neoprene locking nut with a built-in washer already onto it. Just kind of makes it a nice bottom end there. I'm just going to put this on here. Now I'm going to grab my tool, and I'm going to tighten this up.
All right, so we're just going to tighten this up until we can see these bushings just barely starting to squeeze a little bit. I'm going to take it a little bit more. You definitely want to make sure that the neoprene lock is onto the threads and you can see a little bit of threads coming up from the top there. I got a little bit of thread. I'm just going to go a teeny bit more. Can see the threads coming up through. If you cannot see any threads coming up from the top, there's no way of telling you if this is locked in. I can see threads, I know it's locked, it's going nowhere.
Now it's time to compress the shock to get the gases flowing. We want to get it all charged up. I'm going to put it on the floor so it's straight up and down. I'm going to press this down three to five times. I'm doing it with the mount on here cause it gives me something extra to grab onto. Just bring it all the way down. Okay, and now we'll just let it do its thing for a second. Take a break. We'll get some popcorn, lemonade. Almost there. Okay, go again.
We're just going to use our 1A Auto brush. It's available at 1AAuto.com. Just clean up the area around these studs where the mount's going to sit on. Anything we can get up from on there is going to be helpful. Last thing you want is a chunk of rust holding it up. You think you tightened it up, but it's not completely tight. Then of course down the road you have yourself an issue. At least if I tell you about it, you can make your own decision on if you want to spend the time doing it or not.
It's time to get our shock down in here. Just going to go right straight down. Just down here. Okay. That looks like it's waiting for us down there. Little twist.
I'm just going to get this thing so it's turned and ready to go down into its hole. There it is. Perfect. I'm going to grab my bolt. I'll say it's your prerogative if you want to use a little thread locker on these. My opinion, it's a good idea, so I'm going to put a little bit on each one on the studs that hold the mount, and then of course this one right here.
The shock compressed on us, or decompress a little bit more, so I need to be able to lift it up. I'm just using my pry bar, trying to lift up on the mount up there as much as I can so I can try to get this bolt hole lined up. I'm holding the shock up here. Just try to get my bolt in and through. Okay, awesome.
We just need to find our nut on the other side. Okay, so here's our nut, and it's got this right here. That's just something extra for you to hold onto, because the nuts, actually it goes down inside there, but there's a little slot you can go through right along the side here to try to get it lined up with your bolt. Then you're just going to take your bolt from the other side and we're going to try to snug that up, and hopefully this nut is going to grab right on. Grab my pliers. This is pretty much tight here. There we are. That feels good. We'll torque that down in a minute. Let's get back up top, get that situated.
We're just going to bring the mount down, try to get it onto our studs, our nuts. We're just going to torque these down to 30 foot-pounds using our 15 millimeter. There it is. The same to the other two. Okay, so we know all these are torqued. We can move along. We're going to torque this down to 100 foot-pounds. Check it one more time. That's nice and tight. Perfect. Let's move along.
We're just going to put on our intake hose here. It should just slide on. There it is. Give it a little tug. That feels good.
All right, friends, so we've got our new shocks in here. Let's just give them the old try here. Give it a little shake, going a little off roading, and then it stops. I like it. Not bad.
Thanks for watching. Visit 1AAuto.com for quality auto parts shipped to your door, the place for DIY auto repair. And if you enjoyed this video, please click the subscribe button.

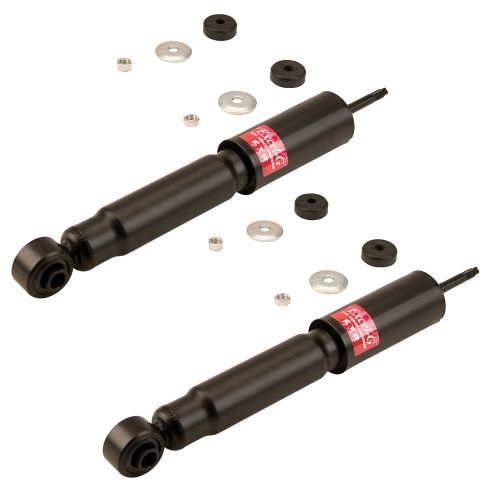
Dodge Ram 1500 2500 3500 Front Driver & Passenger Side 2 Piece Shock Absorber Set KYB Excel-G KYSSP00096
Part Details:
- 2 Piece
- (1) Front Driver Side Shock Absorber
- (1) Front Passenger Side Shock Absorber
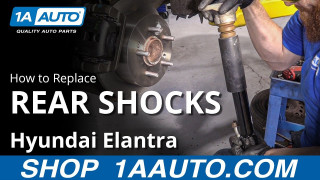
How to Replace Rear Shocks 2007-10 Hyundai Elantra
Check out this video to learn how to replace the rear shock absorbers on your 07-10 Hyundai Elantra. 1A Auto shows you how to do it yourself!
