How to Replace Front Passenger CV Axle 2009-14 Chevy Traverse
Created on: 2018-03-21
How to repair, install, fix, change or replace broken, worn, or vibrating CV axles on 09, 10, 11, 12, 13, 14 Chevy Traverse
-
step 1 :Removing the Wheel
- Loosen the lug nuts with the vehicle on the ground
- Raise the vehicle with a floor jack
- Secure the vehicle on jack stands
- Remove the lug nuts
- Pull off the wheel
-
step 2 :Removing the Axle Nut
- Remove the center cap
- Reinstall the wheel
- Tighten the lug nuts by hand
- Lower the vehicle to the ground
- Loosen the axle nut with a 34mm socket and breaker bar
- Raise and secure the vehicle on jack stands
- Remove the wheel
- Tap on the end of the cv axle with the nut flush with the shaft
-
step 3 :Removing the Brake Caliper and ABS Sensor
- Pry the brake pads into the caliper with a flat blade screwdriver to push in the pistons
- Remove 13mm bolts from the brake caliper
- Pull the caliper aside
- Remove the 10mm bolt from the ABS sensor
- Remove the ABS sensor from the knuckle
-
step 4 :Removing the CV Axle
- Remove the lower strut bolts with 24mm socket and breaker bar, counterholding with a 21mm wrench
- Tap the end of the axle with a hammer to release it
- Remove the nut
- Slide the axle out of the knuckle
- Have a drain pan ready
- Pry the axle out of the transmission
-
step 5 :Installing the CV Axle
- Transfer the metal washer from the old CV axle to the new one
- Insert the CV axle into the transmission until it hits the lock ring
- Tap the CV axle into place with a dead blow hammer until it's locked in
- Clean off any leaks from the transmission case with brake parts cleaner
- Insert the CV axle into the knuckle
- Thread the axle nut on by hand
- Insert the lower strut bolts into the knuckle
- Tighten the strut bolts with a 24mm socket and ratchet and a 21mm wrench
- Torque the nuts to 144 foot-pounds
-
step 6 :Installing the Brake Caliper and ABS Sensor
- Insert the ABS sensor into place
- Tighten the 10mm bolt to the sensor
- Put the caliper on
- Thread bolts by hand
- Tighten bolts to 47 foot-pounds
- Tighten the axle nut down until the axle turns
- Clean the rotor with brake parts cleaner or mineral spirits
-
step 7 :Reattaching the Wheel
- Slide the wheel into place
- Start the lug nuts by hand
- Tighten the lug nuts preliminarily
- Lower the vehicle to the ground
- Tighten the lug nuts to 140 foot-pounds in a crossing or star pattern
- Tighten the hub nut to 173 foot-pounds
- Press on the center cap
Tools needed
-
24mm Socket
13mm Socket
Socket Extensions
Torque Wrench
Hammer
Pry Bar
Jack Stands
Brake Parts Cleaner
21mm Socket
21mm wrench
Flat Blade Screwdriver
Dead Blow Hammer
34mm Socket
22mm Wrench
Bungee Cord
10mm Socket
Ratchet
Floor Jack
13mm Wrench
22mm Socket
Hi, I’m Mike from 1A Auto. We’ve been selling auto parts for over 30 years!
With the vehicle on the ground, you can use a breaker bar and a 22 millimeter socket to loosen the lug nuts. Raise and support your vehicle with a jack and jack stands. We're using our two post lift. Use the socket and finish removing the lug nuts. It's seized to the hub. Take a couple lug nuts, just thread them on lightly, use your dead blow or a rubber mallet, hit on the tire, and it'll knock it free. Lug nuts will keep the wheel from falling off. Now that it's loose can you can finish taking the lug nuts off. Support it so it doesn't fall.
To remove this axle nut, there's no cotter pin but it is on there with a lot of torque, so what I like to do because when you go to try to remove it with the wheel off and the vehicle in the air, it's just going to spin on this brake router. If you have a second person hold the brake for you while you try to break it loose, sometimes the vehicle can be unstable on the jack stands if you're really wrenching on it with a long breaker bar. I like to take the wheel, we'll pop the center cap out with the wheel off. So it just pops out from behind just like that. And then we'll reinstall the wheel.
I'll have access to the nut. I can lower the vehicle on the ground with the vehicle's weight on the wheel and tire and loosen the axle nut. I'm not driving the vehicle anywhere, I'm just going to put four of the six lug nuts on it, and then I'm going to snug them down. I'm going to lower the vehicle to the ground and remove this axle nut. So I'm not worried about torquing these lug nuts.
Spray some rust penetrant on here. Help the axle nut come off those threads. Using a 34 millimeter socket on a long breaker bar, going to loosen the axle nut. That broke free. I'm going to switch to a long ratchet so I can along a bit quicker. I'm not going to take it all the way off but I do want to loosen it enough so that when the vehicle's in the air I can just spin it off by hand and won't give me any troubles. Leave it just like that.
Remove your wheel once again. One thing you want to check before you remove anything else is that this axle's going to come free from inside the knuckle so you can kind of push on it and it is moving so these CV axles will have in and out play, so that's a good sign that this will come out of here once I loosen all this up and move it out of the way.
If need be, you can spray some rust penetrant in here and then with the nut on here hit it with a dead blow. Tap on it just like this. Course a lot harder. You want to leave the nut on here because if you take the nut off, you run the risk of damaging the end of the shaft and could even mushroom it out that would make it difficult to remove. So at least the nut on here helps protect it. Going to loosen and remove the brake caliper and hang it off the strut spring.
Using a 13 millimeter wrench, there's two upper and lower caliper slide bolts. Loosen them up. Slide the caliper right off. Don't need to disconnect the hydraulic line. It needs a pry bar. Just pry it up a little bit. Brake pads are new so it's on here fairly tight. Then we'll hang it up here from the strut spring. Do not want to let it hang from the rubber hose, you'll damage it.
Remove the wheel speed sensor 'cause once this knuckle is free from the strut the wheel speed sensor wire's connected to the strut, I don't want to pull on the wire and break it. There's a 10 millimeter bolt in here. Loosen it up. Grab onto the base, the wheel speed sensor, and work it back and forth. Work it out of the knuckle. There it is there. Slide it up and out of the way.
Strut bolts: the head of the bolt is a 21 millimeter, the nut is a 24 millimeter, so I'm going to counterhold it with a 21 and I'll work on loosening the nut with a 24 millimeter wrench. Get this free. I'm going to use some rust penetrant on here just to help it come off, same for both of them. Just going to use a long ratchet with a 24 millimeter socket to speed up the process.
To get these out, I'm going to put the nut, thread it back on, and I'll take a hammer and just tap them out. I'm going to do the same for the other one. Our knuckle will come loose. Push it apart. I'm going to take the nut off here, I'm going to do my best to get the axle out. These brake pads seem like they're going to fall out, can take them out if you need to. Can put the nut on here and tap it a bit. Now let's try to separate this. There it is. The axle shaft goes up into this little output shaft area here. Going to reach up carefully with a pry bar, try to get it as close to the axle as I can. Hold onto it and pry it out.
There it is. I just had to bounce it a couple times. Reach up here and grab onto it. Pull it off. Brand new one from 1AAuto.com. There's no core charge on this, it doesn't need to be returned. It's a similar design. Comes with a new axle nut. This'll work great and fit great in your vehicle. You can reuse this metal washer, just going to gently pry the tabs up, there's three of them. There, got one underneath here and gently slide it off of the CV axle. I'll take the nut off of this one, slide this onto here, and reuse that.
Going to guide it up into place in the splines. There's a locking washer up there that's going to have to slide over. Get it up in here, push it in place, and leave it right there. Can lift it up, I can give it a couple tap with a dead blow to make sure it's seated. I think that's seated nice actually, you pull on it, it won't come right off 'cause it's locked. Don't pull on it too hard 'cause there is some give in this shaft. Nope, that's locked in place. Perfect.
Feed the axle shaft into the knuckle. Push this in a little bit, going to bend it down, and get that lined up. Might have to turn it a little bit, and get the splines to line up. Pull this in just like that. I'll put the new axle nut on there. I won't tighten it, just enough so that it doesn't fall out on me. We'll leave it like that for now. We'll lift this up in place, if need be you can put a little floor jack under here. Get it up. Get the bottom started, get it slid up into place. That's good. Get the bottom one. Okay. I'm going to tighten the nuts down and draw the bolts in. They feel like they're lined up with the splines but it's not super big deal to get them lined up perfectly and these will just draw themselves in. We'll come back and torque them. I'm going to torque these nuts on the strut bolts to 144 foot pounds. Once it clicks you're all set. Do the same for both.
Don't forget to reinstall your ABS sensor. I put the bolt on there so it wouldn't get lost. I'm going to take it back out. Slide the sensor in place. Just going to wiggle it down in. There it is. Reinstall the bolt. It's just going into an aluminum knuckle, holding a small plastic piece in so I'm not going to tighten it very much. I don't want to break it off or strip the aluminum. Just feel it get tight, I'll just snug it up. Put the caliper back on and unhook it from the bungee cord. Don't forget to take your bungee cord out of here when you're done. I've also got the brake line coiled up here. I'm going to uncoil it, slide it over, it should fit right back on 'cause this came off of here. Put it right back on.
Reinstall the caliper slide pin bolts. Line them up, that one threaded in, thread in the top one. Tighten them up. Just get them snug and then torque them. Torque these caliper slide pin bolts to 47 foot pounds. Once it clicks you're all set. I'm going to see if we can snug this axle nut down. See how far how I can go before the axle starts to turn. It should go pretty far. This axle nut actually has a couple indents in it—it's self-locking so there won't be any cotter pin, the only thing that'll be holding it on will be the high torque it has.
Don't forget to take off your bungee cord. It'll get hot in your suspension and probably make a bad noise. I touched the router surface with greasy gloves. Want to make sure the surface is nice and clean so I'm going to take some brake parts cleaner and clean it off before I put the wheel back on. Reinstall the wheel. I'll snug them up and torque it with the vehicle on the ground. Lower the vehicle to the ground. With the vehicle on the ground, torque the lug nuts to a 140 foot pounds in a cross pattern. Once they click you're all set. Torque the axle nut to 173 foot pounds. When you're done you can reinstall the center cap, it'll just pop into place.
Thanks for watching. Visit us at 1AAuto.com for quality auto parts, fast and free shipping, and the best customer service in the industry.
Shop Products

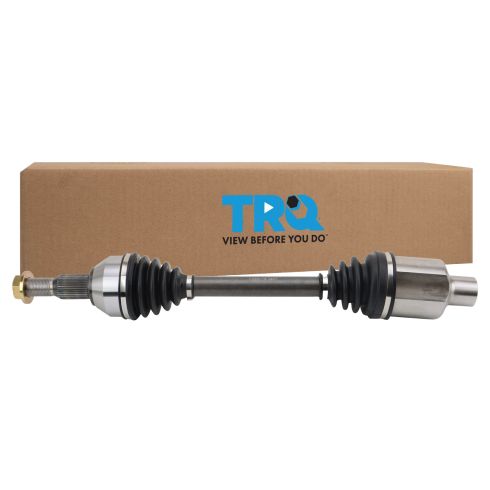
Chevrolet GMC Buick Saturn Front Passenger Side CV Axle Assembly TRQ CSA82136
Part Details:
- Female
- 33
- 27
- 604 mm
- 23.78 in
- Standard Replacement
- No
- Yes
- 33 mm
- M27x2.0
- Male
- Neoprene
- Neoprene
- 1.3 in
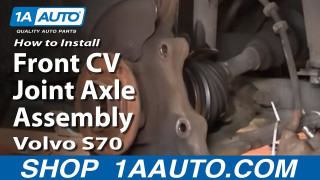
How to Replace CV Axle Shaft 1998 Volvo S70
In this video, 1A Auto shows you how to replace CV joint axles in a 98 Volvo S70.
