How To Replace Front Outside Door Handle 2001-06 GMC Sierra
Created on: 2011-06-23
Watch this video to learn how to replace an exterior door handle. The experts at 1A Auto show how to replace a broken or snapped outside door handle on your 99-02 Chevy Silverado or GMC Sierra.
-
step 1 :Remove the door panel
- Use a screwdriver to pry up the switch panel
- Unplug the switch panel.
- Pry up the door latch bezel.
- Remove and unplug the courtesy light with your flat blade screwdriver.
- Remove the two 7 mm bolts anchoring the door panel
- Pull the door panel up off.
- Unplug the speaker lead.
-
step 2 :Remove the door handle
- Tape up the window and peel back the water shield
- Loosen the two 10 mm bolts anchoring the window to the actuator.
- Remove the window stop bolt above the speaker.
- Untape the window, and bring it down.
- Then unbolt the three 10 mm bolts securing the window actuator rail.
- Unbolt the three 10 mm nuts mounting the door handle.
- Remove the rubber plug hiding one of the nuts in the side of the door.
- Pull the door handle out and unclip the lock rod.
- Pry out the little lock cylinder clip and remove the lock.
-
step 3 :Install the new handle
- Clip the lock cylinder into the handle.
- Attach the lock rod to the door handle and click the door handle into the door.
- Bolt the 10 mm nuts back on to anchor the door handle.
- Re-install the actuator rail and door stop
- Get the window back on the tracks and tighten the 10 mm bolts back up.
- Cover up the water shield.
- Replace the little rubber plug on the side of the door.
-
step 4 :Re-assemble the door panel
- Plug in the speaker lead and thread through the wiring.
- Place the door panel back on the door and bolt in the two 7 mm bolts.
- Plug in and clip into place the courtesy light.
- Clip down the door latch bezel.
- Plug in and clip back in the switch panel.
Tools needed
-
Flat Blade Screwdriver
7mm Socket
10mm Socket
Ratchet
Hi, I'm Mike Green, I'm one of the owners of 1A Auto. I want to help you save time and money repairing and maintaining your vehicle. I'm going to use my twenty plus years of experience restoring and repairing cars and trucks like this to show you the correct way to install parts form 1AAuto.com. The right parts installed correctly, that's going to save you time and money. Thank you, and enjoy the video.
In this video we're going to show you outside front door handle replacement on this 2002 GMC Sierra, same as any Sierra, Silverado, also the Yukon, Tahoe, and Suburbans. This does pertain to '99 to '02, '03 and up is a little different to get the door panel off. Tools you'll need are a 7mm and 10mm socket with ratchet and extension, and a flat bade screw driver.
Remove the door panel, pull off that trim panel there. On these '99 to '02s, you can lift it up a little bit, then if you look through you'll be able to see a little metal tab, press on that tab, lift up, that comes up and off. You press on a lever here to disconnect there, disconnect there, use my screw driver. There's a little tab, push in and pry up on the tab at the same time. Disconnect that. With the screwdriver, pop off your lock, and then pop off this panel here around the door handle, and then the back and the light here. Disconnect that light. There are two 7mm bolts, one right here, and then one down under the arm rest. I'm going to fast forward here as I remove those two 7mm bolts that hold on the door panel. Once those are removed, just push your wires through, lift your door panel up and off, and then there is a speaker lead right back here. Press, there's a little tab, press on the tab, pull that apart, and the door panel's off. You can see I've pulled my water shield down, I've got some tape on the window to make sure it stays up. Now I'm going to loosen up two bolts, 10mm, one's right in there, and the other one is right there. Turn your key on, notice I've got my window hooked back up. Now I can move that down.
Remove this window stop right here, it's right above the speaker. Now you can let your window come down. If you've noticed, I've taken the tape off the window now. Bring your window down carefully, all the way. You can actually grab onto the front of it and slide it forward. Three bolts that hold this window regulator rail in, remove them. I'll speed this up as I remove those three bolts. You have to take these bolts out to get the window regulator rail out so you can move it forward and get to the nut on the door handle. Reach in, lift that regulator rail up, you can move the side a little bit. There are three bolts, one right there, you've got two right in through here. One right there. Pry off this cap, and there's one right in there. I'm going to fast forward again as I remove those three 10mm nuts that hold the door handle onto the door. Do your best not to drop them down in the door, but if you do drop them you can just pull your water shield back a little more, reach down in there and get them.
Now your handle's going to come out, and you can see right down here there's a little clip. Reach your finger in and flip the clip off, and then push that rod ... I'm going to reach in from this side. You can push it off easily enough, and just reach in from that side. Up here there's another clip, right there. Reach in, just using my thumb to pull it off. There's your handle out. Pry out this clip here. Once you've pried that out you can work your lock cylinder out. Here's my new handle from 1A Auto. This goes in this way, like I said, the clip's already in there, so you just put it in and press it. You put it in and press it in. I'm going to put the bolt on, and spin this around, and lock it on. Slip that in there, push it in. It's in, push our clip right down, and lock it on. You'll notice I took the chance, while it was off, to clean up around the door handle. I actually put a coat of wax on it too. What you saw me do there is I put the nut into the socket, then fed it in there and started it. I'm just going to fast forward as I start the other two, then I tighten them up with my ratchet. You want to tighten them up snug, but you don't want to over tighten them.
Test to make sure it closes and opens. You want to do that soft because you don't have your window rail in place yet. Fast forward here as I re-hang and then bolt that window regulator rail with the three bolts. Same thing, when you tighten this up you want to make sure that it's tight, nice and firm, but you don't want to over tighten the bolts. You want to take the window, lift it back up, right up, bring it through here. Carefully slide it up into place. Ensure that it's in the right spot. Now we can put this stop back in. We'll use the fast forward button again as we replace that window stop, or the guide, and put the 10mm bolt in and tighten it up. Again, nice and snug, don't over tighten. Turn the key back on, and first make sure that your window is all the way up, nice and tight into your weather strip, then run the regulator up. These go back up in place. Tighten up these two bolts. The key is still on, make sure you still have a working window. Put your water shield back up in place, and then disconnect your switch plate again. Don't forget to put that access plug back on.
Put your door panel back on, that through there. Right down here you can see the tab in the door, so it rests like that on those two tabs. Now you can reconnect your speaker, and put it back on that clip. Make sure the wires are through, and push the door panel on and down. A little fast forward again as I put those two 7mm bolts in that hold the door panel on. Reconnect these harnesses. I kind of surprise myself here as I connect it. Since I hit the door locks the truck must have thought that I was trying to steal it as I reconnected the switch plate, so it just took me a second to find the keys, turn the truck on, and stop the alarm from going off.
We hope this helps you out. Brought to you by www.1AAuto.com, your source for quality replacement parts and the best service on the internet. Please feel free to call us toll free, 888-844-3393. We're the company that's here for you on the internet and in person.
Shop Products


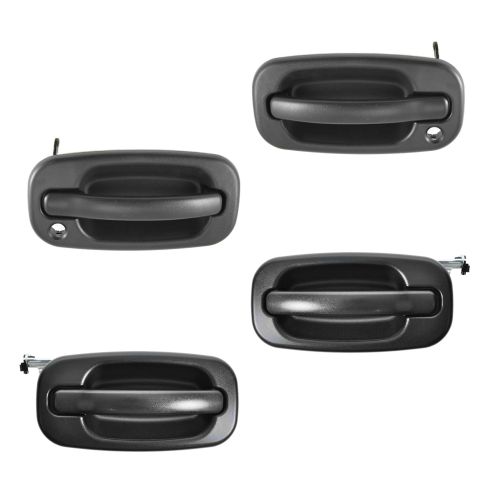
Chevrolet GMC Driver & Passenger Side 4 Piece Exterior Door Handle Set TRQ DHA36781
Part Details:
- Textured
- 4 Piece
- (4) Exterior Door Handles
- Black

1995-2004 Toyota Tacoma Outside Door Handle in Chrome Driver Side
Learn all you need to know about the Exterior / Outside Chrome and Black Door Handle part # 1ADHE00214 on the 95-04 Toyota Tacoma
