How to Replace Front Outer Door Handle 2001-12 Ford Escape
Created on: 2019-02-20
How to replace a front outer door handle in a 2012 Ford Escapeon '01, '02, '03, '04, '05, '06, '07, '08, '09, '10, '11, '12, Ford Escapes.
Tools needed
-
Socket Extensions
T20 Driver
Phillips Head Screwdriver
T30 Driver
Ratchet
Trim Tool Set
Utility Knife
Pick
Mike: Hi, I'm Mike from 1A Auto. We've been selling auto parts for over 30 years.
What's up, guys? I'm Andy from 1A Auto. In this video I'm going to show you how to remove and reinstall a front outer door handle on this 2012 Ford Escape. If you need these parts or other parts for your vehicle, click the link in the description and head over to 1aauto.com.
All right, we're going to remove this cover right here. This is for the switch for the mirrors. I'm just going to use a trim tool, go behind here, pop this out, just like that. To disconnet the mirror switch, just push down right here, slide that out.
Next, I'm going to take a pick tool, we just want to take this cover off behind the inside door handle. I'm just going to pull it forward, pull that cover off.
Next we're going to take this screw out. We're going to use a T-30 socket extension and ratchet. Take that screw out. This little cover that's right here, you're just going to remove that. Use a little pic tool, slide underneath here, pull it up. Next is a screw down here. I'm just going to use a Phillips-Head screwdriver, take this screw out. Take that screw out.
There's some screw along here on the side, right there, so take those two screw out, just use the Phillips head screwdriver. Here's another screw that's right here, on the front of the door. Just use a Phillips head screwdriver, take this one out.
I'm going to take a trim tool, now normally, you pry underneath here, pry up here, then pry up here. This vehicle has two clips, right here and right here. On this vehicle, these clips are broken, so normally you would have to struggle a little bit more to get this piece off, but just keep in mind this goes straight up. Take those clips off. I can disconnect the electrical connectors right here. Just push on this tab, slide it out. Put on this tab, slide it out.
Now, I'm just going to take a trim tool and go in between the door panel, just pry out. There's clips all around the door, holding it on. Just like that. You should be able to grab the door panel and just slide up. There's a cable that's attached right there to the front. Just going to slide this out, just like that. Then, slide the cable up, slide the retainer out. Then there's a connector right here, just disconnect this connector. Just push the tab and slide it down.
Just going to take a trim tool, I want to remove this foam insulation. Just slide underneath the little pushpin. We actually sell this trim tool at 1aauto.com. Pop that out, do the same over here. Slide underneath, pop it out. Same with this one. Take that out, set it aside.
I want to remove some of this vapor barrier. I'm just going to slide this out a little bit. I can use a utility knife and just cut along the edge. When I go to reinstall it, it should stick to itself.
Just to be able to peel this barrier over a little more, I'm just going to remove this little bracket right here. I'm going to use a T-30 socket extension and a ratchet. Slide that bracket off. It just makes this easier to fold over here, get it out of my way. Pull these wires through. Going to use some masking tape to hold this out of my way.
Now, I want to raise the window, so I'm going to reconnect the window switch. Turn the key on and raise the window. Now, I can turn the key off and disconnect the electrical connectors again.
All right, I want to take these two screw out. There's one here and if you go through that hole, there's another screw. It's a torque screw. I'm going to use a T-20 socket extension and a ratchet. Take that one out. Go in through this hole, take this one out. All right, now I'll take that one out. That one's a lot longer, so make sure you keep in mind which one went where.
From the outside, I'm just going to grab this part of the handle, slide it. It's just a little cover. Then, slide it out, there's a little tab right there. Be careful not to break that tab. It just hinges out and pulls out. Now, we're going to grab this handle and just slide it outwards. Then slide this part out and this little hinge out a little bit. Pull that out, just like that.
All right, to reinstall this handle, I'm just going to slide this back portion in there. Slide the front and then we're going to slide it towards the vehicle. Then we'll take this cover and with this hook right here, we're just going to slide this in here, and push it into place.
Now, we're going to install these screws. This one goes through that hole and then the smaller one goes on the backside of the handle. We'll start with the longer one. Take the T-20 and slide this into position. Then we're just going to snug that up. Not too tight, because it is plastic that you're screwing into. Then we'll take the other screw and that one's going to go right here. Just snug that up.
All right, now we're going to remove this tape, pull this vapor barrier, reinstall this. Going to slide the wiring harness through here. Make sure that this is all lined up. I'm going to slide this locker on through that hole. Line that up there. Then it should stick pretty good.
This foam piece is going to go next. Slide this into position and lock it in place. We're going to take this little bracket, it's going to go back right here. Take this torque screw, get this started. Then I'm going to take a T-30 socket and extension and a ratchet, and we'll tighten this down. Just snug that up.
All right, we'll take this door panel. We'll slide these wires through here, or at least get them in that area. Reconnect this electrical connector for the door locks. Line that up, lock it in place. We'll take this. I want to get this little retainer through the slot right here, just like that. Then we're going to slide this cable to the side, and then lock it in right there, just like that.
Take the door panel, make sure the wires are right there. Take this locker-on. We want this locker-on on here. Line that up. Then, with the top make sure you pull that wiring harness out. The top of the door panel, we want to slide into place up here. That looks good. We'll get the door pins to line up all the way around. Just apply a little pressure. Just like that.
I'll take this screw, use a T-30 socket, extension and a ratchet, tighten this up. Snug that down, not too tight, because it is plastic. Take this little cover, this is going to line up in here and just press it in place, just like that.
All right, now we're going to install these three screws. There's two on the backside here, one goes on the front side right here. Just take a Phillips-Head screwdrivers, get this started right here. Before I tighten it up, I'm just going to get them all started. Those are all started, so now I'll snug them down.
For reinstalling this trim piece, take the electrical connectors, line them up, lock it in place, just like that. Then, there's some tabs that should be right here. On this vehicle they broke off. They go right there and right there, so you're going to want to line those up. Then, with them lined up just push it down. Then we'll take this Phillips head screw and a screwdriver and get that started.
Then I'll take this cover and slide it into position. Now, I'll take the electrical connector, get this lined up, lock that down, then line these two tabs up, retainers. Might have to pull this out a little bit. Right there. Lock it in place.
Thanks for watching. Visit us at 1aauto.com for quality auto parts, fast and free shipping, and the best customer service in the industry.
Shop Products


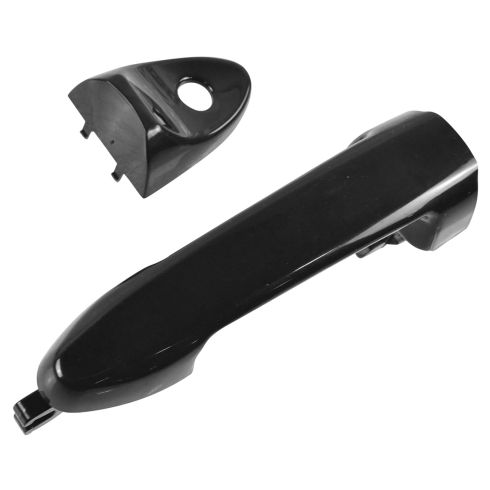
Ford Escape Mercury Mariner Front Exterior Door Handle TRQ DHA48971
Part Details:
- Black
- Plastic
- Yes
- Smooth
- Yes

How To Replace Front Exterior Door Handle 1998-2011 Lincoln Town Car
How to repair, install, fix, change or replace a broken or snapped off exterior door handleon 98, 99, 00, 01, 02, 03, 04, 05, 06, 07, 08, 09, 10, and 11 Lincoln Town Car models.
