How to Replace Front Lower Forward Control Arm 2002-09 Audi A4
Created on: 2016-06-20
New Control Arm with Ball Joint from 1AAuto.com How to repair, install, fix, change or replace failing, rusted, rotted, or damaged front upper control arms on 03, 04, 05, 06, 07, 08 Audi A4
-
step 1 :Removing the Skid Plate
- Remove the plastic clips from the skid plate bumper with a flat blade screwdriver
- Remove the Phillips head screws from the skid plate
- Pull the skid plate down and off
-
step 2 :Removing the Wheel
- Remove the center cap with a pick tool
- Loosen the 17mm lug bolts with the vehicle on the ground
- Raise and support the vehicle
- Remove the lug bolts
- Pull off the wheel and tire
-
step 3 :Removing the Forward Lower Control Arm
- Soak the control arm bolts in penetrating oil
- Remove the 16mm bolt from the top of the sway bar link
- Remove the 18mm bolt from the bottom of the strut
- Loosen the 18mm bolt at the back of the forward lower control arm
- Remove the 18mm bolt that connects the forward lower control arm to the wheel spindle
- Tap a ball joint separator onto the joint with a hammer
- Tighten the ball joint separator bolt until the ball joint separates
- Remove the 18mm bolt that holds the forward lower control arm to the chassis
-
step 4 :Removing a Stubborn Ball Joint
- This step is only necessary if the ball joint cannot be separated with the ball joint separator
- Remove the 18mm nut from the spindle end of the rearward lower control arm
- Remove the 18mm bolt from the chassis end of the rearward lower control arm
- Separate the lower forward control arm ball joint from the spindle with a pickle fork and hammer
- If necessary, remove the forward lower control arm ball joint with a two jaw puller
- If the two jaw puller does not work, cut the ball joint stud with a rotary grinder or sawzall
- If necessary, tap the stud out of the spindle with an air chisel
- If necessary, separate the sleeve and bolt with a hydraulic press
- Remove the 18mm bolt that holds the forward lower control arm to the chassis, if you have not done so already
-
step 5 :Installing the Lower Forward Control Arm
- Start the sleeve into the spindle with a hammer
- Use a ball joint press to press in the sleeve
- Heat the sleeve, if necessary
- Apply Loctite to the edges of the sleeve
- Put the lower forward control arm into place on the frame
- Start the 18mm bolt and nut onto the frame side of the lower forward control arm
- Push the lower forward control arm into the spindle
- Put the strut to the side
- Start the 18mm nut onto the spindle side of the lower forward control arm
- Tighten the 18mm nut to 81 foot-pounds of torque
- Use a pry bar to slide the strut into place
- Reinstall the cv axle into the hub, if you have removed it
- Thread the axle bolt onto the cv axle by hand, if necessary
- Start the 18mm bolt into the bottom of the strut
- Put the lower rearward control arm into place
- Start the 18mm nut onto the lower rearward control arm
- Tighten the 18mm nut to 81 foot-pounds
- Insert the 16mm bolt into the sway bar link
- Lift the spindle to normal ride height with a jack
- Insert the 18mm bolt into the chassis end of the lower rearward control arm
- Tighten the 18mm bolt to 52 foot-pounds
- Tighten the lower forward control arm bolt at the chassis side to 55 foot-pounds
- Tighten the strut bolt to 66 foot-punds
- Tighten the sway bar link bolt to 52 foot-punds
- Lower the jack from the spindle
-
step 6 :Reinstalling the Wheel
- Start one lug bolt into the wheel
- Lift the wheel into place
- Start the first lug bolt by hand
- Insert the lug bolts into the wheel
- Lower the vehicle to the ground
- Tighten the lug bolts to 90 foot-pounds in a crossing or star pattern
- Using a 17mm Allen socket and a torque wrench torque the axle bolt to 148 foot-pounds
- Turn the axle bolt an additional 180 degrees
- Line up the center cap using the slots
- Push the center cap into place
-
step 7 :Reinstalling the Skid Plate
- Lift the skid plate into place
- Insert the plastic fasteners into the skid plate
- Insert the two Phillips head screws into the skid plate
Tools needed
-
Hammer
Socket Extensions
Ball Joint Press
Pry Bar
Jack Stands
7mm Allen Wrench
Pick
Rotary Tool
Pickle Fork
Reciprocating Saw
Acetylene torch
Chisel
Ratchet
Floor Jack
13mm Wrench
Adjustable Wrench
13mm Socket
Air Chisel
Torque Wrench
16mm Wrench
17mm Wrench
Rust Penetrant
18mm Wrench
16mm Socket
17mm Socket
18mm Socket
Liquid Thread Locker
Audi Wheel Cap Removal Tool
Flat Blade Screwdriver
Phillips Head Screwdriver
Slip-Joint Pliers
1/2 Inch Breaker Bar
Brought to you by 1AAuto.com, your source for quality replacement parts and the best service on the Internet.
Hi, I'm Mike from 1A Auto. I hope this how-to video helps you out, and next time you need parts for your vehicle, think of 1AAuto.com. Thanks.
In this video, we're going to show you how to replace a lower forward control arm in this Audi A4 this is a 2007. We do this on the driver's side but the passenger's side is pretty much the same procedure.
You'll need a new control arm from 1Aauto.com, Philips and flat blade screwdrivers, 90 degree pick or center cap removal tool, 13 to 18 mm sockets with a ratchet and extensions and wrenches of the same size, penetrating oil, a hammer, pickle fork, torque wrench, jack and jack stands, and the ball joint separator. We had some trouble with a few things seizing up. Being a car from New England it's to be expected so we used a couple more tools, some different types of pullers, cutting tools, and a hydraulic press. Hopefully your install goes smooth and you won't have to take the extra steps that we did but we do show them for you just in case.
Remove the quarter turn flat blade fasteners at the bottom of the bumper, normally there are three here, and there's several underneath. A lot of these bumpers are missing these fasteners. They become cracked, damaged, lost, and what have you, so just find all the ones you can. There’s a few more at the back. A couple of Philips – occasionally these are torx – are at the front of the wheel wells. Remove the screws inside the wheel well to allow you to remove the belly pin from the bottom of the car.
Using a 90 degree hooked pick, remove the center cap from your wheel. We also have the actual Audi tool for moving the center cap available on 1Aauto.com. Crack your lug nuts lose with a 17 mm socket and a breaker bar. With the vehicle raised and supported remove your lug bolts the rest of the way and take the wheel off.
Just to give you a heads up before you get started, we've been soaking the sub frame bolts for the rear of the lower control arms in penetrating oil for three or four days now, these bolts are very, very prone to being stuck, rusted, and frozen into the bushings, so we recommend if you can if your control arms have a little bit of time that you begin to soak these let it get in there for a few days, soak them in there every night or before you go to work and let them work in their over a couple days. It'll really make this process easier for you when the time comes to change them.
Using the 16 mm socket and ratchet remove the top bolt for the sway bar link. Using an 18 mm socket and breaker bar with a wrench to support the nut on the back, remove the bolt on the bottom of the strut. Using an 18 mm wrench and the socket and breaker bar, we're going to loosen the bolt on the back of the forward lower control arm. We’re not going to take it all the way out just yet, but taking the tension off the bushing is going to make removing the joint at the front a lot easier. Remove the 18 mm nut securing the forward lower control arm into the bottom of the spindle with an 18 mm socket and a breaker bar.
We're going to use a ball joint separator to remove the lower control arm from the spindle, if you don't have one they're usually available for rent at your local auto parts or hardware store. The top hammers into the joint just like a pickle fork. You'll set this arm onto the bottom of the stud so as we tighten this bolt on the top it pushes up on the stud while securing the back to pop the joint out of the spindle. Bring the bolt down until the joint separates.
We ran into some trouble here, our ball joint separator has failed us. If this happens to you or you don't have access to a ball joint separator we're going to show you a few extra steps you can do to still get the project done. So if you have a good ball joint separator and you manage to pop this out on this step we just showed you, you can skip the next couple of steps, just go right to removing this bolt and then reassembly.
Remove the 18 mm nut at the top of the rearward lower control arm ball joint, we are removing this control arm from the spindle to gain better access to the ball joint on the forward lower control arm. Using an 18 mm breaker bar and socket, on the bolt end an 18 mm box end wrench, on the nut break the bolt loose. Using a pickle fork keeping it up tight to the spindle remove the lower control arm. The tricky part about these control arms is they have a metal sleeve pressed into an aluminum spindle that both control arms actually seat into, it's very easy to make these pop out of the spindle and very difficult to remove them from the control arms and get them back in after that's happened.
The best way to remove the ball joint from the spindle on the forward lower control arm is with a high quality ball joint separator. Our separator failed when we attempted to remove the joint, we attempted it with a two jaw puller which pressed the sleeve partway out of the spindle at which point we fabricated a plate in an attempt to retain the sleeve into the spindle with the two jaw puller while pushing the ball joint out of the sleeve. We modified this several times, tried a different two jaw puller, and were still unsuccessful, at which point we drove the sleeve and ball joint out of the spindle and cut the ball joint with a combination of a cutting wheel, sawzall, and air chisel, to allow the control arm to be removed from the spindle, as well as giving us the clearance to remove the sleeve and bolt which we then separated on a press.
Now that we've removed the sleeve and the control arm from the spindle, we’re going to use an 18 mm socket and ratchet as well as a wrench to counter hold the nut to remove the sub frame bolt in the back of the forward lower control arm. There's a hole in the sway bar bracket here that you can send the bolt back into to remove and install and move your control arm.
Place the sleeve back over the hole in the spindle using a pair of slide jaw water pump type pliers. Go ahead and work it back into the spindle. We've removed and reused the axle bolt in our vehicle as a part of showing you the different ways in which this sleeve can be reinstalled. We do not recommend you remove the axle bolt unless absolutely necessary as it is torqued to yield and will have to be replaced with a new part if removed from the vehicle. The best method is with a ball joint press if you have access to one. Heating up the bottom of the spindle may help the sleeve slide in easier. When we know that our sleeve is going to sit back into our spindle we'll add some lock tight to the edges to help ensure it stays in place if we ever have to remove a control arm or spindle again.
Reinstall the lower control arm into the sub frame. Send your bolt through, start the nut but don't tighten it until the full weight of the vehicle is on the suspension. Install the lower control arm into the bottom of the spindle, start the nut on the bottom the ball joint to the lower control arm.
Notice we've placed the strut off to the side of the lower control arm so we can bolt it down into the spindle, give us more clearance to slide the strut back on afterwards. Using an 18 mm socket tighten down the nut on the bottom then torque to 81 foot-pounds.
Using a pry bar, pry up on the strut and allow it back over the control arm. To give us a little more clearance to install our CV axle we're going to cut the wheel all the way to the right. With the wheel turned all the way to the right, compress your CV axle, line up the splines, and reinstall it into the hub. Start the axle bolt on the other side, just a few threads to make sure that it doesn't fall out of alignment while we install the rest of our suspension.
Reinstall the bolt for the strut and the nut. Again, this will be left hand tight until we have the vehicle weight on the suspension.
Reinstall the rearward lower control arm into the spindle, install the nut. If you can get a torque wrench in there, torque it to 81 foot-pounds.
Reinstall the bolt for your sway bar link. While the nut on the back of the sway bar link can't be turned, it can be used as leverage for the 13 mm wrench to help line up your bolts.
Using the screw jack if you're on a lift or a floor jack if you're working with a jack and jack stands, load up the bottom of the spindle until the suspension is in the normal right height position. When the screw jack or floor jack begins to lift the vehicle by the suspension you've reached the highest point, the lowest point is with the suspension hanging. Your normal ride height will be in the middle of those two.
Tighten the rear control arm with an 18 mm socket and ratchet wrench, torque the bolt to 52 foot pounds. Tighten down the front lower control arm sub frame bolt with an 18 mm socket and ratchet and torque to 55 foot-pounds.
Tighten the strut bolt with an 18 mm socket ratchet and wrench. Torque to 66 foot pounds. Finish tightening the sway bar link bolt with a 16 mm socket and ratchet. Torque the sway bar link bolt to 52 foot pounds. Remove the weight of the vehicle from the suspension.
Reinstall the wheel onto the hub. It helps if you send a lug bolt through and hold it with a 17 mm socket on the other side. Start the first bolt by hand to help keep the wheel in place. Torque the lug bolts to 90 foot-pounds in a cross pattern. Using a 17 mm Allen socket and a torque wrench torque the axle bolt to 148 foot-pounds. This is a torque to yield bolt so be sure to always use a new one. Once it's torqued we'll add an additional 180 degree turn.
The slots on the back of the lug cap are staggered be sure to align them before installing.
Reinstall your lower engine cover. Reinstall whatever fasteners you had to remove for the belly pan. In our case they're mostly quarter turn flat blades. Yours may be secured with something different.
Thanks for tuning in. We hope this video helps you out. Brought to you by www.1AAuto.com, your source for quality replacement parts and the best service on the Internet. Please feel free to call us toll-free, 888-844-3393. We're the company that's here for you on the Internet and in person.
Shop Products


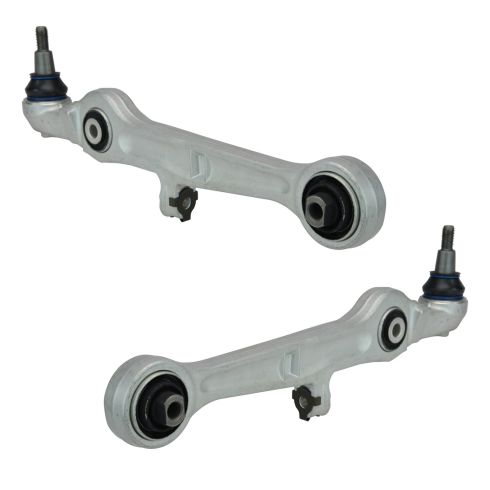
Audi A4 A4 Quattro RS4 S4 Front Driver & Passenger Side 2 Piece Control Arm with Ball Joint Set TRQ PSA62327
Part Details:
- 2 Piece
- (1) Front Driver Side Lower Forward Control Arm with Ball Joint
- (1) Front Passenger Side Lower Forward Control Arm with Ball Joint

How to Replace Front Control Arms 2006-13 Volkswagen GTI
How to repair, install, fix, change or replace failing, rusted, rotted, or damaged rear upper control arms on 06, 07, 08, 09, 10, 11, 12, 13 Volkswagen GTI
