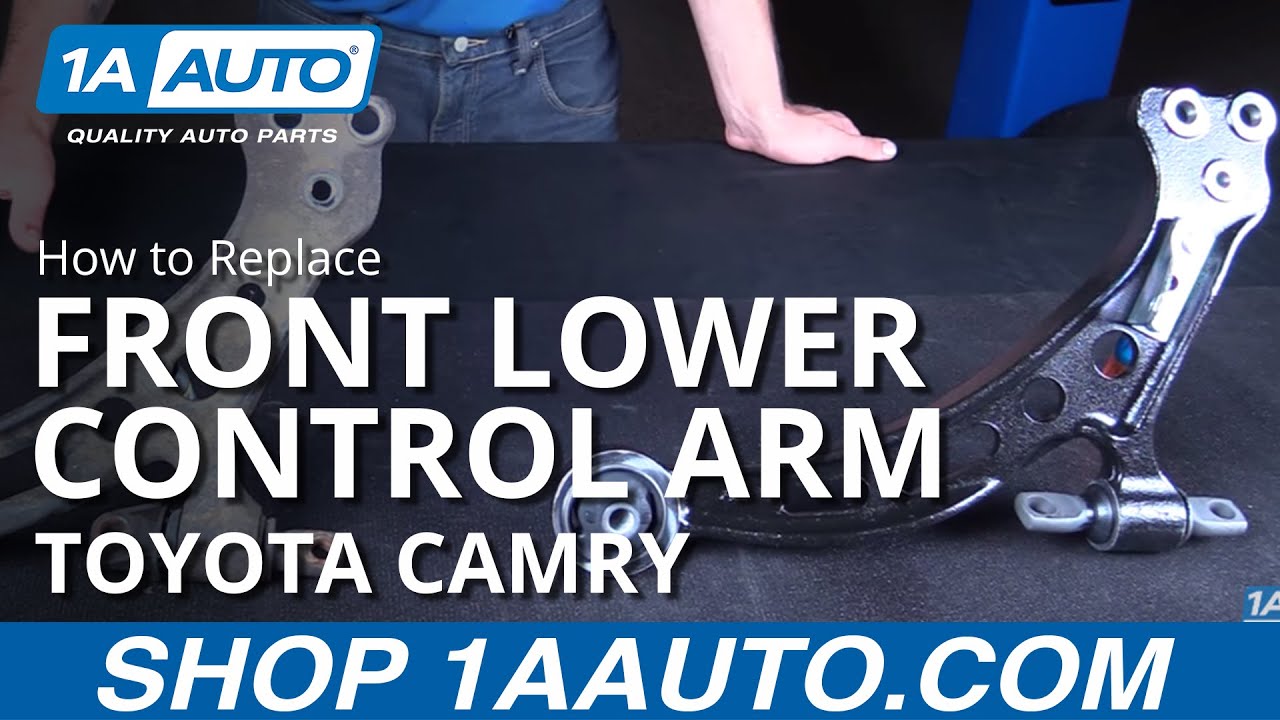
How to Replace Front Lower Control Arm 1992-2001 Toyota Camry
Created on: 2016-07-07
Check out this video to learn how to replace the front lower control arm on your 92-01 Toyota Camry.
-
step 1 :Removing the Wheel
- Loosen the 21mm lug nuts with the vehicle on the ground
- Raise the vehicle with a floor jack
- Secure the vehicle on jack stands
- Pull off the hub cap
- Remove the lug nuts
- Pull off the wheel
-
step 2 :Removing the Control Arm
- Remove the two 17mm nuts connecting the ball joint to the control arm
- Remove the 17mm bolt connecting the ball joint to the control arm
- Separate the ball joint from the control arm with a pry bar
- Remove the two 19mm bolts from the front of the control arm
- Remove the 19mm bolt from the rear of the control arm
- Remove the control arm with a pry bar
-
step 3 :Installing the Control Arm
- Put the rear control arm bushing into place
- Start the 19mm bolt into the control arm bushing
- Position the control arm, using a pry bar if necessary
- Insert the longer 19mm bolt into the rear of the control arm bracket
- Insert the shorter 19mm bolt into the front of the control arm bracket
- Pry the control arm into place
- Fasten the 17mm nuts onto the ball joint bracket
- Insert the 17mm bolt into the ball joint bracket
- Tighten the two 17mm nuts to 94 foot-pounds of torque
- Tighten the 17mm bots to 94 foot-pounds
- Tighten the three 19mm bolts to 152 foot-pounds
-
step 4 :Reattaching the Wheel
- Slide the wheel into place
- Start the lug nuts by hand
- Tighten the lug nuts preliminarily
- Lower the vehicle to the ground
- Tighten the lug nuts 76 foot-pounds in a crossing or star pattern
- Reattach the center cap
Tools needed
-
21mm Socket
12mm Socket
Socket Extensions
Torque Wrench
Pry Bar
17mm Socket
Jack Stands
19mm Socket
Ratchet
Floor Jack
1/2 Inch Breaker Bar
22mm Socket
Brought to you by 1AAuto.com, your source for quality replacement parts and the best service on the Internet.
Hi, I'm Mike from 1A Auto. I hope this how-to video helps you out, and next time you need parts for your vehicle, think of 1AAuto.com. Thanks.
In this video, we're going to show you how to replace the front lower control arm in this Toyota Camry. This one is a 1998, but the procedure is pretty much the same for 1992 to 2001. You'll need a new front lower control arm from 1AAuto.com, 12 to 22 millimeter sockets with a ratchet and extension, a torque wrench, breaker bar, pry bar and jack and jack stands.
Break all your lug nuts loose while the vehicle's still on the ground. You're going to need a 21mm socket and a breaker bar. Install your jack under the vehicle, line it up with the pinch weld, jack the vehicle up high enough that you can get a stand underneath. Making sure you have enough clearance to remove your tire, or whatever you have to do under the vehicle. Install your jack stand onto this unibody frame rail under the vehicle. If you need to work on the rear of the vehicle, put your jack stand underneath and just ahead of the lower control arm here, right by the tow point. Once the weight is on your stands, give the vehicle a little shake, and make sure that they're on there secure. Repeat these steps on the opposite side. Make sure that you bring the vehicle up so that when it sits on the other set of jack stands, the vehicle will be level. You can now lower your vehicle onto the stands on this side.
With the vehicle raised and supported, remove your lug nuts the rest of the way. If you need a little more room to work, you can pull the hubcap off. Remove your wheel from the hub. We've put our vehicle on a lift to make it easier to film for you, but this job can be easily done with a jack and jack stands.
Remove the three 17 millimeters holding the lower ball joint bracket in: two nuts and bolt. We use a 17 millimeter socket and ratchet. Using a pry bar, I'm going to go in between the ball joint bracket and the control arm, pry down, and release the ball joint bracket from the lower control arm.
Behind the steering knuckle on the sub frame, we remove these two bolts holding the front portion of the lower control arm in place. Use a 19 millimeter socket and breaker bar to start them and finish removing them with a ratchet. Remove the bolt for the rear lower control arm bushing with a 19 millimeter socket and a breaker bar. After removing the bolt, use a long pry bar to pry the bushing out of the sub frame. You may have to move this a few different ways, and possibly pry up on the sway bar to release it from the vehicle.
You can see our old part and our new part are exactly the same. Our new part comes with new bushings in both the rear and the front. We have the same three-bolt pattern on both sides to reinstall our ball joint into the control arm. They're both the same size and shape. This provision on our new control arm is for a sway bar that's not applicable to our Camry. It may apply to three liter Camrys or perhaps Solaras and other models. You can simply remove that with two, 14 millimeter nuts on the back, we'll show you how to do that a little bit later. Some common problems with these are they get damaged during accidents. They can be bent or misshapen from hitting heavy potholes or bad roadwork. The bushings – as you can see ours is over here – begin to slide out of the actual control arm as well. You can see it's getting a little torn up and separated in the front here too. That can cause a control arm to not track straight. It will actually push back toward the vehicle when you're driving forward. It can cause shaking, clunking, all kinds of noise, tire wear, alignment issues, you name it. If your old control arm has rusted, bent or tweaked in some way, or your bushings are loose and causing vibrations, noise and other problems, this new part from 1A Auto is going to go in, direct fit, just like your original equipment and fix you up right.
Install the rear bushing of the control arm into the sub frame, line it up, and start your bolt. Swing the control arm into position. Use a pry bar, if you have to, to line it up. Start the bolts. The longer of the two goes in the rear hole, and the shorter in the front. With all your other bolts started, pry down on the control arm, push the ball joint into place, start your 17 millimeter bolts and nuts.
Start the 17 millimeter nuts on the bottom until the centering sleeve is gone into the new control arm. Once the centering sleeves are in place, start the bolt, finish tightening down your ball joint bracket. Torque the hardware to 94 foot-pounds. Finish tightening the two, 19 millimeter bolts on the front bushing of the lower control arm. Torque all the 19 millimeter bolts to 152 foot-pounds. Finish tightening down the rear bushing bolt. Torque it to 152 foot-pounds.
Reinstall your wheel and tire. Start your lug nuts. Check that they're all seated. Jack up on your pinch weld. Be sure that where you jack isn't going to interfere with your ability to remove the jack stands. Bring the vehicle up until it's off the stands. Remove your stands from under the vehicle. With the stands clear, lower the vehicle. Move to the other side, and repeat these steps. If you've removed the tire, only lower the vehicle until the wheel touches the ground. With partial weight of the vehicle on the ground, torque your lug nuts to 76ftlb in a cross pattern. Then you can remove your jack the rest of the way. To reinstall your hubcap, align this notch with the valve stem on the wheel. Snap it back into place.
Thanks for tuning in. We hope this video helps you out. Brought to you by www.1AAuto.com, your source for quality replacement parts and the best service on the Internet. Please feel free to call us toll-free, 888-844-3393. We're the company that's here for you on the Internet and in person.
Shop Products


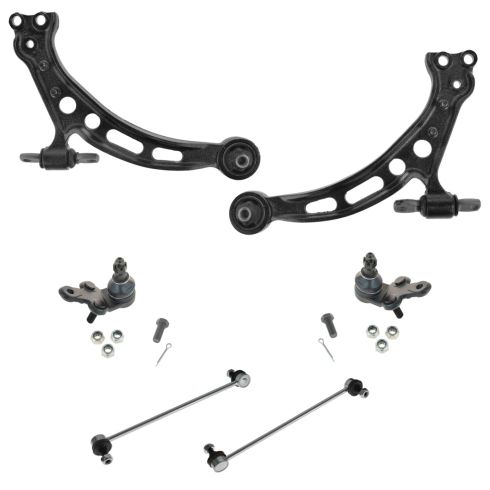
Toyota Avalon Camry Lexus ES300 Front 6 Piece Suspension Kit TRQ PSA85514
- (2) Front Sway Bar Links
- (2) Front Lower Ball Joints
- (2) Front Lower Control Arms
- 6 Piece

How to Replace Front Lower Control Arm 2011-15 Chevy Cruze
Control arms are a crucial part of the suspension system of your vehicle. They carry the load of the vehicle to the wheel and maintain its alignment. Control arms are large and strong. They contain rubber bushings for smoother rides at the cost of eventual wear. How to install a new quality TRQ lower control arm in your 2011-15 Chevy Cruze.

