How to Replace Front Lower Control Arm 2008-14 Cadillac CTS
Created on: 2019-10-01
Check out this video to learn how to replace the front lower control arm on your 08-14 Cadillac CTS.
-
step 1 :Removing the Wheel
- Loosen the 22 mm lug nuts
- Raise and support the vehicle
- Remove the lug nuts
- Remove the wheel
-
step 2 :Removing the Front Lower Control Arm
- Remove the 18 mm lower sway bar link nut to remove the sway bar link from the control arm
- Loosen the 21 mm lower ball joint nut so it's flush with the stud
- Hammer the ball joint stud loose, then remove the nut to remove the stud
- Remove the 24 mm lower shock mount nut
- Pry the lower shock mount off the stud
- Mark the inner control arm bolts
- Remove the 21 mm nuts from the 21 mm inner control arm bolts
- Remove the push pin retainers to move the inner wheel well shield
- Loosen the two 18 mm steering rack bolts
- Lift the steering rack to remove the rearward control arm bolt
- Remove the forward control arm bolt
- Remove the lower control arm
-
step 3 :Installing the Lower Control Arm
- Slide the ball joint stud into the knuckle, and loosely install the nut
- Support the lower control arm if necessary
- Pry the shock mount outward to fit it onto the mounting stud
- Hammer the inner control arm mounts into position
- Grease the inner control arm bolts if desired
- Install the 21 mm inner control arm bolts with the 21 mm nuts
- Tighten the 21 mm inner control arm bolts and nuts following the marks for alignment
- Install the shock mount nut
- Support or jack the control arm to approximate ride height
- Torque the two inner 21 mm control arm nuts to 96 ft-lb
- Torque the 21 mm lower ball joint nut to 30 ft-lb plus 120 degrees
- Torque the lower shock mount nut to 66 ft-lb
- Tighten the 18 mm steering rack bolts and torque them if possible to 44 ft-lb plus 80 degrees
- Reposition the inner wheel well liner and secure it with the push pin retainers
- Install the lower sway bar link into the control arm and secure it with the 18 mm nut
- Torque the 18 mm sway bar link nut to 55 ft-lb
-
step 4 :Installing the Wheel
- Slide the wheel onto the wheel studs
- Install the five 22 mm lug nuts and tighten them by hand in a crossing pattern
- Lower the vehicle with minimal weight on the wheel
- Torque the five 22 mm lug nuts to 100 ft-lb in a crossing pattern
Tools needed
-
24mm Socket
A Piece of Pipe (for leverage)
Torque Wrench
Hammer
Rust Penetrant
Pry Bar
18mm Socket
Block of Wood
21mm Socket
21mm wrench
6mm Hex Socket
Plastic Fastener Remover
Center Punch
Anti-Seize Grease
Ratchet
1/2 Inch Breaker Bar
Marker / Writing Utensil
What's up guys? I'm Andy from 1A Auto. In this video, I'm going to show you how to replace the front lower control arm on this 2008 Cadillac CTS. It's all-wheel drive. If you need this part, or other parts for your vehicle, click the link in the description and head over to 1AAuto.com
So you want to keep in mind when you start this job, you are going to have to get an alignment performed after you do this job because you're going to change steering angles and you want to make sure you keep your tires from wearing out prematurely. We're going to take this wheel off. We're going to use a 22-millimeter socket and an air gun. If you don't have an air gun, you can loose up the lug nuts on the ground with a breaker bar. Take the wheel off. Spray a little rust penetrant in this nut before I take it off.
I'm going to use an 18-millimeter socket and an air gun, take this nut off. Now, what normally happens is once you get to a certain point, the stud's going to start spinning. Oh, and actually, we were lucky on that one. It came off all the way, but if it was spinning, what you can do is take some locking pliers, get it from the backside or you can always use an 18-millimeter wrench and this has a little hex bit where you can put a hex bit and hold the stud from spinning and loosen it up with the wrench.
All right, now we can just try to slide this out. Might have to pull down on the sway bar, just like that. Just going to spray a little rust penetrant right on that nut. Wipe it away a little bit. I'm going to take a 21-millimeter socket and an air gun, take this nut off. Actually, I'm going to loosen it up. I'm not going to take it off completely. That should be good right there. I want the nut to be somewhat flush with the end of the stud. All right.
Now, they have special tools to separate these ball joints. It's like a little clamp with fingers on it and then it pushes up on the ball joint. I don't have that tool right here, right now, so what I'm going to actually do is just give it a tap with a hammer. The reason why I left the nut there is so the end of the stud doesn't mushroom over because then you wouldn't be able to put the nut back on.
There we go. It separated. So now I'm going to just take the 21-millimeter socket and the air gun, take it off the rest of the way. Just watch your head. All right, I'm just going to spray this nut down with a little rust penetrant. Take a 24-millimeter socket and the air gun, take this bold out, this nut off. There we go.
I'm just going to take a pry bar, get behind the lower shock mount. Just give it a tap with a hammer. Once that's under there, give a tap right here. There we go. That's loose. Now, they do make special tools you could use to try to get that off, but, a hammer and pry bar works pretty good. All right, just spray some rust penetrant on this nut and this nut over here. Now, there is alignment adjustments on this. It is a good idea if you mark this ahead of time before you take this part apart. Just mark around the bolt right there on the front side and then also on the backside. You're still going to need to get an alignment afterwards, but this will get, at least, the vehicle closer.
All right, I'm going to take a 21-millimeter wrench and a 21-millimeter socket and a breaker bar, loosen this nut up. Once I get it loose, I can switch to a ratchet. Take that nut off, then I'm going to do the same with the other one. I'm going to leave this bolt in here for just right now, until I'm ready to pull the control arm down. All right, take that nut off. This bolt is in there pretty good, so I'm just going to give it a tap with a hammer. It's in there really good. Spray this down with some rust penetrant. Let that sit for a little bit. Might have to use an air gun on that.
I'm just going to use an air hammer and try to push that bolt out. I'm just going to use a hammerhead bit. All right, well just hammer on this a little bit more. So I got the bolt pushed out a little bit, now, one of the problems we're going to face is hitting the steering rack. So what I'm going to have to do is loosen up the rack bolts so that we can move the steering rack up and be able to get this bolt out.
So that I can gain access to the steering rack bolt, I'm going to remove this panel, or at least get it out of the way. I'm just going to use a trim tool, take some of these push pins out. I won't take it out completely but ... just get it out of the way enough so I can get a breaker bar in there. That's good. Grab the panel and just slide it out of the way like that. That's good. Now I can gain access to that bolt, it's right on top and I'm taking a 18-millimeter socket and breaker bar, put that over the bolt. Take a pipe, just go over the breaker bar, got to loosen up this bolt. There we go. It moved a little bit. Just going to rotate the socket. Sometimes, if you rotate the socket, you can get on the bolt on a different angle, if you get in a small area where you can't get the socket on the bolt.
Let's try pushing it by hand. I'm rotating that again. We can get on right there and loosen it up. I am going to loosen up the other side. I'll just put a wrench on because there's not much room. I don't have to take this bolt out completely, but just get it loose. Put a pipe on the end of the wrench. This bolt doesn't seem to be as tight as the drivers side bolt.
All right, so I got this bolt loose. I'm just going to leave it there and I have this other one pretty loose. What I'm going to do is just get a pry bar, pry underneath here. Just trying to get a block of wood somewhere underneath so that it'll hold it up. Let's see. There we go. Right there. Now, I should be able to get this bolt out. I'm actually going to have to hammer it some more but that bolt should come out, no problem. Let's hammer this out some more.
So, I just sprayed some rust penetrant. What I'm actually going to do is send the bolt back through this way and then we'll try to send it back out. It's just stuck right there. Use a pry bar and that 21-millimeter wrench, just work it back and forth a little bit while I pry it out. That's really not working too well. All right, so, at this point, I'm going to use a punch and punch it out. I'm just going to use a punch and a hammer and just punch it out.
Make sure you don't rip the steering boot. Just be careful there. There we go! Popped right out. All right, now I can take this bolt out. Grab a pry bar, just be careful, you don't want this to swing down and hit you. You can take this shock mount out, just slide it out of the way. Just like that. Pry this down and pry this down. There you go. Put that down and grab the ball joint and slide it out.
Here's the old part. Here's the new lower control arm from 1AAutio.com As you can see, the shape is the same. Has this same mounting part for the sway bar links. The ball joint is the same. Comes with a nut. There's just this cover and you have to take that off and then comes with a nut for the shock mount. Get yours at 1AAuto.com and you'd be ready to rock and roll.
I am going to take the nuts off that come with the lower control arm off the ball joint and off this shock mount, right there. Now, we want to slide the lower ball joint in first. Get that lined up. All right. Then we kind of want to angle this up a little. You could take this piece, this bracket off the lower part of the shock, if that helps you out, if you're struggling with that. We're just going to leave that on. Just use a pry bar and try to pry it out of the way. Let's see.
I'm just going to start that lower ball joint nut. I'm not going to put it on all the way yet. I am taking a screw jack and going underneath the lower control arm. As I do that, I'm going to try to pry out on this lower shock mount. All right, so I'll pry out on that while I raise this up a little bit. Make sure you watch your head and watch your fingers. Once that lines up, that's good. Release that a little bit and just use a pry bar, pry that into position.
I am going to take a dead blow hammer, or a rubber hammer, just make sure this side doesn't fall on you. Just give it a couple taps, get it to line up. Get this one to line up. I am going to put a little anti-seize on this bolt just so that it doesn't happen again. Whoops, dripped some. So it doesn't happen again where the bolt gets stuck inside there. I'm not going to put it on the threads. Just on the center of the bolt. I guess it doesn't matter. You can put it on the threads if you want.
All right, we'll get that lined up. Slide this bolt in. It would be a good idea to replace these bolts, but, if you don't have that option, do the best you can with reusing them and slide this bolt in. You can use a pry bar to get this to line up if you need to. There we go. And now I can get the nut started. Right there and right there. Now, you want to get these lined up with those marks that you made. So, now I'm just going to take my 21-millimeter wrench and 21-millimeter socket and ratchet just to get these snug. So they're still pretty loose, almost snugged up. You don't want them too tight and then, I'll do the same with this side.
Still pretty loose, which is good. All right, I am just going to put this shock nut on. Just leave that on. Now, I'm going to torque these bolts but what they want you to do is have all this stuff together, put it on the ground and torque these at regular ride height. So, that's not real ... realistic. We don't have a drive on ramp, lift, to be able to do that so what I need to do is get the control arm to ride height level the best I can. So I'm just going to use the screw jack and raise this up as high as I can, as far as where I think that's going to be ride height level. And you could try to measure this before you do this and that looks pretty good right there.
I think that's okay. All right, so now I'm going to tighten these down. I'm going to torque them down. It's the 21-millimeter wrench and 21-millimeter socket and a torque wrench ... torque these to 96 foot pounds and on this, I'm going to torque the nut side. Hold the bolt side. Good. Do the same on this side. And the reason why you raise this up is so that the bushing is at regular ride height level, otherwise you're going to be putting a lot of strain on the bushing and could wear the bushing out prematurely.
All right, looks good. Now we can remove this screw jack, lower that down. And now I'm going to start to tighten this nut up, the lower ball joint nut. I'm going to use the 21-millimeter socket and ratchet. You want to make sure the stud isn't spinning. It starts spinning so what I need to do to stop that stud from spinning is use a hex bit. I'm going to use a 6-millimeter hex bit and a 21-millimeter wrench and we'll tighten it up. Use the hex bit to hold it. Oops, wrong way. There we go. Just tighten it up.
Once it is snug, then you can take your torque wrench and should be able to tighten it up the rest of the way. Then I'm going to take the torque wrench and use a 21-millimeter socket. Now, I only need to torque this to 30 foot pounds. It's not very much and then I need to go an additional 120 degrees. All right? So a 120 degrees, so, if you're going to go ... we'll take a Sharpie. If we were going to go 90 degrees, it's going to go right there. And if we were going to go 180 degrees, it's going to go right there. So, basically, what we want to do is in between 90 degrees and 180 degrees, if we split that in two, then you'd get 120 degrees right there. So, we can move the nut to right there and that'll be our 120 degrees.
That's the way to do it if you don't have a torque angle meter. Just think about 90 degrees and 120 degrees and just get as close as you can. Now, let's just take the break bar and tighten that up to there. A little further. And that right there is 120 degrees.
Now, I'm going to take a 24-millimeter socket and a ratchet and tighten up this lower shock bolt. This actually goes to the bracket for the lower shock bolt. This is actually separate from the shock, but ... all right, there. I'm going to torque that using a 24-millimeter socket and a torque wrench to 66 foot pounds.
So now we can pry up on the steering, steering rack and pull that piece of wood out. Get that lined up and, I never pulled the bolts out completely so I'll just get those started again. Both of those ... just use my 18-millimeter wrench and just tighten these down. Actually, I'm going to use a ratchet wrench. All right, now I'll snug that up. So, tighten this side. Now, it is recommended that you replace these bolts whenever taking them out, but, we obviously are not going to be able to do that so we're just going to reuse ours.
Now, if you can fit a torque wrench on there, you want to torque these bolts to 44 foot pounds and then an additional 80 degrees. So do the best you can with that. And reinstall this inner fender liner, or fender well. Get the push pins, line these back up. Line this lower control arm up with the sway bar link. Sometimes you can just pull down on the sway bar a little bit. Try to get that to line up a little easier. There we go. Just use a 18-millimeter wrench. Put the nut on. Then we'll take a 18-millimeter socket and ratchet, tighten this up. Then we'll take a torque wrench and with your 18-millimeter wrench, torque this to 55 foot pounds.
All right, take the wheel, reinstall the wheel. Install the lug nuts. All right, now we're going to use a 22-millimeter socket and a torque wrench. Tighten these lug nuts to 100 foot pounds, I'm going to do this in a star pattern so that it tightens the wheel down even more. I'll just go around again.
Thanks for watching. If you want the parts to do it yourself, check out 1AAuto.com, the place for DIY auto repair.
Shop Products
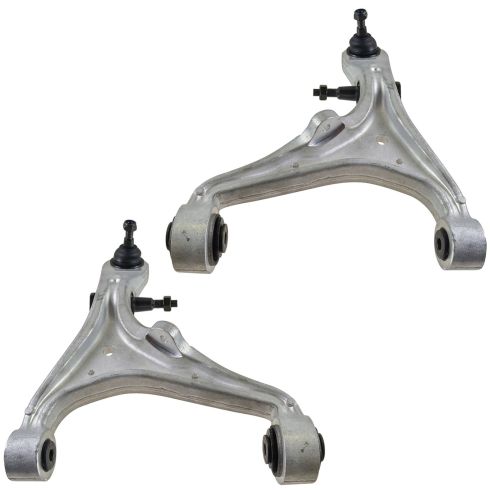
Cadillac CTS SRX STS Front Driver & Passenger Side 2 Piece Control Arm with Ball Joint Set TRQ PSA62565
Part Details:
- 2 Piece
- (1) Front Driver Side Lower Control Arm with Ball Joint
- (1) Front Passenger Side Lower Control Arm with Ball Joint

How to Replace Front Control Arms 2006-13 Volkswagen GTI
How to repair, install, fix, change or replace failing, rusted, rotted, or damaged rear upper control arms on 06, 07, 08, 09, 10, 11, 12, 13 Volkswagen GTI
