How to Replace Front Lower Ball Joint 2007-17 Ford Expedition
Created on: 2020-12-07
This video shows you how to install new, quality TRQ ball joints on your 2007-2017 Ford Expedition.
Tools needed
-
Torque Wrench
Hammer
Socket Extensions
Ball Joint Press
Rust Penetrant
Channel-Lock Pliers
Pry Bar
Jack Stands
Trim Tool Set
21mm Socket
Ratchet Strap
Brake Caliper Hanger
Snap Ring Pliers
Socket Driver
8mm Socket
Wheel Chocks
Center Punch
Straight Cutters
Floor Jack
Swivel
1/2 Inch Impact Gun
Okay, friends, one of the first things we need to do to get started on this job is to safely raise and support the truck. After you've done that, remove your center cover here and then remove all 6 of your 21-millimeter lug nuts and get the wheel off. Now that the wheel's off, let's go ahead and get this ABS wire disconnected. I'm just gonna come right along here and then remove this 8-millimeter bolt. Now let's go ahead and remove our anchor bolt for our flex hose for the brakes. The next thing we need to do is remove our two caliper bracket bolts. Like this. I'm just gonna start that in a couple threads. Now we're gonna remove our caliper and we're gonna hang it so it puts no pressure on the flex hose. Let's remove the rotor. Let's go ahead and remove our vacuum lines here. Let's go ahead and remove this little center cover. Now let's remove our axle nut. Now we're just gonna push on this axle stub here. If it doesn't move, just go ahead and put the nut back on a few good threads and then give it a couple loving bonks with a hammer. Now let's go ahead and get this off of here. Let's go ahead and follow that ABS wire and just continue disconnecting it up along the way here. Comes up to this area coming in from the back. You're gonna see you have a little push button. Go ahead and push on that and then separate the two.
Now let's go ahead and get our cotter pin out for our tie rod. Set that aside for recycling. Let's remove the nut. Now we're gonna use a hammer and we're gonna hit right on the knuckle right here to try to break this free. Now let's remove our upper ball joint nut. Now we're just gonna separate these two. So now we're just gonna go ahead and put that nut on just a couple small threads here. That's gonna help prevent this knuckle from falling down when we relieve the lower ball joint. The next thing I wanna do is pull down on the upper control arm and we're gonna put it just like this so it leaves a nice gap between the knuckle and the nut itself so we can move down to the lower ball joint. Let's just leave this on a couple threads. Now the next thing that we need to do is carefully bonk on the knuckle and try to separate the ball joint from it. Let's remove that nut. Hold up on your knuckle. Remove the lower ball joint nut. Bring it down and slide it out and away from the vehicle. Next, let's go ahead and put our axle up on top of our sway bar link so it's out of the way and then we'll continue on to spraying the lower ball joint upper area. Now looking at it from the top, you'll be able to see that there's a snap ring on this. We're gonna go ahead and spread this clip, and then what we're gonna try to do is just peel it right off of that ball joint. Watch your eyes.
Now it's gonna be time to get our lower ball joint out of the lower control arm. To do that, you wanna use a ball joint press to get it out. You could of course also use a hammer in case you don't have access to this. Just give it a couple loving bonks along the top and be careful for when it shoots out the bottom. There it is, friends. Okay, friends. Now it's gonna be time to get ready to start installing our brand new lower ball joint. One of the first things I wanna mention is we're gonna take off this nut right here, and then also, we're gonna remove the boot. You wanna be careful not to tear it in any way. I'm gonna use a nice screwdriver, get in between here, and carefully pry down. We'll remove this and we'll set this stuff aside. Let's go ahead and clean up this area. So we're gonna go ahead and install our ball joint using that ball joint kit with the cup that just barely fits onto the lip right here. We wanna be very careful not to damage any of the center aspect. You're gonna have a short cup that looks like this. That's gonna go just like that. Grab the ball joint press and get it set up. So what we're gonna do here is try to press the ball joint straight up and into the control arm. We only wanna go until it bottoms out. You don't need to go too much further than that but you do wanna make sure that it's going up as straight as possible.
After you have it so it's completely bottomed out, what you're gonna wanna do is give this a couple loving bonks with your hammer. Just be careful. The reason why we did that is to help make sure that it's completely settled in. Remove your ball joint press. Now let's go ahead and put on our snap ring. There we are. Just give those ears a couple bonks. We just wanna kinda spin it in the groove to make sure it's completely situated. Now it's gonna be time to get our boot back on there. You wanna pay special attention to it and just make sure it's not damaged in any way. We're gonna find a cup that fits right over and along the lip right here. We don't need to squish on this area. This fits perfectly. Put it up on here. Double-check to make sure it's completely seated the whole way around. All right. Let's go ahead and clean down this area. All right. Let's go ahead and get this axle back inside the bearing there. We're gonna slide the knuckle up so we can get the ball joint started on the lower aspect here. There we are. Go ahead and give that axle a nice wiggle and it should wanna set right in and then it's gonna be coming out the other side here. Let's snug this up. Now we're gonna torque this to 85 foot-pounds and then we'll continue on to putting on the cotter pin.
Now the next thing you wanna do is line up the slots on the nut to the hole in the stud for the ball joint. If for some reason after you torque it it doesn't line up, continue tightening until the very next slot does. The next thing we need to do is get our axle inside the knuckle as we push the knuckle up. You wanna be very careful not to damage your internal seal. Now I'm just gonna take a pry bar, come in and under here, and then I'm gonna try to put the ball joint through the knuckle. Go ahead and start that nut. Snug it up. Torque it to 85 foot-pounds. What you wanna do next is make sure that you have your slot lined up with the hole on your ball joint stud. If for some reason it isn't, you need to continue tightening until it is. Next, take your cotter pin, go ahead and put it through the slot and the hole, and then, of course, lock it down. Now before we can continue on to putting the brakes together, we wanna make sure that the hub mating surface and the back of the rotor mating surface is nice and clean. After you've done that, apply a little bit of copper Never-Seez. Let's go ahead and get our rotor back on here. I'm gonna start a lug nut on so it holds the rotor for me. Let's get our caliper reattached. We're gonna use some thread locker, of course, on the bolts. Start them both in and then we're gonna torque them to 185 foot-pounds. Let's get our vacuum lines reattached.
Now we're gonna reconnect in our bracket, the ABS wire. Let's snug them up. Let's start re-securing our ABS wire. Make sure you go up and in between the brake line here just like that. This looks good for now. Make my way down here. Get a little push clip. It's gonna go into your hole right there. The rest of it should just line up if we continue on. Making our way up here, let's make sure we reconnect in our ABS wire. Listen for a click, and then, of course, give it a nice tug. After that, you wanna make sure that you secure it back in up here. Make sure everything's nice and secured and it's definitely not rubbing up against anything and there's no way it can get caught. Let's get the outer tie rod end on here. Snug this up. Torque it to 85 foot-pounds. The next thing we wanna do is make sure that our slots line up with the hole and the stud for the tie rod. If for some reason it doesn't, you need to continue tightening until the next one does. Install your locking cotter pin and then lock it down. Let's get the wheel back up on here. Start all of your lug nuts, snug them up, and torque them to 150 foot-pounds. Torqued. Okay, friends, so that's pretty much it aside from making sure you pump up that brake pedal and then get yourself safely down to an alignment shop.
Shop Products


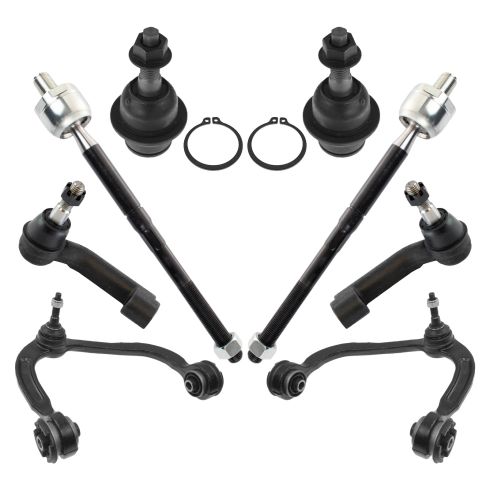
2015-17 Ford Expedition Lincoln Navigator Front 8 Piece Steering & Suspension Kit TRQ PSA34568
Part Details:
- (2) Front Lower Ball Joints
- 8 Piece
- (2) Front Upper Control Arms with Ball Joints
- (2) Front Outer Tie Rods
- (2) Front Inner Tie Rods
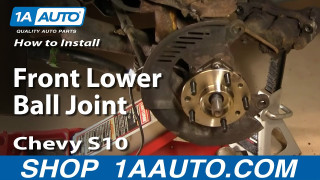
How to Replace Ball Joint 1997-2004 Chevy S10 Pickup Part 2
In this video, 1A Auto shows you how to replace the front lower ball joint in a 1997-04 Chevy S10 pickup.
