How to Replace Front Lower Ball Joint 2003-08 Toyota Matrix
Created on: 2020-08-25
This video shows you how to install new, quality TRQ ball joints on your 2003-2013 Toyota Matrix.
Tools needed
-
Torque Wrench
Hammer
Socket Extensions
Rust Penetrant
Pry Bar
17mm Socket
Jack Stands
19mm Socket
Liquid Thread Locker
21mm Socket
Pickle Fork
Flat Blade Screwdriver
Socket Driver
Copper Anti-Seize
Wheel Chocks
Straight Cutters
Floor Jack
Swivel
30mm 12-Point Socket
Okay, friends. One of the first things we need to do is safely raise and support the vehicle with the suspension hanging. Once we've done that, we're going to remove our 5 21-millimeter lug nuts. Let's get the wheel off of here. Now that we have the wheel off, let's just go ahead and put one of those lug nuts on just to hold the rotor so it can't flop around. Now, it's going to be time to remove our axle nut. You're going to want to use a 30-millimeter, and you want it to be a 12-point. If you're working on the ground and you're trying to use a ratchet, you're going to notice that this likes to turn. If that's the case, go ahead and use a nice, long pry bar. Come in between the studs like this. Put it against the ground so you have some leverage, and then continue to remove your nut. Put this on there a little bit. Now, we're just going to give this a couple loving bonks, just to break it free from the wheel bearing. Tiny bit of penetrant. Loving bonk. That's moving freely. Let's get this off of here. Let's go ahead and remove these under here with a 17-millimeter to separate the control arm from the ball joint. This one right here is going to be a bolt. Just be careful because it is going to be under a little bit of tension, so you want to make sure that you're safe as possible. Now, let's take a nice pry bar. We're going to come through the holes in the top of the control arm, just so we can pry down. Turn this so it doesn't resituate itself, and then you can release.
The next thing we need to do is go ahead and pull back on this. As you pull away, you want to make sure that the axle is going to be coming out of the knuckle area. There we are. Set that right aside. Okay. So, the next thing we need to do is get our cotter pin out that's holding the ball joint nut on there. Ours is in very poor condition, so it's not really saveable. I'll try to get it off of there, and then, of course, we'll take the nut off. There it is. I'm going to use a swivel with an extension. Put it right over that nut. For me, personally, I'm going to give it a couple bonks. Okay. Let's try to get this off of here. I'm just going to put that nut on just a couple threads. After that, we're going to separate the ball joint from the knuckle. I like to use a pickle fork. All right. In between like this. Be careful for your brake rotor, of course. Remove that nut. There it is, friends. Now, it's going to be time to install our brand new ball joint.
Now, it's going to be time to get our brand new ball joint into the vehicle. I'm going to start with the ball joint stud into the knuckle. We'll snug it up, and we'll torque it to manufacturer specifications. We're going to go ahead and torque this nut to 76 foot-pounds. Now that we have it torqued, you want to double-check to make sure that the slot on your nut is matched up with the hole in the ball joint stud. If for some reason it isn't, you need to continue tightening until it is. Okay. So, I got this lined up. If it comes towards the knuckle like mine does, just go ahead and peen it up a little bit, and then continue pushing it through. You have to make sure that this is peened completely over so there's no way that this nut can loosen up on its own. Perfect.
Now, I like to use a little bit of copper Never-Seez along the backside of the bearing where the axle is going to be going into. Pull your knuckle away, line up the axle, and then carefully try to put it in there. Once again, be careful for your boot. Make sure it's not going to get caught on anything. Let's line up the lower ball joint with the control arm. Can do that by pulling down. Okay. Grab your mounting hardware. I like to use a little bit of threadlocker on these. Just throw them on there. Next, we're going to bottom these out, and then we'll torque them to manufacturer specifications. Let's torque these to 66 foot-pounds. Let's go ahead and put on our axle nut. We'll bottom it out, and then we'll torque it to 159 foot-pounds.
So, now we need to get the vehicle a little bit closer to the ground. I'm going to take a nice, long pry bar, and I'm going to come across my lug studs, just like this. Once I've done that, I'm going to torque my axle nut to 159 foot-pounds. Remove this. The next thing we need to do is peen over this area right here into that slot. That's going to be the part that locks in this nut so it can't move. If you forget that, it's a very dangerous situation. So, I'm just going to take a nice, flat punch like this, come right here, and then I'll give a couple loving bonks to peen that down. As you can tell, there's definitely a dimple there, and there's no way that this nut could spin. If you want to go a little bit further, it's up to you. I'll give it a couple extra wax because that's my favorite part. Perfect.
Let's get our lug nut off of there. Get the wheel up on here. We'll bottom out the lug nuts, and then we'll torque them to 76 foot-pounds. All right. Let's torque them in a crisscross manner. Torqued.
Shop Products


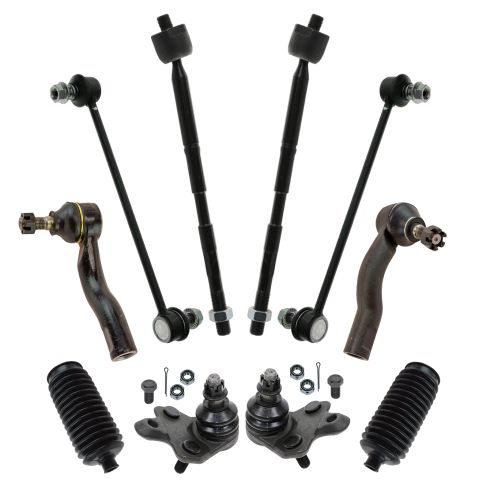
2005-10 Scion tC Front 10 Piece Steering & Suspension Kit TRQ PSA30351
Part Details:
- (2) Front Sway Bar Links
- 10 Piece
- (2) Front Lower Ball Joints
- (2) Front Steering Rack & Pinion Bellows
- (2) Front Outer Tie Rods
- (2) Front Inner Tie Rods
How to Replace Front Lower Ball Joint 2005-16 Toyota Rav4
How to replace a rusty, worn, or broken front lower ball joint on your 05-16 Toyota Rav4.
