How to Replace Front Lower Ball Joint 1997-2005 Lexus GS300
Created on: 2019-04-24
Learn how to to replace the lower ball joint and remove it using two different methods. The 1A Auto experts show how to do this on a 97-05 Lexus GS300
-
step 1 :Removing the Wheel
- Loosen the 21mm lug nuts with the vehicle on the ground
- Raise the vehicle with a floor jack
- Secure the vehicle on jack stands
- Remove the lug nuts
- Pull off the wheel
-
step 2 :Removing the Lower Ball Joint
- Remove the two 17mm bolts from the ball joint assembly
- Tap the knuckle with a hammer to break it free
- Straighten out the cotter pin with cutters
- Remove the cotter pin
- Remove the 19mm castle nut
- Tap the control arm with a hammer to loosen the ball joint
- OR remove the ball joint with a hammer and pickle fork
-
step 3 :Installing the Lower Ball Joint
- Insert the ball joint into the control arm
- Align the ball joint with the knuckle
- Tighten the two 17mm bolts by hand
- Tighten the two 17mm bolts to the ball joint
- Tighten the 19mm castle nut
- Torque the castle nut to 83 foot-pounds
- Install the new cotter pin and trim the excess with the side cutters
-
step 4 :Reattaching the Wheel
- Slide the wheel into place
- Start the lug nuts by hand
- Tighten the lug nuts preliminarily
- Lower the vehicle to the ground
- Tighten the lug nuts to 100 foot-pounds in a crossing or star pattern
Tools needed
-
21mm Socket
Torque Wrench
17mm Socket
19mm Socket
1/2 Inch Breaker Bar
Hey, everyone. It's Len down at 1A Auto. Today we're going to be working on a 2001 Lexus GS 300. I'm going to be showing you how to put in a lower ball joint. All right, one of the first things that we're going to want to do is after we have the vehicle semi-supported off the ground, you want to make sure the wheel is still on the ground firmly. You take your 21 millimeter socket, and if you have a long ratchet or a breaker bar, just a little bit. You don't want to go too far.
Now, as we take off this one last lug nut, you want to make sure you hold that wheel on. You don't want it to fall off, go bouncing off, hit you in the knee, hurt yourself. Safety is key. Let that down nice and easy. We're going to remove the two lower bolts right here. There's one right there and there's one on the other side, and that will remove the knuckle from the ball joint assembly.
Finding the bolt. Safety glasses on. Take that out. You can give it a couple screws in if you'd like. I would recommend it. Just give it a couple threads. It'll help keep it from falling off possibly hurting you. Next, I'm going to find the other 17 millimeter bolt. Watching your ears. Take that one completely out. Now I'm just going to bonk it and it should want to break free.
There we go. I'm going to take out that one bolt that I started in a little bit. There it is. Put it aside where it won't get lost. All right, so now that we've gotten to this point--you don't have to take the whole knuckle out to do this, but for my purposes, I'm doing a lot of different things on the front end. I just took it right out of the way. What we're going to do is the lower ball joint.
This attaches directly into the lower control arm which comes across here, which I'll also be replacing in a later video, but what I wanted to show you is that we always want to match up the parts anytime we have the opportunity because it's so important to make sure everything's the exact same. As you can tell, we have the same spacer right here. Spacer there comes across, has the same lift, comes across. Everything's bent the same way.
If this bend came around and shot out this direction for some reason, that would be the ball joint for the other side. You'd have a problem putting this together. It looks good to me. Let's go ahead and start taking this puppy out. It has a cotter pin down here. What his does is it actually folds over and it makes it so if for some ungodly reason this nut came loose whether it wasn't torqued or wasn't tightened on enough, the nut can't come off all the way.
I'm going to use my cutters and I'm just going to grab on to it very carefully. Bend it out of the way. You can cut it right off if you want, but if you don't need to, you don't need to. I will. Boom. A little piece is getting ready to come out. You got the little fat side right there. Grab it. Pull it out.
This is actually a 19 millimeter nut. You can use a short or a deep socket. Short will work because it doesn't have a long shank, six-point if you have it. See if this puppy breaks free. Nice. There we go. You can take it all the way off or just leave it on a thread or two.
Next, if you have the opportunity or you have the tool, you can use a pickle fork or you can just whack on the control arm with a hammer, but a pickle fork, if you have it, is the optimal tool to use. You're going to stick it in between there carefully with safety glasses. Get it started.
Here we go, and there's our old ball joint. You might be doing this inside the vehicle, which is fine, but for me, I'm doing other jobs on this vehicle, so I have the knuckle out. I'm just going to do this while it's out. It's going to be very simple. Here's our old. In with the new. Throw this in the recycling pile. You'll notice that this has little shafts on it. These are going to go into these bolt holes a little bit and it's going to help you align.
You put it so the ball joint's facing down. Those go down just a little bit. They're meant to be forced in, not just kind of babied in, so that's what these are going to do. We'll just get them started. By the way, I put thread locker on these, so we'll get this started in by hand, get few threads in. That's not going anywhere. Get this one started. Never tighten any bolt like this before getting the other one started because you might have to move the ball joint around a little bit.
Both of those are in. I know nothing's cross-threaded. Now I'm going to take my air gun. You can use a ratchet if that's what you like, but I prefer to use an air gun because I have access to it with a 17 millimeter, six-point socket. I'm going to blast them right in keeping my fingers clear of any pinch points which would be between here and here. Those are in.
I'm going to remove the lower ball joint nut. I'm going to set it right in here holding the knuckle firmly so it can fall down and hit me in the head. I'm going to get this one started. I'm going to turn a little bit to the left just to find the first thread there, and then I'm going to turn to the right, get it started. You don't have to tighten it all the way down. Now, using our 21 millimeter socket, we're just going to snug this up. You don't have to go too much because we're going to torque it. The torque on this is 83 foot-pounds, so I'm going to get my torque wrench, my socket. Bring it over.
All right, now that we've got it that far, what we need to do is we need to make sure that the hole for the ball joint lines up with the castle nut hole. It goes through perfectly. Now I'm just going to peen it over so it can't come loose. Be careful not to get a poke point on your fingers. If you wanted to, you could bonk it with whatever you have in your hand, really, and that lower ball joint's all done.
All right, now it's time to get the wheel up on here. Roll it up on to your leg or knee. Never lift with your back unless you have to. You really shouldn't have to most times. Go ahead and grab a lug nut. We're going to start one on getting it lined up. Now that we've got our wheel on the ground, you don't want all pressure of your vehicle on it because if this isn't tightened down snug enough, you could off-kilter your wheel, and even though you're thinking you're torquing it down to the 75 foot-pounds it's specified to be, it might not be.
With the wheel gently on the ground to the point where it can't spin on, you're just going to start with one and you're going to go in a criss-cross pattern with your 21 millimeter socket to 76 foot-pounds. One click. Crisscross. Make a star. Feeling up to it? Let's go around one more time. One, two, three, four, five. This puppy's all torqued up. Good to go.
Thanks for watching. Visit 1aauto.com for quality auto parts shipped to your door. The place for DIY auto repair, and if you enjoy this video, please click the subscribe button.
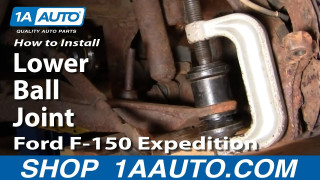
How To Replace Lower Ball Joint 1997-2002 Ford Expedition PART 2
This video continues the installation of the ball joint and CV axle, including some handy ways of completing the repair without special tools
