How To Replace Front Lower Ball Joint 2001-06 Hyundai Elantra
Created on: 2013-05-19
This video will show the removal and reinstallation of the wheel, stabilizer link, and control arm. Follow the steps and learn to replace it yourself!
-
step 1 :Removing the Wheel
- Loosen the lug nuts with the vehicle on the ground
- Raise the vehicle with a floor jack
- Secure the vehicle on jack stands
- Remove the lug nuts
- Pull off the wheel
-
step 2 :Removing the Stabilizer Link
- Turn the wheel by hand
- Hold the upper stabilizer link stud with a 14mm or 9/16 inch wrench
- Remove the upper nut from the stabilizer link with a 14mm wrench
- Hold the lower stabilizer link stud with a 14mm or 9/16 inch wrench
- Remove the lower nut from the stabilizer link with a 14mm wrench
- Pull off the stabilizer link
-
step 3 :Removing the Control Arm
- Loosen the lower ball joint nut with a 19mm wrench
- Strike the wheel spindle with a hammer to loosen the ball joint
- Remove the two 19mm bolts from the control arm
- Loosen the 19mm bolts from the control arm bracket
- Remove the 22mm bolt from the control arm
- Remove the 19mm nut from the ball joint
- Pry the control arm off with a pry bar
-
step 4 :Removing the Ball Joint from the Control Arm
- Tear the boot off the ball joint
- Break off the metal ring at the base of the ball joint
- Knock out the ball joint c-clip with a flat blade screwdriver and a hammer
- Put a 30mm socket over the ball joint
- Hammer the ball joint out of the control arm using the socket
-
step 5 :Installing the New Ball Joint into the Control Arm
- Put the new ball joint into the control arm
- Put a 30mm socket on the back of the ball joint
- Hammer the ball joint into the control arm with a socket
- Apply grease to the ball joint
- Put the c-clip onto the ball joint
- Put a 36mm socket on the ball joint
- Hammer in the c-clip with the socket
- Push the clip in with a flat blade screwdriver and a hammer
- Apply more grease to the ball joint
- Put the boot into place
- Put a 36mm socket on the boot
- Hammer in the boot with the socket
- Push the boot in with a flat blade screwdriver and a hammer
-
step 6 :Reinstalling the Control Arm
- Put the control arm into place, starting at the rear
- Feed the 22mm bolt into the control arm
- Push the ball joint into place
- Thread the 19mm nut onto the ball joint by hand
- Insert the two 19mm bolts into the control arm
- Insert the 22mm bolt
- Tighten the 19mm bolts to 100 - 110 foot-pounds of torque
- Tighten the 22mm bolt to 130 foot-pounds
- Tighten the 19mm nut on to the ball joint
-
step 7 :Reinstalling the Stabilizer Link
- Push the stabilizer link into place
- Start the 14mm nuts by hand
- Hold the upper stabilizer link stud with a 14mm or 9/16 inch wrench
- Fasten the upper nut onto the stabilizer link with a 14mm wrench
- Hold the lower stabilizer link stud with a 14mm or 9/16 inch wrench
- Fasten the lower nut onto the stabilizer link with a 14mm wrench
-
step 8 :Reattaching the Wheel
- Slide the wheel into place
- Start the lug nuts by hand
- Tighten the lug nuts preliminarily
- Lower the vehicle to the ground
- Tighten the lug nuts to 100 foot-pounds in a crossing or star pattern
Tools needed
-
14mm Wrench
Socket Extensions
Torque Wrench
14mm Socket
Pry Bar
Jack Stands
19mm Wrench
19mm Socket
Bearing Grease
Flat Blade Screwdriver
Large Hammer
Vise-Grips
9/16 Inch Wrench
30mm Socket
Ratchet
Floor Jack
36mm Socket
22mm Socket
Brought to you by 1AAuto.com, your source for quality replacement parts and the best service on the Internet.
Hi, I'm Don from 1A Auto. I hope this how-to video helps you out, and next time you need parts for your vehicle, think of 1AAuto.com. Thanks.
In this video, we're going to show you how to replace a ball joint in this 2005 Hyundai Elantra, pretty much the same for any 2001 to 2006 Elantra. We show you the right hand passenger's side, the left hand driver's side is basically the same. This is one of those repairs where you can save some time and money doing it yourself but you will need to take your car and have it aligned afterwards. You'll need jack and jack stands, 14, 19, and 22mm sockets. You'll need ratchets, extensions, and breaker bar or a pipe for some leverage. You'll need two 14mm, or you could use one 14mm and a 9/16 inch wrench. You'll need a 19mm wrench, torque wrench, large hammer, large sockets. In this case, I think we used a 30mm socket and a 36mm socket and a screwdriver and a vise or some other hard surface to work on.
Start by removing one of the front wheels. If you don't have the benefits of air tools, you'll want to start with the vehicle on the ground, loosen the lug nuts then jack up and secure the vehicle on jack stands and remove the lug nuts, the wheel cover and wheel and tire.
I'm going to turn the wheel and get a little bit better access for my wrenches. You use 14mm wrenches to hold the backside of this sway bar link and for the nut put a wrench in here to help me get a little bit extra leverage to break the nut free. Fast forward as we remove that nut the rest of the way. I'm going to use my 14mm to counter hold, like I did on the top, and a 14 to break it free. As you can see there, what we do is we put the wrench on and just hook another wrench onto the end just to give yourself some extra leverage. That helps you break the nut free. With the two nuts free, pull your sway bar link out.
I've got a 19mm wrench on the nut for the lower ball joint, and another wrench for leverage. You might have to hold the brake rotor in place. Once you get it broken free, you don't want to lock up your wrench between your axle and the nut so you can use your open ended wrench and switch it back and forth. We'll speed it up here as we loosen that nut up, you don't want to take it quite all the way off yet. Now, give it a couple of whacks to the spindle here to free up the ball joint. I think you got it.
Locate your two 19mm front control arm bolts. I'm going to use my ratchet with a couple of extensions to reach the bolt and then to break them free I'm going to use a pipe for extra leverage at the end of my wrench. Speed it up here, again, as we just remove those two bolts. You can see you use a pipe for some extra leverage to break it free, and then it comes out fairly easily just with your ratchet. We only need to get this bolt out but this bracket is not allowing us to get a socket on it so we're going to loosen up the other three bolts for bracket. This upper frame bolt is a 19mm and I'm just going to loosen it up a little bit. In this case, I'm going to use a pipe for extra leverage. The other two here are 14mm. I'm going to put on my 22mm socket. I'm going to take down the lower control arm bolt. I'm going to remove it completely. I'm going to finish removing this nut from the ball joint. Then using a pry bar, pry up the rear mounting to the control arm.
Once the control arm's out, you see we've put it into a vise, there is a metal clip on the bottom of the boot that you just have to get off. You can see we've just torn the boot open and we're just ripping off all the metal and then just basically showing no mercy, pry that ring out, break it, whatever you have to do and get the boot and the metal ring that holds the boot off of the ball joint.
For that exposed C-clip that's holding the ball joint in place, you're going to go ahead and get that off with a flat blade screwdriver and a hammer. It should knock it out of its groove. You can see that as we started tapping it and then C-clamp started moving in the groove, which is good. It just breaks it free and then use another screwdriver and you may need a helping set of hands to try and have one screwdriver hold the C-clamp in place while you get the other screwdriver underneath and then once you get the other screwdriver started underneath, pry out and up and eventually the C-clamp comes up and off. I'm going to have Mike help me out here and hold the control arm. I'm going to use a socket to go over and touch the top portion of the ball joint.
We've got our new ball joint from 1A Auto. Make sure you configure it correctly and that you've got the ball joint stem facing down on your control arm and then for here I'm just using a 30mm socket, anything that you can get on top of this and make sure it's square as possible. An alternative to this is taking it somewhere and having somebody with a press put it in but this is basically the crude version of a press. A press gives smooth constant pressure; this is just quick jolts of high pressure. It gets the ball joint in; it does the same job. You just don't want to be hitting the ball joint directly. You can see right here it's fully seated. The ball joint comes supplied with a little bit of grease in a packet. I'm just applying it around the edge to help us get the clip back in. You'll see that there's just a rim around the bottom where the clip is going to seat. Try and get it in the notch down there, we're going to use just a large socket to get it started. The best technique we found is to start at an angle, the clip has obviously an open area, it's a C-clip so you want to try and drive the closed area of the clip on first so it spreads out. We got it started on there. Then the C part of the clamp opens up. I'm going to finish it by pushing down, tapping down with a flat blade screwdriver, going back and forth so that it doesn't pop back up. You'll know because it'll snap back into place when you're done. You can see it's in the groove. I'm going to speed up here sd we take the grease that comes with the ball joint and put it in around the shaft of the ball joint and then using the same technique we put the boot back on, put the boot in place, use a large socket and in this case, just for your reference that large socket is 1 and 7/16 also probably a 36mm socket. It's quite a large socket. Start, just like before, use a socket tpstart the boot into place and then use a screwdriver to drive it to its final destination.
Reinstalling the control arm, I make sure I put the little piece here on the backside of the front control arm bushing and I'm going to try and feed the rear bushing in first. I'm going to speed up here. What we do is get that rear control arm bushing up in there, feed the bolt up in, you won't be able to put the bolt in all the way but just feed it up in there so that you know the rear mount is lined up. Now put the ball joint into the spindle, and loosely thread the nut. Start to reinstall the control arm bolts. Use your socket, ratchet and extensions, put them on the bolts and basically just lift the bolts up into place, push them in and get them going and then you want to just tighten them up preliminarily. Get that up in. For that other bolt, use a screwdriver or something, line it up preliminarily then use a hammer, drive it into place a little bit, and then tighten it up. You'll want to torque your two front bolts to between 100 and 110 foot-pounds and the other bolt to about 130 foot-pounds. I'm Tightening up the ball joint nut. I'm going to fast forward as this is just tedious. You can only do it about an 1/8 to a 1/4 of a turn at a time. Tighten it up with the one wrench and then hook another wrench onto it, pull it nice and tight, basically about as tight as you can with those two wrenches.
I'm installing the link back into the sway bar and into the control arm. There's a nice shot of our elbow there. What you can see once you've got it out, is that it's pretty easy process to get it back in. You might have to just manipulate the length a little bit to get it to go through this stabilizer bar and the control arm. Then put the nuts on, pretty much hand tight, and then, use your two 14mm wrenches. We used two 14mm wrenches and you could also use 14mm and 9/16 inch if you had to. You basically want to get them about as tight as you can with a wrench and then just hook your wrench on and just give it another pull, about a quarter of turn, using both wrenches.
Put the wheel back in place, put the hub cap on and start your lug nuts and then you just want to hand tighten them, hand start them first to make sure you don't cross the threads and then once they're hand started then just preliminarily tighten them up. With the car back on the ground with a little bit of pressure on it or weight on it, I'm going to use the 22mm socket and the torque wrench that I've set to 100 foot-pounds and torque them in a star pattern.
We hope this video helps you out. Brought to you by www.1AAuto.com, your source for quality replacement parts and the best service on the Internet. Please feel free to call us toll-free, 888-844-3393. We're the company that's here for you on the Internet and in person.
Shop Products


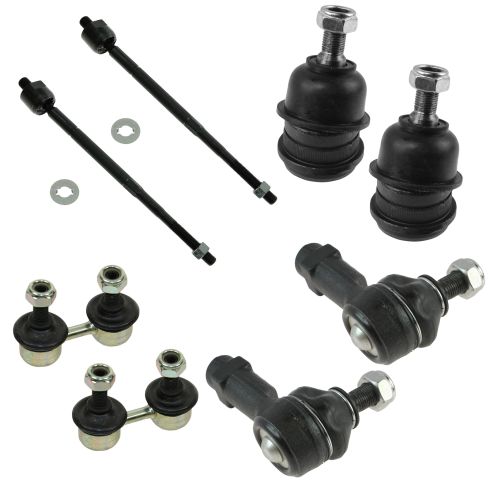
2001-06 Hyundai Elantra Front 8 Piece Steering & Suspension Kit TRQ PSA59146
Part Details:
- (2) Front Lower Ball Joints
- (2) Front Sway Bar Links
- 8 Piece
- (2) Front Outer Tie Rods
- (2) Front Inner Tie Rods

How to Replace Front Lower Ball Joint 2002-14 Volvo XC90
This video shows you how to replace the front lower ball joint on your 02-14 Volvo XC90. 1A Auto shows you how you can do it yourself, step by step!
