How To Replace Front Interior Door Handle 2004-15 Toyota Tacoma
Created on: 2012-06-14
If the front inside door handle is snapped or broken, follow the steps in this video to DIY
-
step 1 :Removing the Door Panel
- Pry off the trim piece inside the door pull with a flat blade screwdriver
- Pry off the trim piece inside the door handle with a flat blade screwdriver
- Remove the plastic clip at the front top corner of the door panel
- Pry off the mirror base trim piece by hand
- Remove the Phillips head screw inside the door handle
- Remove the Phillips head screw inside the door pull
- Pry up the window switch panel with a flat blade screwdriver
- Disconnect the window switch wiring harnesses
- Pry out the door panel by hand
- Lift the door panel up and off
-
step 2 :Removing the Door Handle
- Slide the door handle back and off
- Unclip the door lock cable from the handle
- Unclip the door latch cable from the handle
-
step 3 :Installing the Door Handle
- Clip the door lock cable onto the handle
- Clip the door latch cable onto the handle
- Slide the door handle on
-
step 4 :Reinstalling the Door Panel
- Lift the door panel into place
- Push in the door panel clips
- Push on the mirror base trim piece
- Push in the plastic clip at the front top corner of the door panel
- Insert the Phillips screw into the door handle
- Insert the Phillips screw into the door pull
- Push in the door pull trim piece
- Push on the trim piece inside the door handle
- Connect the window switch wiring harnesses
- Push in the window switch panel
Tools needed
-
Flat Blade Screwdriver
Phillips Head Screwdriver
Brought to you by 1AAuto.com, your source for quality replacement parts and the best service on the Internet.
Hi, I'm Mike from 1A Auto. I hope this how-to video helps you out, and next time you need parts for your vehicle, think of 1AAuto.com. Thanks.
The only tools you'll need are a small flat blade screwdriver and a Phillips screwdriver.
To take the door apart, start here. Use a small screwdriver to reach in and pull that out. There's a Phillips screw in there, and the same thing here, a small Phillips to hold that door. There's a Phillips screw in there. For this clip right here, push the center in, and then, the clip comes out. Then for this panel here, just put your hands in behind and it pops off. We'll fast forward as I remove those two Phillips screws.
Your switch will come up under here. Lift it with your fingers a little bit, and use a small screwdriver again. Carefully pull that up and forward. On the connector, there's a little tab. Push the tab in and you pull. It's kind of a locking collar. You can actually work your screwdriver in there. Pull that locking collar back. The locking collar comes up. Then that disconnects. You'll want to pull this collar all the way back till it clicks. Put that in there.
Just use your fingers, working them behind the door panel. Pull firmly. There's a series of clips right around this edge. Once those clips are off, the door panel comes right up and off.
To remove your inside door handle, you kind of push, get some pressure back, and pull it out at the same time. The equipment comes off, and hen these cables. Do the green one first, which is your lock. It should come right out, up and out. Then the other one, bring it out, twist it up and off and then the door handle off.
To reinstall it is just reverse of the procedure. Hold our handle like that. Bring this one here. Clip it in. Bring your lock into place. This one you have to break out and put it into place. Lock it down. You need to push the front end first. Slide that forward and snap it back into place.
We'll replace your door panel. It's a pretty easy task. Make sure the harness comes through. Put it up and onto the window sill. Back here, you peek in and see your pins. Make sure they're going in correctly. Put this back in. We'll push this back through so the lock is sticking up. Put it in. Push it to lock it. Speed this up as I put the two screws back in. The black one goes in behind the door panel and the silver or natural colored one goes in behind the door pull. Push that little trap door back in place. Again, make sure that this locking collar is pulled all the way back. Let's see here. It goes in this way. We'll put the back end first then the front down.
We hope this video helps you out. Brought to you by www.1AAuto.com, your source for quality replacement parts and the best service on the Internet. Please feel free to call us toll-free, 888-844-3393. We're the company that's here for you on the Internet and in person.
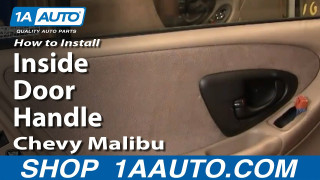
How To Replace Rear Interior Door Handle 1997-2003 Chevy Malibu
Watch this video to learn how to replace an interior door handle. The experts at 1A Auto show how to replace a broken or snapped interior door handle on your 97-03 Chevy Malibu.
