How to Replace Front Exterior Door Handle 2006-11 Toyota Camry
Created on: 2017-10-26
How to repair, install, fix, change or replace a broken or snapped off Exterior / Outside door handleon 09 Toyota Camry
-
step 1 :Removing the Door Panel
- Pry the courtesy light out of the door panel with a trim tool
- Disconnect the courtesy light electrical connector
- Pry the trim piece off the mirror base with a trim tool
- Pry the grab handle panel off the door handle with a trim tool
- Pry the trim piece out of the door handle with a trim tool
- Pry the clip out of the front of the door panel with a trim tool
- Remove the Phillips screw inside the door handle
- Remove the two Phillips screws from the grab handle
- Pry out the door panel clips by hand
- Lift the door panel off the door
- Unclip the door lock cable from the door handle
- Pop the door handle out of the door
- Disconnect the wiring harness from the door panel
- Unclip the wiring harness from the door panel
- Disconnect the door latch cable from the door handle
-
step 2 :Removing the Water Shield
- Pull off the water shield
- Remove the wire from the clips
- Disconnect the wiring harnesses
- Slide the wiring through the water shield
-
step 3 :Removing the Door Lock Actuator
- Peel off the water shield
- Slide the cables out of the water shield
- Disconnect the electrical connector
- Pop off the clip from the rod on the door lock actuator
- Remove the T30 Torx bolts from the actuator
- Unclip the cables from the clip
- Lift the actuator out
-
step 4 :Removing the Exterior Door Handle
- Remove the gray clip from the door handle
- Remove the rubber plug on the end of the door
- Loosen the T30 Torx captured bolt on the left side
- Remove the T30 Torx bolt on the right side
- Pop off the trim to the right of the exterior handle
- Pull out the door lock cylinder
- Pull the handle back toward the rear
- Remove the handle
- Pry off the grommets
- Press the clip
- Slide the backing of the handle toward the front
- Remove the backing
-
step 5 :Installing the Exterior Door Handle
- Press the white grommet into the backing
- Press the backing into the door
- Slide the backing toward the front of the vehicle
- Press in the grommets
- Slide the exterior handle in
- Push the handle forward
- Push in the door lock cylinder
- Press on the cap beside the handle
- Tighten the T30 Torx bolts to the handle
- Press on the rubber plug
-
step 6 :Installing the Water Shield
- Slide the wiring and cables through
- Press the shield to the door
- Press the wire into its clips
- Plug in the wiring harnesses
-
step 7 :Installing the Door Panel
- Clip the white door cable into the top of the door handle
- Clip the green door cable into the bottom of the door handle
- Feed the courtesy light electrical connector through the door panel
- Connect the electrical connector to the door panel
- Clip the door handle into the door panel
- Lift the door panel onto the door
- Line up the door panel, using the locating pins
- Push in the door panel clips
- Insert the Phillips screw inside the door handle
- Clip the trim into the door handle
- Insert the two Phillips screws into the grab handle
- Clip the trim onto the grab handle
- Clip the trim piece onto the mirror base
- Push the plastic clip into the front of the door panel
- Connect the courtesy light electrical connector
- Push the courtesy light into the door panel
Tools needed
-
Side Cutters
Gloves
Socket Extensions
Flat Blade Screwdriver
Phillips Head Screwdriver
T30 Driver
Wire Ties
10mm Socket
Ratchet
Trim Tool Set
T25 Torx Driver
Hi, I’m Mike from 1A Auto. We’ve been selling auto parts for over 30 years!
To remove this, take a plastic prying tool. You can get this from 1AAuto.com. Just kind of push in on this side. It'll pop it out. There's a clip there that you're trying to pop it out of. Push in the tab. We're going to pop off the piece behind the mirror. You're going to get your fingers in there or use a plastic trim tool. It just pops to the two clips. To pop off this grab handle here, use a plastic trim tool. Pry it up. Pop it out. Put that aside. Pull the door handle open. Use the plastic prying tool to get in here. Pop that out.
Use the plastic prying too to get this clip out. If you can get the middle up, that helps unlock it, but sometimes when they're flush like that, it's difficult. This one snapped, but it'll still work. I'm going to use a Phillips head screwdriver to remove the one that’s behind the door handle. There's one in here and one deep in here.
With these screws removed, the door panel is clipped around this edge and then it's going to lift off of the door frame. So I'm going to reach under here and pull it out. Do the same on this side. It’s free. Just be careful. The screws are in there so one just fell out. Put that aside. You disconnect the door handles. That's the door lock. Pop this out. Pull it straight up. Same thing with this one. Pop it out. This whole piece actually came with it. That's fine. I guess that can stay in there. Disconnect the main harness from the door panel. It's clipped up here. There's a lock that's on the other side. Push it in. Pull it down. Door panel will come off. Pop this out. Pull it right off. Put that aside.
To get to this door lock actuator, we have to remove the vapor barrier that's in the door. It's stuck on with this Butyl tape. It's really sticky. You probably want to put gloves on because it just gets everywhere but you can peel it away and take a razor blade and just sort of cut it. This stuff is so sticky that if you're careful you should be able to stick this back up and reuse the vapor barrier. Try not to pull too hard or stretch it.
If you just need to access the door lock actuator or the inside of the outer door lock handle, you could just peel it down halfway. Since we're going to also access other stuff inside this door I'm going to take the vapor barrier totally off. This wire harness for the door goes through the vapor barrier. It's taped to this mount so you could either cut it and retape it so it's actually easier just to untape it and pull it off. Need to unplug this from here. Use the plastic trim tool to reach in there, push the lock in and just kind of pull it out.
Disconnect the speaker plug and push the lock in, up. You can either cut this and rezip-tie it or try to push it out with a trim tool. I'll try to push it out. Pop that out. Unplug the mirror connector. Now I can keep taking this off, slide the harness up and through. Keep removing the vapor barrier. You can reuse this, just be careful with it. Go lay it down sticky side up.
All right. Inside the door handle, there's a gray clip here. You can see it if you go up this way. So inside the door panel is a gray clip here on the control rod. When this actuates it moves. This is what happens when you pull the door handle. This is what unlocks the door. Just going to reach up with my finger and pop that off. Pull the prop rod straight out. All right, so it's in there pretty well. I'm just going to slide up our little trim tool and just kind of just gently pry on it to pop it out. Just like that. And it's got a ball into it right there, and that's what made it hard to come out, so you just have to get it over that, and then we're all set. To remove the outer door handle, pop this rubber plug out. It looks like you can do this without having the actuator out. Reach in here.
This is a T30 Torx. We're going to loosen this up with a captured bolt so it won't fall. Need to come in here and need to remove that T30 Torx right here. So with this screw loose back here, we should be able to use a plastic prying tool to pop this off the tabs. Pull the handle out. Lift it forward so it lifted off of the tab here and the tab here. Then this can come out. There's our lock cylinder. To get the main part of the handle out, I push it toward the back of the car. Just slide it right out.
To remove the holder that's behind here, just going to pop these little weather seals out from the side. Some little tabs. This has got a little tab here. Push it down. Push this one out. Slide that forward. Got to hold onto it. Reach inside the door. Pull this out. That's our whole door handle mechanism, so the screw in here is captured so it can be dropped while you're trying to install it. This little threaded insert that the screw goes through. It actually goes, the wider part goes on the other side of the sheet metal that you can take this out. It just kind of wiggles out of the plastic. Hold that aside.
Now we're going to put this through the door panel to install it. Get this lined up. Pop that tab in just like that. I'm going to hold it from the back side and take our threaded insert and kind of do a hex key to it. Push it in. That holds it in place.
To reinstall these rubber gaskets, they've got little tabs on them we're going to slide behind the sheet metal. Just clip them into place. Same thing for this one. It goes this way. Take our door handle and feed it in the opening kind of sideways like that. That's going to slide into there to put it flat like that and then push it forward. I'm going to take our door lock cylinder, and we're just going to place it in like here. Our door latch is not installed yet, but you just want to make sure that these four prongs slide into the door lock actuator.
I can show you what's happening. So this door lock actuator is sitting inside the door. As you slide this in, these are going in here, so when you turn the door lock with your key, that's what locking and unlocking the door. We're just going to take this and push it straight in and take our cover piece so it's got a clip there and a clip there, and there's some tabs there and a little tab there. We're going to catch it on this one first and push it this way. That's locked in place. This is a T-25 Torx. I'm going to use my extension to be able to hold on to it with my hand. This is going to keep the door lock cylinder from coming out. Feel it getting tight. Just going to snug it down a little bit.
I'm not going to over tighten it. Right there feels good. We need to install the other Torx bolt. It's going to go right here to hold the rest of the handle on. Try to do it without dropping it in the door. Feel it get tight. I'm just going to stop because I don't want to break it. I'm going to reinstall this little rubber gasket. Up in here is this gray clip. This rod needs to go into the gray clip. Push into place, and then we're going to pull this clip down and lock it so it can't come out. So, that rod connected. That's what works the door handle and pulls on the door lock actuator.
Before we put the vapor barrier back on, you can plug in the harness for the door lock actuator. Now you can reinstall the vapor barrier. This black stuff that looks like silicone is actually Butyl tape, it stays sticky for like a long time, so we can reuse this. If you need to, you can get more. It's called Butyl tape but this stuff should be fine. It's very, very sticky.
I'm going to feed these wires through here and sort of let that hang a little bit. There's another opening here that our harness needs to come through and to feel all of the connectors through here to actually make sure our window is unplugged because that needs to come through. Feed all these through. Just going to get this lined up in relatively the same spot and just push it down with your fingers. You'll feel it, it's really like gummy and sticky. Definitely want to be wearing gloves or else you'll have this all over your hands for a couple days.
This harness was taped here so you can either re-tape it or zip-tie it. I'm just going to plug it in first, plug our speaker in. This was clipped in up here for our mirror, I'm going to run that back into the clip, plug our mirror back in.
For our courtesy light, there's an opening in the bottom of the door panel for it. Just feed that through. A little trick to install this: get that started.
Take your door harness. Don't forget to plug that in or else nothing's going to work. It'll snap into place, so get this lined up. It's got a couple pins on the top and the bottom and those are going to push into these tabs.
Now we take the door panel and kind of push it up towards the window. Push it up towards the window and then down over. Sometimes you’ve got to push in on it. Just push down just like that. I can see the screw holes are lining up. I've got that where I want it. I'm just going to push in. That’s just going to capture all the clips.
I can reinstall the screws and install this small screw here behind the door handle. Our little trim piece has got all the clips. Pull this door handle out and get this front one captured first. Push that in place. There's two large self-tapping screws. One's going to go in the top. One's going to go in the bottom here in this door pull handle. Start with the top on. With two screws installed, we can clip this back into place.
Install our little triangle piece that goes near the mirror. These two clips are here. Push right into place. There's this little clip here. This one kind of broke, but we push it in there. If you don't have it, it's not a big deal. It doesn't do too much. The rest of the door panel is secure.
To reinstall the courtesy light and plug it back in. Push that up into place. The door panel's reinstalled.
Thanks for watching. Visit us at 1AAuto.com for quality auto parts, fast and free shipping, and the best customer service in the industry.
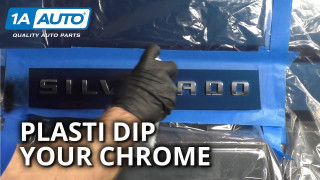
How to Cover Chrome Emblems or Badges on Your Truck with Plasti Dip
Say goodbye to chrome! Learn how to dip, or coat with special rubberized paint, any part of your vehicle you like!
