How to Replace Front Drivers Exterior Door Handle 2005-10 Chrysler 300
Created on: 2017-02-08
This video will show you how to remove the door panel and the exterior door handle. Follow the steps to DIY
-
step 1 :Removing the Door Panel
- Pry out the trim piece inside the door handle
- Remove the Phillips screw behind the handle
- Remove the tan circle clips by pressing in the center and prying out the clip
- Remove the four Phillips head screws on the bottom of the panel
- Pry out the panel below the door pull
- Pry out the door panel with a door panel clip tool or putty knife
- Release the door handle cable by popping the clip, rotating the handle, and popping the hook out
- Disconnect the window switch wiring harnesses
- Pop out the wire harness retainers
- Unplug the courtesy light and its wire retainers
- Lift the door panel up and off
-
step 2 :Removing the Exterior Door Handle
- Disconnect the connectors on the door control module
- Pry out the plastic clips on the module
- Pry off the wire harness retainers
- Pry off the adhesive on the weathershield
- Release the lock and latch rod clips
- Remove the two 8mm bolts from the door handle
- Remove the door lock cylinder
- Remove the door handle
-
step 3 :Installing the Door Handle
- Insert the door handle into the door, starting with the front
- Tighten the 8mm screw to the door handle
- Insert the door lock cylinder into the handle
- Tighten the 8mm bolt to the cylinder
- Connect the lock and latch rod clips
- Connect the wire harness retainers
- Press the module into the door
- Connect the connectors to the module
-
step 4 :Installing the Door Panel
- Connect the courtesy light
- Clip in the wire harness retainers
- Connect the window switch wiring harnesses
- Insert the latch rod into the door handle
- Slide the clip over the latch rod
- Lift the panel up over the door lock
- Press the panel into place
- Press the clips into the door panel
- Tighten the four Phillips screws to the bottom of the panel
- Tighten the Phillips screws beneath the door pull
- Tighten the Phillips screw into the door handle
- Press on the trim buttons
Tools needed
-
Socket Extensions
Phillips Head Screwdriver
8mm Socket
Ratchet
Trim Tool Set
Utility Knife
Pick
Hi, I'm Mike from 1AAuto. We've been selling auto parts for over 30 years! We're dedicated to delivering quality auto parts, expert customer service, and fast and free shipping, all backed by our 100% satisfaction guarantee. So visit us at 1AAuto.com, your trusted source for quality auto parts.
In this video we're going to be working with our 2006 Chrysler 300. We're going to show you how to remove and replace your vehicle's exterior door handle on the driver's side. This procedure will be very similar on the front passenger door, with the exception of there being no lock cylinder to remove.
If you like this video, please click Subscribe. We have a ton more information on this and many other vehicles. If you need this part for your car, they're available in a variety of colors and options in the link down in the description.
Here are the items you'll need for this repair: trim removal tool, hooked pick, Phillips screwdriver, utility knife, 8mm socket, ratchet, socket extension
Normally, there would be a little panel here that's broken off and missing from our vehicle. You would want to take a hook pick, put it in there, and just pop it down. Once that's out of the way, you can use a Phillips head screwdriver to remove the screw and the handle. Now, unless you're replacing the mirror, you'll only have to remove the three color matched clips: one here and two at the back of the panel. The black clips can stay in place since this piece of trim is all on its own.
To remove these clips, push the center in one click, and you can see there's a small hole in there. I find the easiest way to remove these is get a hooked pick, grab that, and pull it out. Repeat this process for the other two clips. And then three Phillips head screws along the bottom, as well as one above the side here in the front. We'll remove all of those with our Phillips head screwdriver. Below the door pull is another panel.
We'll have to pop down. Behind that panel is another Phillips head screw that we'll have to remove with our screwdriver. Grab the bottom of the panel, pop it out, release the door handle cable here by popping this clip off to the side rotating it and lifting the hook out. You should be able to lay it back enough to remove the connectors on the master window switch. And we'll want to pop out all the retainers, the wire harness down here. Unplug the courtesy light at the bottom of the panel as well. Again, this is another great place that our trim tools come in handy. Just reach it under there and pop them out, and set your panel off to the side.
Disconnect the electrical connectors on the door control module. Then we'll need to use our trim tool to pop out the plastic clips for it. Use your trim tool to pop off the wire harness retainers. We have one there and one down here. Now, the adhesive on this weatherstrip is pretty tough, so you might want a razor blade to help score and separate it so you don't tear the weather shielding itself. Once you've removed all of your adhesive, you can peel off your interior door shielding. Go ahead and carefully pull that out of the way, being sure to move it over the lock rods, door handle, and all of the wiring harness.
Now, it's going to be a little difficult to see, but reaching through this opening in the door you should be able to locate the clips on your latch rod and your lock rod on the driver's door. The passenger's door won't have this lock rod on it. Here, you can see this little purple clip. Now, all I'm going to do is snap it back. You see there? Flip it up out of the way, and pull the rod back. We'll do the same thing with the latch rod, however this one we'll push toward the outside of the door. Rotate away before pulling that one out, as well. We'll now remove these two 8 mm bolts at the back of the handle on the driver's side. In this case it is on the lock assembly, but there should still be two screws there on the passenger's side. We're doing this with an 8 mm socket, ratchet, and a long extension. Now, when the last bolt comes out, your lock mechanism is going to come with it so make sure you keep those together and remove them from the vehicle. Now, the last bolt is a little tricky because it's behind the glass, but you can fit an 8 mm socket and ratchet in there if you're careful. Now, once you're at the very end of the threads, you want to finish removing the screw by hand and keep a hand on your outside door handle. You'll lift out and away, and pull back to remove the handle from the vehicle.
Here we have our old part that we removed from our vehicle and our new handle from 1AAuto.com. Now, this is a chrome option. You could buy a set of these and upgrade the look of the outside of your vehicle. We also have them available in a paint to match style where you could get this same color sprayed onto it to match the rest of your vehicle. However, regardless of finish, the door handles are going to operate in exactly the same way. You can see we have the same pivot on the ends and we have the same latch mechanism here, as well as the driver's door handle having provisions for the lock cylinder right here along with the screw holes.
Now, plastic door handles are prone to cracking and breaking, as well as having these little metal latch rods break off after lots of use. Sometimes it'll get cold and the plastic cracks too easily. You go to fight open a stuck door and it breaks off or shatters in your hand. Fortunately, these handles are fairly easy to replace and you can get a great quality replacement from 1A Auto that's going to go in direct fit just like your original equipment and fix you up right.
This can be a little tricky. You have to start with the front first and then pull the handle to help slide the rest through. Reinstall the 8mm screw on the front of the door handle. This is the tricky one behind the glass. We'll then tighten that down with our 8mm socket and ratchet. Reinstall the door lock cylinder. Start your 8 mm screw. Once you've started the screws, go ahead and tighten them down with your 8 mm socket, ratchet, and extension. Reinstall your latch rod. Be sure that the plastic latch is swung to the outside of the door. Slide the plastic latch back in and lock it against the latch rod. Reinstall the lock rod and snap the latch into place.
Reinstall the interior door weather shielding here over the latch rod and the door lock. Stick this corner in just to keep everything in place for now. Make sure the harness stays on the outside of it over here, as well as the harness for the door module. Install the driver's door module by reconnecting the connectors and pushing the plastic clips back into place. Reinstall the harness.
Reconnect the courtesy light. Pop those two harness connection back into their proper locations. Reconnect the power mirror switch.
I know there are two gray connectors with a lot of similar colored wires going to them, but the one for the mirror switch is slight smaller and has a lot more connections on it, so we'll plug that in all the way at the front of the panel closest to me. The little black connector goes in the top of the power window switch and the large gray connector goes at the far end of the power window switch. Reinstall the lock rod. Slide that clip back over. Lift up and slide over the door lock, line up your panel and snap all the clips back into place.
To reinstall these clips you'll have to push the tab back out and through. Place it back into its opening in the door panel. Pop the tab back in in the center. Repeat that process with the other two clips at the back of the door. Reinstall the three screw along the bottom. The one up here at the front of the door, one under this panel, and one behind the door handle with our Phillips head screwdriver. Remember to close those cover panels on the door if your vehicle still has them.
Thanks for watching. Visit us at 1AAuto.com for quality auto parts, fast and free shipping, and the best customer service in the industry.
Shop Products


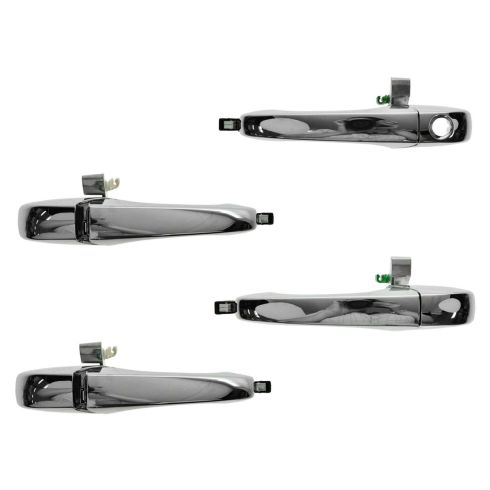
Dodge Magnum Chrysler 300 Front & Rear 4 Piece Exterior Door Handle Set TRQ DHA36686
Part Details:
- 4 Piece
- (1) Rear Exterior Door Handle
- (1) Front Exterior Door Handle
- (2) Exterior Door Handles
- Chrome

How To Replace Front Exterior Door Handle 1998-2011 Lincoln Town Car
How to repair, install, fix, change or replace a broken or snapped off exterior door handleon 98, 99, 00, 01, 02, 03, 04, 05, 06, 07, 08, 09, 10, and 11 Lincoln Town Car models.
