How to Replace Front Drivers CV Axle 2010-15 Toyota Prius
Created on: 2018-04-17
How to repair, install, fix, change or replace broken, worn, or vibrating CV axles on 11 Toyota Prius.
-
step 1 :Removing the Wheel and Axle Nut
- Pry off the center cap with a flat blade screwdriver
- Unstake the axle nut with a punch and hammer
- Loosen the axle nut with a 30mm 12-point socket
- Loosen the 21mm lug nuts with the vehicle on the ground
- Raise the vehicle with a floor jack
- Secure the vehicle on jack stands
- Remove the lug nuts
- Pull off the wheel
- Remove the axle nut
-
step 2 :Removing the Driver Side CV Axle
- Tap on the end of the axle with a dead blow hammer to free it
- Remove the 12mm bolt from the ABS line
- Pry the wire clip out from the strut
- Loosen the 22mm bolts from the strut
- Separate the knuckle from the strut
- Loosen the axle nut with a 30mm 12-point socket, ratchet, and breaker bar
- Tap the axle with a dead blow
- Remove the axle nut
- Remove the axle from the knuckle
- Remove the clips from the access tray
- Pry out the axle with a pry bar and hammer
- Remove the axle
-
step 3 :Installing the Driver Side CV Axle
- Insert the axle into place
- Tap the axle in with a dead blow hammer
- Insert the axle into the knuckle
- Lift the knuckle to the strut
- Tighten the 22mm bolts to the strut by hand
- Tighten the axle nut by hand
- Tighten the 22mm bolts to the strut with a socket and ratchet
- Torque the 22mm bolts to 177 foot-pounds
- Press the wire clip to the strut
- Connect the ABS sensor
- Tighten the 12mm bolt to the ABS sensor
- Replace the clips to the access panel
-
step 4 :Reattaching the Wheel
- Slide the wheel into place
- Start the lug nuts by hand
- Tighten the lug nuts preliminarily
- Lower the vehicle to the ground
- Tighten the lug nuts to 77 foot-pounds in a crossing or star pattern
- Tighten the axle nut to 159 foot-pounds
- Stake the axle nut with a punch and hammer
- Reattach the center cap
Tools needed
-
12mm Socket
Socket Extensions
Torque Wrench
Hammer
Rust Penetrant
Jack Stands
Brake Parts Cleaner
Trim Tool Set
21mm Socket
Flat Blade Screwdriver
Phillips Head Screwdriver
Center Punch
Ratchet
Floor Jack
30mm 12-Point Socket
1/2 Inch Breaker Bar
22mm Socket
Hi, I’m Mike from 1A Auto. We’ve been selling auto parts for over 30 years!
To remove the wheel cover, just take a small pry bar or a large flat-bladed screwdriver, get under the edge, and it'll pop right off, and put that aside. Before you remove the axle nut, you need to unstake it. There's no cauter pin, it's actually pinched in there so it can spin off. So you take a punch, you slide it into the opening, and the hammer. Use a 30mm 12-point socket to remove the axle nut and a long breaker bar. I like to do this with a vehicle on the ground because if you try to do this while the wheel and tire is off of it, you can rock the car off of the jack stands 'cause it does take a lot of torque to get these off, and you'd also have to have somebody holding the brake to keep the axle from spinning while you try to turn it off.
So by having the wheel and tire on while you do it, nothing's going to move. You're just going to loosen the nut. Make sure you get it pretty loose. Actually, you got to spray some rust penetrant in here. You want to give quite a few turns, because once it's in the air you want to make sure you can take it off by hand. With the vehicle on the ground, use a 21mm socket and a long breaker bar to loosen the lug nuts.
Raise and support your vehicle using a jack and jack stands. We're going to use our two-post lift. I'm going to use the socket to finish taking off the lug nuts, and remove your tire wheel and put it to the side. I'm going to hold on to the wheel, it's kind of loose, and I don't want it to fall as I take off the last lug nut. There it is. With the wheel and tire off, put it aside.
The axle nut off. So one thing I want to do before I disconnect the knuckle from the strut, this is all tight. I want to hit on the end of this axle with my dead blow just to make sure that it comes free. Sometimes they get bound up in these splines, a little bit of rust. So we use the rust penetrant. Don't worry about if this drips down the rotors. We'll clean it up at the very end with brake parts cleaner. Just going to hit on this. So that's moving. That's good. So it's going to come free.
When I go to pull this down, it will separate from the inside of the hub. I need to remove the 12mm bolt that's holding on the ABS line to the bracket and the rubber brake hose to the bracket. This way I can separate this knuckle and move it out and it will be taut. I'm also going to unclip the ABS line from the strut. Put a little bit of rust penetrant on here.
Going to use the 12mm ratcheting wrench, loosen it up. Get this out of here. Use the clip removal tool to pry this out. The bolts and the nut are both 22mm for both of these that are holding in the knuckle to the strut, so we're going to loosen up the nut first. Spray some rust penetrant on here. Use the 22mm socket and a long ratchet. Careful you don't smash this into the fender. Loosen this up. If the bolt starts to spin, you can counter hold it with a 22mm box wrench. This one's moving free. So we're going to do that. We're going to loosen up both, same way. I'm just going to spin these off.
You can push in on the knuckle a little bit and wiggle it around. The bolts will come right out. Same for both of them. There it is. This'll lower come out. So we carefully feed this out and the axle is already separating from the hub. I'm feeding it out from the back. We'll just put it aside, just like that. Bottom of this car has a large, plastic undertray. I'm going to try to remove just some of the clips, just so I can have a little better access to get a pry bar under here and pop that CV axle out.
Start with a flat-bladed screwdriver. Pop these down and get them started. Use a trip clip tool to pry them out. Slide the pry bar up between the frame rail and the transmission, and just sort of catch the edge. See the axle? I've got the pry bar under this little tiny edge. I'll have to show you just after I get this out. Got it on the edge of this, and I'm going to hit it with a ball peen hammer to try to knock it out. Bring the pry bar in, there's an edge right here on the edge of the axle. Pry against that. There it is.
You're going to want to have a drain pan here ready. Some transmission fluid might come out. Guide it out of the transmission. So it's loose. There it is. Pull it out of the transmission. There it is. Guide it out of the transmission. There's our CV axle. We're going to use the original axle, because this one is fine. We just wanted to show you how to take it out. Be careful not to damage the seal. Maneuver it in. Have to turn it a little bit to line up the splines. Then once it's lined up, take the dead blow and hit it home. Put it back into the knuckle. You may have to turn it. It should slide in. You can hook this back up—the knuckle to the strut. Get the bolts caught. Wiggle this around. Just need some brake parts cleaner to clean up any spilled transmission cleaner. I can check for leaks later. I'm just going to toss the nut on here for now so it doesn't come out.
Install the strut bolt nuts, spin those down. Snug them up, then come back and torque them. Torque these two with 177 ft-lbs. Once it clicks, you're all set. Do the same for both. If the bolt starts to turn on you, you can counterhold it. But these are in here pretty tight. Put the brake hose back into the bracket and the ABS wire will go here. Reinstall the bolt. Tighten the bolt back up. You don't want to overtighten it because it might break. So if you feel like it's tight, stop. Then push the plastic clip back in to the ABS wire. Snug the axle nut up.
Reinstall the wheel now. Lower the vehicle to the ground, torque this nut, and then we'll stake it. Start the lug nuts by hand. These do have a shoulder to them. The shoulder fits on the inside of the wheel, so the wheel is both hub-centric and lug-centric. If you're having trouble getting these to thread down, you might have to wobble the wheel around a bit. Reinstall any plastic clips you took down to get the shield off. Now torque the lug nuts in a cross pattern to 77 ft-lbs. Torque the axle nut to 159 ft-lbs. So now we just need to stake the axle nut. Take the punch and punch it into the little divot. Put the hubcap back on, line up the opening with the valve stem. Just push it into place.
Thanks for watching. Visit us at 1AAuto.com for quality auto parts, fast and free shipping, and the best customer service in the industry.
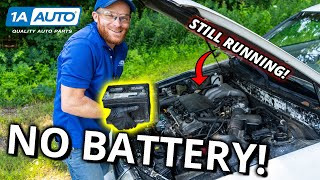
Can a Car or Truck Run with No Battery How Vehicle Alternator and Electrical System Works
Len demonstrates how the alternator both charges the battery, and provides the electrical needs of your car or truck while it's running.
