How to Replace Front Drivers CV Axle 2006-12 Toyota RAV4
Created on: 2019-09-16
How to repair, install, fix, change or replace broken, worn, or vibrating CV axleson 06, 07, 08, 09, 10, 11, 12 Toyota RAV4
-
A professional alignment is recommended after this repair
step 1 :Removing the Wheel
- Loosen the lug nuts with the vehicle on the ground
- Raise the vehicle with a floor jack
- Secure the vehicle on jack stands
- Remove the 21mm lug nuts
- Pull off the wheel
-
step 2 :Removing the Axle Nut
- Tap underneath the metal bended metal on the axle nut to loosen it
- Secure the hub with a pry bar
- Remove the axle nut with a 12-point 30mm socket and breaker bar
-
step 3 :Removing the CV Axle
- Remove the 17mm bolts from the control arm
- Separate the control arm from the knuckle
- Remove the CV axle from the knuckle
- Underneath the vehicle, remove the push-pins from the splash shield with a trim tool
- Remove the 10mm bolts from the splash shield
- Have a drain pan ready
- Tap the axle out with a pry bar and hammer
- Once loose, remove the axle
- Let the transmission fluid drain
-
step 4 :Installing the CV Axle
- Insert the CV axle into place
- Insert the CV axle into the knuckle
- Tighten the 17mm bolts to the control arm
- Torque the 17mm bolts to 68 foot-pounds
- Insert the splash shield into place
- Tighten the 10mm bolts to the splash shield
- Press the push-pins into the splash shield
-
step 5 :Installing the Axle Nut
- Secure the hub with a pry bar
- Tighten the axle nut to 159 foot-pounds of torque for 2.5L engine
- Tighten the axle nut to 215 foot-pounds of torque for 3.5L engine
-
step 6 :Reattaching the Wheel
- Slide the wheel into place
- Start the lug nuts by hand
- Tighten the lug nuts preliminarily
- Lower the vehicle partially to the ground
- Tighten the lug nuts to 76 foot-pounds in a crossing or star pattern
Tools needed
-
21mm Socket
Hammer
Torque Wrench
Pry Bar
17mm Socket
Jack Stands
Center Punch
Drain Pan
30mm 12-Point Socket
Floor Jack
1/2 Inch Breaker Bar
What's up, guys? I'm Andy from 1A Auto. In this video, I'm going to show you how to replace the left-front CV shaft on this 2010 Toyota RAV4. If you need parts for your vehicle, click the link in the description and head over to 1AAuto.com. Just keep in mind when you're doing the job like this, because we're removing suspension components, after the job's done, you're going to want to go to a local shop and have your alignment performed because you don't want to have premature tire wear.
I'm just going to take this wheel off. I'm going to use a 21-millimeter socket and an air gun. Take the wheel off. We want to take this nut off, but when you put the nut on, you're supposed to clean this over a little bit with a punch, or then that's going to prevent me from taking it off very easily. So, what I'm going to do is take a punch and a hammer. Let's try to tap right here. That piece looks like it broke a little bit, which is okay. That's okay. I should be able to take that nut off now.
Now, I'm going to use a 30-millimeter socket. It's got to be a 12-point socket and an air gun. If you don't have the air gun, you can use a breaker bar, and you can also use a pry bar to prevent the hub from spinning. Came right off. Then the axle's nice and loose here, which is good. If it wasn't, just take a punch and a hammer, just give it a tap. Just try to loosen it up a little bit. You don't have to force it all the way in. Just make sure it's loose. That'll make it easier for the next step when you pull the rest of it off.
All right. At this point, we want to separate the ball joint from the lower-control arm. I'm going to take these nuts out and then this bolt out. Now, you could do this a different way. You could take that ball joint nut off and separate the ball joint there at the knuckle. But sometimes that can be difficult to do without messing up the boot on the ball joint, and sometimes tools don't fit in there that great. So, it's a little bit easier to just take these bolts out.
So, I'm going to use a 17-millimeter socket and an air gun. Take a pry bar and put it underneath there. Get that separated. I can just push this out of the way. I should be able to pull the axle through. That's good like that. There's some pushpins over here, right here. Just use a trim tool. There should be one right there. Another one right here. There should be some over here and over here. So, take all those out.
Then there's a couple of screws in here. I'm going to use a 10-millimeter socket and a ratchet. Take those out. Ours only has two, but you should have four. There may also be some over here on the sides. Check for those, take those out. Pull it down. All right, so I'm going to take a pry bar and go behind the axle over here. It's a little area you can get behind. Make sure you have a drain bucket. I have a drain bucket down below to catch any fluid that comes out. Get in behind here, and I'll just give it a pry. Pry it out.
You can try to support the axle, so it doesn't fall, but it shouldn't. You should be able to just pry it out and not being a big deal. Sometimes, it's a little tricky to get to. All right. I'm just going to try and use a pry bar on the little slot on the CV shafts and just give it a tap with a hammer. Let's see if I can get it out that way. All right, so that works. We'll just move the drain bucket underneath a little better, and I can get behind this. Let me just pry it out. There we go. Sometimes, they come out easy, sometimes not so much, and just slide it up. Here it is.
All right, I'll just slide this CV shaft back in. Now, it's a good idea just to check that seal in there. It is recommended that you replace it, but if it looks okay, and it's not too dried up or anything, you can reuse it. CV shaft, line it up, and you might want to twist this while you try to push it in.
All right, make sure it locks in place, and you can try to wiggle it out a little bit. See if it comes out. If it doesn't come out, then you know it's locked, which ours is good. This point, I'm just going to take a little break parts cleaner, clean that area up where it was dripping. Now, this axle was out before, so under normal circumstances when you pull that axle, you're going to lose a lot more fluid than we did in this video, but you want to make sure when you're done to top off your transmission fluid.
All right, now, take the end of the axle and slide it into the knuckle of the bearing. Get that started. Slide the lower-ball joint in position. It's lined up. Put these two nuts on right there and there and right there, and then take the bolt, get that bolt started. Once those are all started, we can tighten these down and torque them.
I'm going to take my 17-millimeter socket and a torque wrench, and I'm going to torque these to 68 foot-pounds. All right, now, we're going to put the axle nut on. It's a good idea to replace this axle nut, but if you don't have one, just reuse the old one. All right. Now, we want to torque this. We're going to use a pry bar. Stick it in between the studs, the lug studs.
All right, so, I'm going to use the 30-millimeter socket, 12-point socket, and a torque wrench. Now, on this vehicle, I have a 2.5-liter engine, so I need to torque this axle nut to 159 foot-pounds. If I had the 3.5-liter engine, I would want to go to 215. So, 159. Here we go. That's good. I can remove the pry bar. All right. Now, I'm going to reinstall this panel underneath. Put those screws in. Put those push clips in any locations that you had them, and make sure you tighten these screws down.
Reinstall the wheel. Install the lug nuts. All right. I'm just going to snug these up. I am going to lower the vehicle down and torque this. Now, using a 21-millimeter socket and a torque wrench, I'm going to torque these lug nuts to 76 foot-pounds. I'm going to do this in a star pattern, so that the wheel gets tightened down evenly.
I'm just going to go around again, just double-check. Good to go.
Thanks for watching. Visit 1AAuto.com for quality auto parts shipped to your door, the place for DIY auto repair, and if you enjoyed this video, please click the Subscribe button.
Shop Products


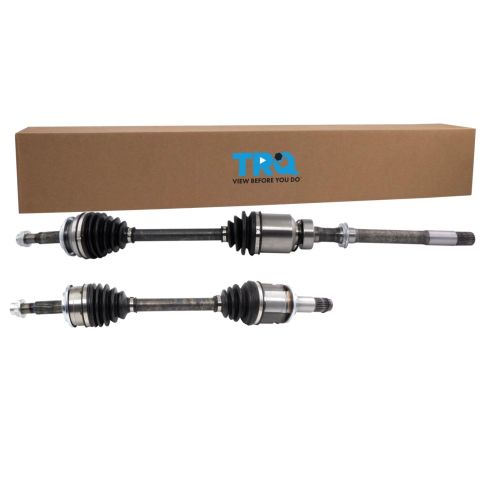
Toyota Rav4 Front Driver & Passenger Side 2 Piece CV Axle Assembly Set TRQ CSA70764
Part Details:
- 2 Piece
- (1) Front Driver Side CV Axle Assembly
- (1) Front Passenger Side CV Axle Assembly
How to Replace Passenger CV Axle 2010-15 Toyota Prius
How to repair, install, fix, change or replace broken, worn, or vibrating CV axles on 11 Toyota Prius
