How to Replace Front Door Weatherstrip Seal 2007-14 Chevy Suburban 1500
Created on: 2017-08-04
This video shows you how to replace the front door weather strip on your 07-14 Chevy Suburban. 1A Auto shows you how to do it yourself.
-
step 1 :Removing the Door Weatherstrip
- Pry up the foot panel
- Pry out the side dash cover
- Pry out the side trim beneath the dash
- Lift the seal off the body seam
- Peel the weatherstrip off
-
step 2 :Installing the Door Weatherstrip
- Start the weatherstrip into the old seam
- Work the weatherstrip around and press it in close to edge as you go
- Work the weatherstrip back and forth for tightness to remove any slack
- Press on the lower trim
- Press on the side dash trim
- Press on the foot panel
Hi, I'm Mike from 1A Auto. We've been selling auto parts for over 30 years. We're dedicated to delivering quality auto parts, expert customer service, fast and free shipping, all backed by our 100% satisfaction guarantee. Visit us at 1AAuto.com, your trusted source for quality auto parts.
We're going to replace our front door weatherstrip that is on the body. This one is ripped. Getting in and out of the vehicle, foot rubs on it, tore it. You can see it's one piece. It goes all the way around. That's where the seam is. Start with our plastic prying tool. If you don't have these, you can buy them from 1AAuto.com and pry up this trim piece. I'm going to remove this part of the dash, this cover, by pulling up on this and popping it out of the clips. You can see the weatherstrip seal goes behind this trim, and this trim sits in the channel. You need to remove this trim.
Behind this, there's two blind clips. We're going to take our plastic prying tool and just going to work at getting it out. This is the two clips here. The metal clip actually stayed in the body, which is fine. We can clip that back in afterwards. This trim out of the way, now we can lift the seal off of the body seam. You're just going to unpeel it.
Here is our door weatherstrip, our old one. You can see it's ripped and rusty. That's where someone's foot or leg was rubbing against it. There's metal inside of it that gives it shape. That's why this one sort of has like a square or rectangle shape because it's been in the vehicle for so long. It's formed to the body. The new strip from 1AAuto.com is going to come coiled up. That's okay as you put it back on the vehicle, it will form and follow these curves. That metal will bend, that's inside, will bend to fit this curve. As you can see, these are identical. They fit the same type of channel and you can just see the metal inside the new one. Here's your outer part.
Rubber is all nice and soft and new. This is torn up and worn out. This new piece is going to seal up in your door nice and tight. Keep out wind noise and look a whole heck of a lot better than this old one. Take our new weatherstrip, just kind of throw it around my neck so it's not hanging on the ground. This part goes to the outside. This part goes to the inside. I'm going to roughly find where the old seam was. It looks like it's about here. Push that down. Just going to keep working it all the way around the opening. It's going to go underneath the dash.
We've got some slack here so we just need to keep working it back and forth and making sure that the seal is tight in all the corners. You can see, on this car, you can just see a dirt ridge where the original was. I'm just trying to get this one as close as possible to pick up any extra slack. It's even closer this time so now I'm going to go in the other direction. Just keep working it in and try to make it tighter. As you can see, because we keep working it back and forth making sure it's really pushed into these corners and now matches up.
After you've installed it, make sure that the rubber is on the top side of this trim here. If you need to flip it over, you can take your plastic trim tool. You can get these from 1AAuto.com and just sort of gently work it up. This trim goes on the underside of the dash. It goes over this trim here. We're going to take our plastic trim tool and sort of run it over it. Make sure it's in there. We're going to reinstall our trim piece that goes around the hood opener. This metal clip stayed in the body, so I'm just going to clip it back into that. The metal clip looks like this and feed it over the hood latch. You might end up popping your hood open so make sure you close it afterwards. There's a lip on this plastic that's going to sit in the channel in the rubber strip.
Now there's finding where those clips were. Push it back into place. Take our dash cover. Put it back into the clips in the slots. Take our sill plate. It's got clips. Push that back down into place. Now we got our nice, perfect weatherstrip installed.
Thanks for watching. Visit us at 1AAuto.com for quality auto parts, fast and free shipping, and the best customer service in the industry.
Shop Products

Chevrolet GMC Cadillac Front Driver Side Door Mounted Door Weatherstrip Seal General Motors OEM 22766409
Part Details:
- Rubber
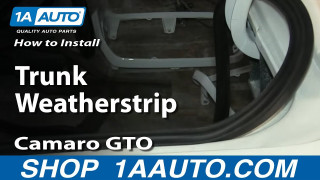
How To Replace Trunk Weatherstrip Pontiac Ventura
New Trunk Weatherstrip Seal from 1AAuto.com How to repair, install, fix, change or replace a weather strip that is falling down, coming apart, or the adhesive is failing on 66 Pontiac Ventura and many GM models from the 50s, 60s, and 70s, including the Chevelle, Camaro, GTO, Firebird, Catalina, Caprice, Skylark, Malibu, and more
