How to Replace Front Door Air Bag 1997-2006 BMW 325Xi
Created on: 2019-06-11
Watch this video to learn how you can replace the front door air bag on your 97-06 BMW 325 Xi and similar 3 Series models.
-
step 1 :Removing the Door Panel
- Pry up the mirror switch with a trim tool
- Disconnect the wiring harness
- Pry out the wood grain trim with a trim tool
- Pry out the trim covers underneath the arm rest with a trim tool
- Remove the five T20 Torx screws from the door panel
- Pry out around the door panel with a trim tool
- Lift the door panel up and off
- Disconnect the handle cable
- Unclip and disconnect the speaker wiring harnesses
-
step 2 :Removing the Front Door Airbag
- Disconnect the battery negative cable (the battery is located in the trunk) using a 10 mm wrench
- Remove the three 10 mm bolts securing the airbag to the door
- Disconnect the air bag electrical connector
- When setting the airbag module aside, make sure the deployment side is facing up
-
step 3 :Installing the Airbag
- Connect the airbag electrical connector
- Install the airbag in the door
- Tighten the three 10 mm bolts securing the airbag to the door
-
step 4 :Installing the Door Panel
- Clip on and connect the speaker wiring harnesses to the door panel
- Pass the mirror switch wiring harness through the panel
- Reconnect the door handle cable
- Lift the door panel up into place
- Tap in the door panel clips
- Tighten the five T20 Torx screws to the door panel
- Press on the trim clips underneath the arm rest
- Press on the wood grain trim
- Connect the switch wiring harness
- Press the mirror switch into the door panel
Tools needed
-
Wireless Scan Tool
Socket Extensions
Flat Blade Screwdriver
T20 Driver
10mm Wrench
10mm Socket
Ratchet
Magnet - Extendable
Trim Tool Set
What's up, guys? I'm Andy from 1A Auto. In this video I'm going to show you how to remove the front door airbag on this 2001 BMW 325xi. If you need parts for your vehicle, click the link in the description and head over to 1aauto.com.
To pull the switch out you want to use something really thin. You can use a trim tool or a really small pocket screwdriver. Get in here. Just be careful, you don't want to ruin the door panel. You can try to put your plastic trim tool behind it to try to prevent from damaging the panel. Get underneath here, get under there, and it'll slide right up. To disconnect the connector, just grab it and slide it up. Take a trim tool, we want to take this trim off right here and just slide it behind here. Gently pry behind here being careful. Pop this out. There's some clips that hold it on. This one popped out, but we can pop that back in.
And with my trim tool, just get underneath here. Take these little covers off, pop those off. Now I can take these screws out. There's five of them. I'm going to use a T20 extension and a ratchet. Can use a little magnet to get the screws out. Now I'm going to get a trim tool and we'll just pry behind the door panel. I'm just going to pry it out. You want to make sure you pry it out this way. And slide it off the lock rod. Be aware of those clips, that's why you want to slide it straight out. Now we can disconnect the handle right here. We'll just pry it up like that and slide it out, that's actually really easy. Take these wires off. Can use a trim tool. Get behind here. Pop these off. Disconnect the speakers, just use a small blade screwdriver. And there's no lock on that, but there is one on this one. You just squeeze it just like that.
And I'm actually going to disconnect the battery because I don't want to disconnect the airbag without the battery disconnected. In the trunk you're going to have a cover over here. Take that cover off and loosen up this 10 millimeter nut. Loosen up the battery terminal and disconnect it. Slide it out of the way so it's not going to arc out on the battery. Now after waiting a minute after disconnecting the battery, then I can take these bolts out. I'm going to use a 10-millimeter socket, extension, and a ratchet. Take that last bolt out and then can I slide the airbag module out. Disconnect the wire, slide it out of here. To disconnect the airbag right here use a straight blade tool. Just get under here, this little lock, loosen up that lock and then just gently pry this out and disconnect it. Now when you put this aside, you always want to put this down so that the explosive bag side is going up. You never want to put it down like that, otherwise if it does go off, it'll go flying.
Let's reconnect this airbag. Take the connector, slide it in position just like that. It'll lock it in place. Then push the little lock tab down. Slide that in position right there. Get the 10-millimeter and these bolts, get these started. Take a 10-millimeter socket, extension, and a ratchet, tighten them down. Make sure those are all tight. Now we want to reconnect the speaker wiring harness. Connect the big speaker then we'll connect the tweeter. Right there. This wiring harness is going to slide through here just like that. And then push this retainer right here. Make sure this wire comes through here just like that. And then when we connect up this rod, this lock latch cable, we want to make sure that this inside latch is in the closed position like that. And slide this in here, latch it in place, double check to make sure it's working properly, which it is. It'll slide onto the lock rod. Get everything lined up and just push it back on it.
Then we can reinstall the screws. Remember the long screw goes right here and then the short ones go in the other places. So a shorter screw goes right here. I'm using a T20 socket and a ratchet and extension. The smaller one goes right there and then also under here, under the armrest. All right, those are all tight. These little covers go on the bottom one. Just line those up, push them in. This cover goes on the top. Let's just pop this piece off here. Take a straight blade screwdriver, pop this off. That can go right there. Take this piece, line it up. Get that lined up. Oh, there is two little tabs on the front of this, so get those in first. Take the mirror switch. Let's connect the connector. It only goes on one way. And slide it in position. Push it straight down.
So after I was done with the repair, I had a airbag light on. The reason I had the airbag light on was because when I had to move the window up and down, the airbag was disconnected in the door. So what I can do is go through with my scan tool, go to BMW. I can do manually select or automatic with this scan tool. I'll just manually do it, 3 Series, E46, and I'm going to go through body and I want to scroll through and find the airbag, SRS. Select that. Click okay. Read fault codes. And when I read the fault codes there was no fault codes but I still had the airbag light on. So back out and I hit clear fault codes. Do you want to clear the fault codes? Click yes, and that's going to clear the codes. And now my light is out.
Now I just have to back out of this with the scan tool and then my airbag light is out, so that's good. So I could have avoided that by hooking up the air bag again and then reconnecting the battery, getting the window where I needed it to go, taking those screws, loosening them up, and then disconnecting the battery again. And then I would have been able to do that and then I could take the airbag out and I would have avoided having to use a scan tool to clear that.
Thanks for watching. Visit 1aauto.com, your place for DIY auto repairs, for great parts, great service, and more content.
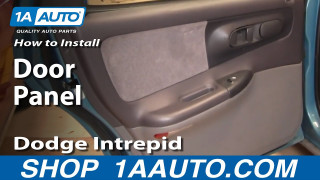
How to Remove Rear Door Panel 1993-97 Dodge Intrepid
How to remove or replace the interior door panel trim on your vehicle. You need to remove the door panel for a number of different repairs, for example door handles, window regulators, power window motors, door locks and more to the Dodge Intrepid, years 93, 94, 95, 96, and 97.
