How to Replace Front CV Axle Shaft 2007-14 Toyota FJ Cruiser
Created on: 2019-07-26
Watch this step by step video from 1A Auto to learn how to replace the front CV axle on your 07-14 Toyota FJ Cruiser!
-
step 1 :Removing the Wheel
- Raise the vehicle with minimal weight on the wheel
- Loosen the six 21 mm lug nuts
- Raise and support the vehicle
- Remove the six lug nuts
- Remove the wheel
-
step 2 :Removing the Brakes
- Pry against the brake pads to compress the brake pistons slightly
- Remove the brake line retaining clip
- Remove the 12 mm bolt to remove the brake line retaining bracket
- Remove the tie rod cotter pin
- Remove the 19 mm tie rod castle nut
- Hammer on the knuckle to loosen the tie rod and remove it
- Remove the two 17 mm caliper bolts
- Remove the brake caliper and hang or support it
- Remove the brake rotor
-
step 3 :Removing the Axle
- Remove the axle hub cap
- Remove the axle cotter pin
- Remove the axle nut retaining cap
- Remove the 36 mm axle nut
- Disconnect the ABS wire electrical connector
- Pry the ABS wire retaining clip on the wheel knuckle and remove the wire
- Remove the 18 mm nut to remove the sway bar link from the knuckle
- Remove the upper control arm cotter pin
- Remove the 19 mm upper control arm axle nut
- Remove the upper control arm from the knuckle
- Remove the two 19 mm lower ball joint bolts
- Remove the knuckle
- Tie off the axle around the strut to prevent it from falling
- Hammer or pry the axle out of the front differential
- Untie and remove the axle
-
step 4 :Installing the Axle
- Insert the axle into the differential
- Tap the axle in to seat it fully
- Install the knuckle onto the axle and align it with the lower ball joint bracket
- Install the two 19 mm lower ball joint bracket bolts
- Install the sway bar link into the knuckle
- Install the upper control arm into the knuckle
- Install the 19 mm upper control arm castle nut
- Install the 18 mm sway bar link nut
- Torque the 19 mm upper control arm castle nut to 81 ft-lb, and continue tightening if necessary to align the nut with the cotter pin hole
- Install the upper control arm cotter pin
- Install the axle nut
- Torque the axle nut to 173 ft-lb
- Install the axle nut retaining cap
- Install the axle cotter pin
- Apply gasket maker to the axle hub cap
- Install the axle hub cap
- Reconnect the ABS wire electrical connector and reseat the wire in the retaining clips
-
step 5 :Installing the Brakes
- Install the brake rotor onto the wheel studs
- Temporarily install a lug nut to hold the rotor in place
- Apply brake grease to the pad surfaces of the brake caliper, and the rims of the pistons
- Install the brake caliper
- Install the two 17 mm brake caliper bolts
- Torque the 17 mm caliper bolts to 91 ft-lb
- Reinstall the brake line retaining bracket
- Reinstall the 12 mm brake line retaining bracket bolt
- Reinstall the brake line retaining clip
- Remove the temporarily installed lug nut
- Reinstall the tie rod into the wheel knuckle
- Install the 19 mm tie rod castle nut
- Torque the 19 mm castle nut to 67 ft-lb, continue tightening to align the castle nut with the cotter pin hole if necessary
- Insert and peen the cotter pin
- Press the brake pedal to seat the brake pads
-
step 6 :Checking the Differential Fluid Level
- Remove the 10 mm hex differential fill plug
- Insert your finger or a pick into the fill hole to check the fluid level
- The fluid level should be just below the rim of the fill hole
- Top off the fluid with 80W-90 gear oil if necessary
- Reinstall the 10 mm hex fill plug
-
step 7 :Installing the Wheel
- Install the wheel onto the wheel studs
- Install the six lug nuts and tighten them by hand in a crossing pattern
- Lower the vehicle with minimal weight on the wheel
- Torque the 21 mm lug nuts to 85 ft-lb in a crossing pattern
Tools needed
-
12mm Socket
Socket Extensions
Torque Wrench
Hammer
Pry Bar
17mm Socket
Jack Stands
18mm Socket
19mm Socket
Pocket Screwdriver
21mm Socket
Side Cutters
24mm Wrench
Flat Blade Screwdriver
Brake Caliper Hanger
RTV
Ratchet
Floor Jack
1/2 Inch Breaker Bar
36mm Socket
Hey friends, it's Len here at 1A Auto. Today I'm working on a 2007 Toyota FJ Cruiser and I'm going to be replacing the left front axle. It's going to be a very easy job. I want to be the guy that shows you how to do it if you need this or any other part, you can always check us out at 1aauto.com. Thanks.
Okay, so what we're going to do first is we're going to take off these six lug nuts, 21 millimeter. You can use a ratchet and a socket if you want or your air gun. There we are. Get the wheel broken free. Drop this down. Wheel it out of the way. Okay, so now we're just going to try to push back the caliper a little bit. I'm just going to go like this. Just try to push back these pistons best I can. This is just to release the pads from the rotor. Cool. Okay. Rotor can move around freely. If we need to, we can push them back a little further in a minute. Now we're going to remove the caliper.
One of the first things we need to do is take off this clip right here. Generally, cutters work pretty good for this to grab onto it. Let me grab some in a second here. There we are. Now this line can move around. It's very important so when you take your caliper off, it can move around a little bit. I'm going to use a 12 millimeter up here on this bolt. That's going to remove this bracket so it can move around.
Get my socket off of there. There we are. Okay. The bracket can move around freely. I'm going to take these off right here. If it's easier and you wanted to, you could take off the outer tie rod end. I'm probably going to do that. That way there I can turn this and I can get to those bolts easier. Let's grab some cutters. There we are. Just wiggle this around. If you have a new cotter pin, you don't have to worry about saving this one. But if you don't, you're going to have to try to save it. We do have new ones. So I'm not super worried about it. This one doesn't look like it's coming out. So I'm just going to cut that off of there. Tie rod end nut is a 19 millimeter. There we are. Took that off of there, 19 millimeter. Just going to give the knuckle a couple bonks. I want to be careful not to damage the threads on the tie rod or hit the boot. It's super important you don't break your boot open. If you do, you'll have to replace the outer tie rod end.
All right, around this way. There we are. Now when we go to install this, we're going to have to make sure that we get that cotter pin out of there. Okay, because we want to put a new one in there. We'll set this aside. Now we can pivot this and we can do what we need to do. We're going to use a 17 millimeter to remove the two bolts for the caliper to the knuckle. Same thing to the other one. At this point, the caliper may come down. You want to make sure you hold onto it so it doesn't fall down and hang too far.
Bolt number two is the same as the first. Set it aside with the other one. Now I want to hang the caliper not by its flex hose obviously. So just grab whatever you've got, coat hanger or something that everybody would have. There you are. We can remove our front rotor. Okay, so now we're going to take off this cover right here. It's just a tin cover. So you don't want to completely destroy it. Along the hub and the cap itself, there's a little lip. There's kind of a little a gap. Hopefully you can try to get a pry bar or screwdriver or whatever you've got in there. You just kind of want to get in between, break it free. If this bends a little bit, that's okay because you can just bend it back if you have pliers or anything like that. Like I said, you just don't want to damage it too bad because it needs to create a good seal. Okay. Let's see if I can get something else in there. Looks like we're pretty close. Let's get this here.
There's our cover. It's not too damaged. I can try to straighten that out a little bit. When I go to reinstall this, I'm just going to use a little bit of RTV or gasket maker. It's just going to help keep moisture out of here and protect this nut area. I'll set the cap side. We're going to remove this cotter pin. I'm going to use my cutters. Again, if you have a new cotter pin, you can go ahead and cut it. If you don't, you need to try to save it because you do need to have the cotter pin in there. I have access to new cotter pins so I'm going to cut this. Just watch your eyes.
It's a little locking thing. Okay? Just slides over the nut there and then you line up the slots with the hole and put your cotter pin through. It makes it so this nut can't loosen up when you're driving down the road. Not that it should. You're going to have it torqued down anyway. It's just precautionary. We'll set this aside because we're going to reuse it. Now we're going to take off this nut. So I'm going to grab the socket we need and we'll move along. We're going to take off this nut right here. 36 millimeter. It's easiest with an air gun. If you don't have access to an air gun, what you're going to want to do is you're going to grab a bar. You're going to bring the vehicle closer to the ground and set this up against your lug studs just like this pretty much.
So when you go to loosen up this nut, your hub won't be able to turn. Okay? You can use your 36 with a long ratchet. Break it free. It'll come loose. With an air gun, you don't need to worry about that. Just hold this. Easy peasy. Okay. Now you want to try to push your axle in. This one feels like it moves a little bit. So we know we're in good shape on that. I'm going to go with a little bit of penetrate here. Let it do its job. It's going to hang out in there. Oh yeah. So that's moving freely. We're going to take off this outer tie rod end nut.
Bonk that out of there. Now we can turn this. Next what we want to do is we want to disconnect the ABS wire from the sensor itself. We're going to take it off of here, here. We'll get it off of here just so it's out of the way. All right, and we'll try to just move the ABS wire out of the way so we don't put any tugs on this because what we're going to need to do optimally is remove this knuckle so we can get the axle out of here. So what I'm going to do, I'm going to try to get my pocket screwdriver in here, right like this. Let's see if I can get that to do its thing. When I go in between right here where this white dot is, there's a little nub, like a squeezy nub. You can't grab with your thumb obviously because it's in there. So you need to use something small like this. Wedge it in. Give it just a little pry and it lifts up on that little lock right there. Okay? When that lifts away, you can just grab this, wiggle it.
Disconnect your ABS wire. You always take a peek. Make sure there's no funny colors in there, no reds, greens, blues, rust, dirt, water. That looks really great. You can move along. We'll start disconnecting these clips. Just use your pocket screwdriver still. Stick it in there. It should lift right up. Okay. Do the same thing to the other one right along the edge. Lifts right up. Okay. This one doesn't look like we have to do anything with it because it's very far out of the way.
So I'm really not worried about that. Now when we try to take the knuckle off of here, we don't have to worry about the ABS wire getting a tug and/or breaking because last thing you want to do is break your ABS wire or your ABS sensor. It's going to cost you a couple more bucks and who needs to spend more money? Let's do it right. That's out of the way. We're safe with that. We can move on to the next step. We're going to take off this sway bar link right here. Okay? To do that, we're going to hold right along here. You can use some locking pliers if you want or you can find the wrench that fits along it. Then you're going to take off this nut right here. We'll grab the tools and I'll show you how. So now I'm going to take off the sway bar link. This is 1A Auto sway bar link. I'm going to use a 24 millimeter on the link side and an 18 millimeter for the nut side. Remove that nut. We'll set this aside.
Just going to get this link out of here. Grab my pry bar. Okay, we're cruising. This cotter pin right here is going to have to come out. It's kind of a funny cotter pin though. On the backside that curls around, so right here, normally you'd have two straight pins that go straight through this. This one has one that goes through it and then the other one goes around the outside and it curves like this. So you want to grab that leg, pull it out and away, bring it down. Then you should be able to walk this out of here if you can't, with a small screwdriver just grab some cutters and then pull it out. So that's what it looks like. Just like I mentioned, it was through like this and there's a little hooky do, goes around the backside there. We're going to remove this nut and then we're going to put it back on a few threads and we're going to give the knuckle a couple bonks and try to break it free from the upper control arm.
I'm going to use my 19 millimeter to remove this nut. Safety glasses of course. There we are. We'll take it off just so I can show you. But then I'm going to put it back on, like I said, a few threads because now what I'm going to do is I'm going to bonk right here on the knuckle. I'm going be careful for my boot. I don't want to damage my boot. I'm just going to hit right here. Okay? Once this breaks free, it's going to want to drop down. That's the purpose for the nut being on there. If you don't have that and you just let this drop down, it can swing down. It'd hit you in the face. So, safety first. It's the number one concern here at 1A Auto. I'm just going to go ahead and hit right here. It broke free. Okay?
Pull down on it like that if you want. I'm going to slowly bring this down so can't hit me in the face. There we are. Cool. So this is pretty much ready to come out at this point. Okay? We just have two more bolts down at the bottom here that we're going to remove, one here and one here. Once we do that, the knuckle is going to be ready to separate from this bracket right here. We can draw it right out and then we'll take off the axle. So here we go. I'm going to use a 19 millimeter socket. That's what the bolt looks like. Okay? Set that aside. I'm going to hold the knuckle at this point.
Bolt number two, the exact same as the first. Now the knuckle is going to pull straight off just like this and we've removed our left front knuckle. So now I'm going to use something as simple as a small bungee cord here and I'm just going to go around the axle and the strut and that's just for safety's sake because what I'm going to do next is remove this axle and I'll be doing that, if I can get this thing on there. There we go, and I'll be doing that by trying to drive the axle out of the front differential. Once it breaks free, it has the possibility of coming off, hitting the ground. I'm going to be under there. So I don't want to get hurt. So I'm just going to put that under there and we're going to go ahead and remove this axle now. I'm going to use a large pry bar. I'm going to try to grab on this lift. I'm going to try to pry the axle out. When the axle comes out, it's going to go in this direction.
Let's see if I can get over here. Doesn't feel like it wants to go there either. Okay, so the axle isn't coming out that way, which is common. Sometimes it does. Sometimes it doesn't. It doesn't hurt to give it a try. Now I'm just going to come underneath it like this and I'm going to give my bar a couple of bonks and see if I can drive this out. Okay. Looks like it's starting to come out a little bit. So we're going in the right direction. Just got to get this up in there.
If you wanted to, you could try to take down your skid plate. Get a little bit of gear oil. As you remove this, there's going to be fluid that comes out from around the seal and the axle. It's going to come down. You want to make sure it goes into your collection bucket. Now I'm just going to pull the axle out of here or pry it, depends on what we need to do. There we are. So now we're going to take off our bungee cord or whatever you used to tie up your axle or maybe you didn't even use anything. That's up to you. It's your prerogative. I'm going to pull the axle out through here. Now we've removed our left run axle. Easy peasy. Okay, friends, a quick product comparison for you. Over here, we have our original axle out of our 2007 Toyota FJ Cruiser. We just removed it.
It was very easy. Over here, we have our brand new quality 1A Auto part. As you can tell, they're both the same length, which is important. If it looks like one's a little bit different, you just squeeze it in. They can expand and they can contract. Okay? Just like that. So if it looks like it's a little longer, it's okay. If it's a lot longer, you've got an issue. Okay? We got brand new boots, super important. A lot of times what happens is these get dry and crack. They start spraying grease all over the place. Once that happens, you get debris in there, you get a clicking noise every time you turn your wheel while you're driving. So everything's brand new here, essentially. Right along here, you've got your splined area. You got this little clip right here. That's what presses into the transmission and locks it in. That's why when we took out the old one, we had to drive it out. It just breaks it free from the little slot that's in there. This side, you got your splined area even comes with a brand new nut.
Another great thing about this axle, comes with a cotter pin and your little castle lock there, super important. All that said, I don't see any reason why this wouldn't be a quality part to install under the vehicle. So I'm going to go ahead and do it. If you need this or any other part, you can always check us out 1aauto.com. Thanks.
Okay, so now we're going to go ahead and install our axle. I'm just going to bring it over to the seal. Try to get it just past it. There we are. Shake the axle around a little bit. Okay. You might notice that really doesn't want to go in very easy, right? That's because at the end, it has a little lock clip. So I'm just going to go ahead and hold the axle. I'm going to give the end of bonk. I like to keep the nut on there a little bit and use a rubber mallet and that way there, I can drive it without actually hurting any of the threads. You definitely don't want to mess up your threads. Okay. Take a look at it. Looks like we're getting close. There we are. Okay. Just a couple of light slams like that. Easy peasy. Broke a sweat. It's okay. All right. We can move onto the next step. All right, so we'll get our knuckle. So now we're going to slide our axle into our knuckle. Bring the knuckle over the lower ball joint bracket.
Take our two bolts. Try putting one in this hole, one in this hole. I'm going to ahead and tighten this up with our 19 millimeter. Those are both tight. I'm just going to get this sway bar link up in here just like that and when we do this, we can use a pry bar. Go right in between one of the coils and the upper control arm and we can bring it down to where we need it. So I'm going to get my nut ready. You just need to get a few threads on it. There we are. Let's see. Get our sway bar link nut started here. Okay, now we're going to tighten these down. We'll get the torques back in. Just going to tighten this up. It's tight. You can grab the torque spec for that. We're going to tighten this down too. So we'll bottom this out with our 19. There we are. We'll grab the torque spec. We'll torque it down. So now we're going to torque the ball joint nut, 81 foot pounds with a 19 millimeter. There we are. That's torqued. Now we just want to look at it.
We can see where the hole in the ball joint is. Needs to line up with the next slot. So at this point we're going to need to tighten this a little bit more to get it so it lines up. Then I'm going to use my ratchet. So you can see the hole in the slot are lined up. Now we're going to replace that cotter pin. This little pin right here, same thing we removed. We're just going to slide it back over just like we did before. Then pull it over the ball joint so it clips into the slots. Can't fall out. It feels nice and tight. I'm just going to go ahead and put on the axle nut now. So I'm going to take my bar. I'm just going to go straight across the studs just like this. That's going to make it so the hub can't turn while I torque this down. I'm going to get my torque wrench and we're going to torque this down to 173 foot pounds with my 36 millimeter socket. So here we go. 173 foot pounds. There we are. Set it one more time. Torqued.
So now it's time to put on our new lock. This just slides over the nut. You line up the slot with the hole, put your new cotter pin through. Then you could choose which way you want to peen it. Some people like to make one of these gears go one way, one go the other. It really depends on what you want to do. It's your prerogative. I'll leave it up to you. Some people will bring it up around the front. Basically, as long as you bend them over and the cotter pin can't come out on its own and then the axle nut can't unlock on its own, you're doing all right. Okay? That's never going to come off on its own. We're all set. Now we'll grab our cap. Okay, so I'm just going to use a little bit of gasket maker here. Just go right along the edge.
There we are. We're going to put this right into the hub just like that. I'm going to grab my rubber mallet. Give it a couple of bonks. There we are. Let's make sure it's in. Okay. No moisture is going to get in there. Now if you want to clean it up, go ahead and clean it up. Just go around it. Do the best you can. It doesn't have to be anything too pretty.
Well, it's your vehicle. Maybe you do want it to look pretty. It's going to be hidden though, FYI. Get that out of there. Cool. I'd say that looks decent. It's getting worse the more I touch it. So I'm just going to stop. We're just going to plug in our ABS wire. Listen for it. Clip. Give it a nice little tug. Feels good. It goes right in these little plastic brackets here. I'm going to push that down in one second here. I'll just get this on there. Okay. We'll just clip these in. ABS wire can't go anywhere. It's not going to get caught on the axle anywhere. You should be good to go. Now we'll put on a little bit of copper Never Seize. Perfect. We'll grab our rotor and we can move along. All right, we've got our rotor. Just put it right on here.
I'm just going to grab a lug nut. I'm going to try to put this on as far as I can. I want this to make sure or this is going to help me make sure that the rotor can't move around on the hub. The more it moves around, the more chances you have of rust flakes falling in between the rotor and the hub, which will cause a brake pulsation down the line. We'll just kind of give it a little spin like this. I don't hear any brake grinding. The backing plate isn't hitting up against there. It's very common for it to happen. Maybe you are moving something around. You tweak the backing plate a little bit. This one sounds good. Carefully put it back over.
Grab your mounting bolts. If you want to use a little thread locker on these, you can. It's your prerogative. For the purpose of this video, I'm not going to worry about it. We're just going to turn these all the way in and then we'll torque them down. So now we're going to torque down these two bolts to 91 foot pounds using a 17 millimeter. I'm just going to turn that. Okay, I'll check them again real quick. We can set our bracket back up. Get the hole for the bolt and then the hole for the ear on the bracket. I'm just going to go like this. Going to turn it so there's less pressure. That's going to come up here. A bolt like this, you definitely don't need to use thread locker on it. Might actually be better to use a little bit of Never Seize if you have access to some. But I'm not going to worry about it for the purpose of this video. I'm going to use my 12 millimeter, tighten this up. Okay.
Take our line, try to bring it down so we can see the groove. We're going to use this clip. This is going to go through with the little flippy ear facing our thumb. I'll just try to bring it in. Sometimes getting these in is pretty difficult. I'm just going to loosen this up again real quick a little bit. Maybe that'll let us get some more movement out of this once it's set up where we need it. As soon as I let go, it goes back. Okay. Now, I'm just going to bonk that in. That's what I had in my hand. So small hammer would work for this. Okay. Snug this back up. Tight. Okay. Tight, tight. All that's tight. Okay. We've get this right here.
When we took it apart, we had to break the cotter pin. So I'm just going to need to drill that out real quick. So I'll do that. Okay. So we got the hole through that. Easy peasy. Now we'll just clean it off and we can tighten it down and put a brand new cotter pin in there. So now we're just going to take the tie rod nut. We're going to bottom it out and then we'll go ahead and torque it down using my 19 millimeter. We'll go with the assumption that it doesn't want to tighten down. It's just spinning inside the the knuckle there. Something you can do, if you have access to a long pry bar, just apply upward pressure. Be careful of course for your axle, wherever you need to go that you're not pressing on your axle. Just going to keep moving around until I find a nice safe spot. That'll be all right I guess. I'm just going to apply upward pressure. There we are.
Now we're going to go ahead and torque this down and then we're going to have to bring it continually clockwise until we get to the closest slot that lines us up with our locking point. Okay. We're going to torque this down to 67 foot pounds. Okay, that's torqued. Now it's important to pay attention to, like I said before, where the holes are. There's a hole right here. But it kind of lines up with the castle nut, the castle part of the castle nut. So we need to bring it a little further until it lines up. So I'm just going to use my ratchet. I'm just going to go as far as I feel like I need to here. A little bit more.
There we are. Slide that right through. It's your prerogative how you want to set this. Some people go side to side, one ear to one side, one ear to the other side. Some people go over the top. As long as it's bent and it can't come out on its own, you're doing all right. So you do you, booboo. Get that on there. That cotter pin can and go nowhere. There is no way that this nut's going to be able to loosen up on its own and the tie rod won't be able to come off causing the wheel to go out of control. So we're tight, tight. Everything's tight coming around here. Perfect, clear to move on to the next step. Okay, so we've got our caliper on there. Now all you're going to do is you're going to get up inside the vehicle. Well, actually you want to make sure that your brake fluid's topped off of course.
I mean, that's just generally speaking and then get inside the vehicle and then just pump up the brake until the brake pedal's nice and firm and then you should be clear to go for a road test. Okay, so now that you've finished that service, you want to make sure that you top off the fluid. To do that, you'd want to take out the fill plug or the check plug. Once that's out, you can stick your gloved finger or if you have a little pick, you can put it inside and just see if you feel a little bit of fluid right there. If you don't feel any fluid, just go ahead and top it off. You're going to use a little bit of 80W-90 weight GL-5, very simple. Once it's topped off, you just want to make sure that you put the plug back in, snug it up so it's nice and tight and off you go. Okay, so now we're going to get the wheel up on here. I've got a couple of lug nuts in my hand.
I'm going to take the wheel, put it up against my leg and I'm going to lift with my leg/ab muscles just like that. I'm going to try not to use my back. I don't want to hurt my back. Go like this. Lift this up. There we are. I'm holding the wheel. Get one lug nut started on there. Number two started on there. Now I can release the wheel and I can grab the rest of my lug nuts. We have all of our lug nuts on. All right? We still have to snug them up. To snug them up, what we want to do is go in a snowflake pattern on this. Generally speaking, go criss cross. But this is more like a snowflake. So you go boom, boom, boom, boom, boom, boom. Okay? Never go around in a circle. You go ahead and go around in a circle, you tighten it up along this way, pulls it in, right? You get over to this side, you think you have a tight. You might even torque it down and it's still cocked off to the side a little bit.
You go ahead and hit a bump, boom. Next thing you know, your wheel's ready to fall off. Okay, so just go ahead. Go criss cross, start pattern, whatever you want to call it. I'm just going to bottom it out and then we're going to torque them down after. We're going to go ahead and torque down the wheel now to 85 foot pounds with our 21 millimeter socket. We're going to continue in our snowflake pattern or crisis cross, whatever you want to call it. Start here. Go to the opposite side of the wheel. There we are. We know they're all torqued. If you want to hit him again, hit him again. Small price to pay for a little bit of safety. There we are. Easy peasy.
Thanks for watching. Visit 1aauto.com for quality auto parts shipped to your door, the place for DIY auto repair and if you enjoyed this video, please click the subscribe button.
Shop Products


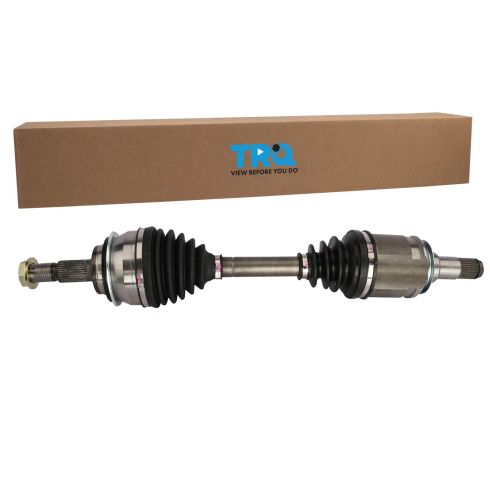
Toyota Lexus Front CV Axle Assembly TRQ CSA82161
Part Details:
- 30
- 25.47 in
- 30
- Male
- 647 mm
- Standard Replacement
- No
- Yes
- 1.38 in
- 35 mm
- M28x1.5
- Male
- Neoprene
- Neoprene
How to Replace Passenger CV Axle 2010-15 Toyota Prius
How to repair, install, fix, change or replace broken, worn, or vibrating CV axles on 11 Toyota Prius
