How To Replace Front CV Axle 2001-10 GMC Sierra 2500 HD
Created on: 2011-06-23
Watch this video to learn how to replace your CV axle. The experts at 1A Auto show you how to replace the axle on your 03-07 Chevy Silverado and Suburban or GMC Sierra.
-
step 1 :Remove the wheels
- Use a 21 mm socket to loosen the plastic lug nut covers and hub cap.
- Loosen the lug nuts on the ground, raise and secure the vehicle and remove the lug nuts completely.
- Remove the wheel.
-
step 2 :Remove the center dust cap.
- Use a hammer and chisel or screwdriver to pry off the center dust cap.
-
step 3 :Remove the center hub nut
- Put the wheel back on, lower the truck
- Remove the center hub nut with a socket and breaker bar.
- Raise and secure the vehicle again.
-
step 4 :Remove the axle
- Give the axle a good smack with a hammer to loosen it out of the hub.
- Use a socket, ratchet and extension to unbolt the axle.
- Use a bar or screwdriver to keep the hub from turning.
- Pull out the axle.
- This may take some force and finesse.
- Use a 9/16 wrench to remove the stabilizer link out of your way.
-
step 5 :Install the new axle
- Put the new axle in place.
- Bolt it back in, torqueing them to 60 ft lbs.
- Install your stabilizer link with your 9/16 wrench.
- Replace the washer and hub nut, but do not tighten too much.
- Put the wheel back on and lower the vehicle.
- Torque the hub nut to 155 ft lbs
- Your lug nuts should be torqued to 120 ft lbs.
- Replace the dust shield.
- Replace the hub cap and lug nut covers.
Tools needed
-
Socket Extensions
Torque Wrench
15mm Socket
Jack Stands
32mm Socket
Flat Blade Screwdriver
34mm Socket
9/16 Inch Wrench
Lug Wrench
Ratchet
Floor Jack
1/2 Inch Breaker Bar
22mm Socket
This video is brought to you by 1AAuto.com your source for quality replacement parts and the best service on the internet.
Hi. I'm Mike Green. I am one of the owners of 1A AUTO. I want to help you save time and money repairing and maintaining your vehicle. I am going to use my 20 plus years experience restoring and repairing cars and trucks like this to show you the correct way to install parts from 1AAUTO.com. The right parts installed correctly that is going to save you time and money. Thank you and enjoy the video.
In this video we are going to show you how to replace the front axle on this 2002 GMC Sierra. It is pretty much the same as any Silverado Sierra and Suburban 2500. Tools you will need are 15mm, 22mm, and 35mm sockets, ratchet, breaker bar or pipe for some extra leverage, two inch extension to avoid damaging your CV boots, jack and jack stands and a hammer.
Start up by using a 21 mm socket and just loosening the plastic retainers and taking off the hubcap if you have the style wheels. You want to raise and secure the vehicle. If you are not working with air tools like I am, then loosen the lug nuts while the wheel is on the ground then raise it with a jack, support it with a jack stand and remove the lug nuts the rest of the way and remove the tire.
You want to remove the center dust cap. I started by using a smaller screwdriver and then using a larger screwdriver just working it in at kind of the four corners and opposite sides prying it out and eventually it came off. Now you want to remove the center hub nut. I have a benefit of air tools. If you don't have air tools you want to actually do this. You will probably put the wheel back on, put the truck back down on the ground and remove the hub nut with a big socket and breaker bar. Take a good size hammer. We are replacing the axle so we are not really that worried about it so you can just hit this right out. Basically you can give it one good wrap and just watch the axle in relation to the hub and if it moves then it is all broken free and it moved so this should come right out.
Next you want to unbolt the axle right here. Okay, 15mm socket, you wanted a small extension and then your ratchet. Your extension just keeps it away from the boot which is important when you put it back together. You don't want to ruin that boot. I am just going to take a screwdriver right here and that is how I am going to hold my wheel.
I am going to get some serious high speed here as I loosen up the bolts and remove them all. Now you want to take your axle and put it that way. Okay. Now, okay before you can get all the way out. We'll get a 9/16th wrench and take out this stabilizer link and get the axle right out. Okay. New axle from 1A Auto this is with a new locking nut and put it up in just how you took it on out. Just be careful not to damage these rubber boots at all and work it into your hub here. Push it directly. I am just going to take this and push it right up in there. All the way up.
Okay, really speed it up here. I start each one of the bolts first and then I just kind of preliminarily tighten them with my ratchet and then the next step is going to be to torque them up. I draw all my bolts in and they are tightened preliminarily. Use a torque wrench and I am going to torque these bolts to 60 foot-pounds and use my screwdriver again to hold. Let's use chalk to mark it so I know and then I like to go to the opposite one and pull this around. Okay so I just go to the opposite one and like I said I use a piece of chalk just to mark each one so I know it has been torqued and then I will spin it, and then you torque one then kind of torque the opposite one until you have got them all done.
Okay and kind of continuing the working at fast pace just put the stabilizer link back in. Just make sure you put it all back together with the sleeve in the middle and then when you tighten it up, I usually tighten up so there is about a half an inch of threads at the top showing and that is good enough and tight enough for the suspension. Okay so I am going to put the washer on and hub nut, okay. The hub nut that it came with is actually a 36mm and I don't have a socket that big so I am going to have to reuse my whole one.
Now what I am doing here is I am just tightening it preliminarily with the impact wrench. I am not tightening it all the way up yet. I want to torque it when it is on the ground. Okay, we will go back to speeding up here as we just put the tire on. I'm going to put the lug nuts on all by hand first and then again use our impact wrench just to tighten them preliminarily like the center nut. We are going to torque them when the vehicle is on the ground. Now my center nut I'm torqueing to 155 foot-pounds. I am going to pull it tighter and I'm backing off and I am going to re-torque. I take my wheel lug nuts to 120 foot-pounds.
Okay and we'll speed up here and you can see that I kind of cross and do the opposite lug nuts and then afterwards I actually go around one by one and just make sure they are all torqued. Continuing on, we put that center cap, the dust shield back on. Just tap it on with a hammer. That will be fine. I said I used the screwdriver and just kind of tap it on the edges a little more, and then you use your 21mm socket and replace your center cap.
We hope this helps you out, brought to you by www.1AAuto.com, your source for quality replacement parts and the best service on the internet. Please feel free to call us toll free 888-844-3393. We are the company that is here for you on the internet and in person.
Shop Products


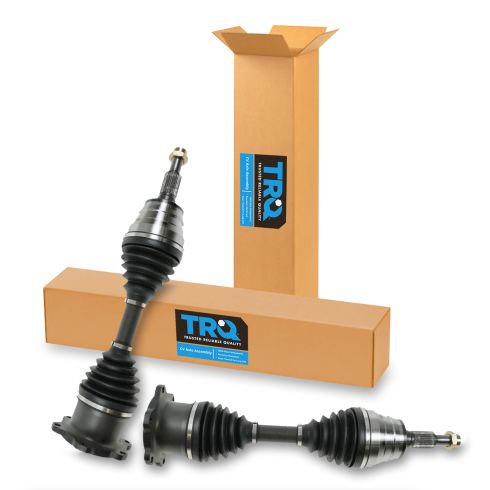
Chevrolet GMC Hummer Front Driver & Passenger Side 2 Piece CV Axle Assembly Set TRQ CSA82438
Part Details:
- 2 Piece
- (1) Front Driver Side CV Axle Assembly
- (1) Front Passenger Side CV Axle Assembly
How to Replace Front Driver Side CV Axle 2011-15 Chevy Cruze
This video shows you how to install a driver side CV axle on your 2011-15 Chevy Cruze.
