How To Replace Front Control Arm 1995-2005 Pontiac Sunfire
Created on: 2010-01-22
Learn how to replace the front control arm with ball joint on your 95-05 Pontiac Sunfire. This 1A Auto video will show you the process
-
step 1 :Remove the front tire and prepare
- Lubricate all the bolts with penetrating oil
- Loosen the lug nuts.
- Raise and secure the vehicle.
- Remove the lug nuts and the wheel.
-
step 2 :Remove the control arm
- Unclip the ABS sensor wiring.
- Remove the stabilizer link.
- Use a half inch wrench and an adjustable wrench to remove the stabilizer link.
- Remove the cotter pin on the ball joint bolt.
- Use an 18 mm wrench to remove the ball joint.
- Separate the ball joint and control arm from the steering knuckle.
- Remove the front control arm bolt and the rear control arm bolt.
- Support the strut with a floor jack.
- Use a hammer and a pry bar to work out the control arm.
-
step 3 :Install the new control arm.
- Work the new control arm into place.
- Use a pry bar and a hammer to get it lined up so you can bolt it in.
- Get the ball joint into the steering knuckle and lift the control arm up with the floor jack to line things up better.
-
step 4 :Use a wrench to tighten up the ball joint.
- Put a cotter pin in, making sure it doesn't interfere with the abs sensor ring.
-
step 5 :Finish reassembly
- Install the brace and stabilizer link.
- Clip your ABS sensor wiring back in.
- Put the wheel back on and hand tighten the lug nuts.
- Lower the vehicle and use a star pattern to torque the lug nuts in accordance with your vehicles specifications.
- Once everything is assembled, torque to 75-80 foot pounds.
- Double check your owners manual to double check the specifications on torqueing your suspension bolts for your specific vehicle.
Tools needed
-
Socket Extensions
Flat Blade Screwdriver
Torque Wrench
Tie Rod Fork
Tie Rod Puller
18mm Wrench
Jack Stands
Ratchet
Floor Jack
1/2 Inch Breaker Bar
Complete Metric Socket Set
We're going to be replacing the front control arms on a 97 Sunfire, same as a 95 to 05 Cavalier and Sunfire. You might think, whoa, control arms suspension, that's tough. Yeah, it is. It's involved, but it is something the do-it-yourselfer or backyard mechanic can do.
Here our control arm needs replacing. There's a lot of play in it. I'm actually not prying that very hard with that bar, and there's a lot of movement. Start any suspension project by lubricating all the bolts with penetrating oil very well. You can see I'm doing the front bolt, the rear mount bolt, and now the ball joint. While the penetrating oil does its work, remove the front tire.
Now that you have the tire clear, you can compare the new control arm with the existing control arm. Make sure the clip spots are in the right spot. The ball joint looks good. The next step is to remove the front brace to expose the front bolt. A helpful tool is this magnetic tray. It holds your bolts right in place. You can put it up anywhere underneath the car, and it holds everything right in place.
Our next step is to remove the three wire clips that hold the ABS wire in place. Remove the stabilizer link. You can see it's about a half inch bolt down there. That's the end I'm going to put the wrench on. Then I'm going to hold the top end with a wrench. You can see I'm using a towel. That's because it's a small wrench because of clearance, and that's just to pad my hand. Many times these links will break when you remove them, so you may want to order an extra set or order our kit that comes with the links.
The next step is to remove the Cotter pin that holds the bolt for the ball joint. The best way to do it is just break it off on the end that sticks through. Once you've broken it off, you can pound it through a little bit with a screwdriver or a lineup tool, and then pull it with a screwdriver or a pair of needle nose pliers on the other end. Then use an 18 mm wrench and get it started on the ball joint with the hammer, kind of a mock impact tool if you will. Once it's going once you get that loosened up, use a pickle fork and a hammer to separate the control arm and ball joint from the steering knuckle. You drive that in with quite a bit of force. Hammers and tools good times. Now remove the front control arm bolt, and then the rear control arm bolt.
Now at this point, here's where we end using the nice tools, and you start using crowbars and hammers. They'll be your best friends. You need to have the strut supported, and then you just yank on it with the crowbar to get the front out. Then you'll see I actually lift up the control arm more. Bang on the rear with the hammer, actually bang it in, and then kind of pull it up and out. Don't be nice here.
Now you have your new control arm, and you kind of reverse the process. Put the back in further than it goes, and then get the front on its way. Then you use a bar and a hammer. And again, you're not being nice. These are durable parts. You want to put the bar right onto the flange where the bolt goes through, and you're going to knock it in. Tap, tap, tap, or bang, bang, bang like in this case. You're using quite a bit of force. Then you can see that the collar is starting to get aligned. You're going to give it a few more hits. Get that aligned pretty well. Then we're going to put a screwdriver in there to just hold its place. Use a screwdriver or a lineup tool or whatever. It just allows it to move around a little bit to help us, but it makes sure it doesn't fall out of place.
Then in the back- actually, before we go to the back, we're going to line up the hole in the ball joint so it's front to back in the car. This will make it really easy to get the Cotter pin into the ball joint once you're at that step. It saves you some time. Now we're putting the ball joint up into the steering knuckle, and we're going to thread the bolt on there just to keep it together. Then after that, take a bar. And again, we're not being too nice here. We're going to pry out the rear mount. You can see I'm actually raising up the strut more to get the control arm in its natural location which is more horizontal. Then I'm giving a good pry with the pry bar, and it'll kind of slip out into place. Then you can see up into the hole just like the front. It starts to line up. I got a lineup tool, and I kind of got it in there. Now I'm just taking the bolt, pressing right up in there. I'm using an impact wrench at this step, but a regular wrench would do, and forcing it right up in there.
At this point, we're not tightening bolts. We're just getting them into place. You only want to tighten it up after you get the suspension all into the right place. Ideally, you want to put the car down on the ground on its wheels and tires, and then tighten up the bolts. So here I'm driving the front bolt in, and I'll get it into place some. Again, I'm not tightening it up here. I'm just getting it into place.
So now actually I'm using this jack to raise the suspension up. I'm pushing the ball joint in. I'm threading the bolt on more. Now I'm using a wrench to tighten up the ball joint. Basically I just got a regular wrench and I'm pulling as hard as I can. Then I'm looking back in the back to see if the holes are lined up on the bolt because what you'll need to do is put a Cotter pin through the bolt. You see I'm basically just pulling as hard as I can with that wrench. So it's not a big huge bar getting it incredibly tight, but it is tight with the smaller size wrench. Now you can see we lined up that hole before, and the Cotter pin goes right in. Grab it with needle nose pliers, bend it over. Up above the Cotter pin is the ABS sensor ring. Make sure when you bend the Cotter pin over it doesn't interfere with that sensor ring at all.
You can see now I've taken all the weight off of the lift. It's actually all on that bottle jack there. So now I can tighten up the suspension because everything's in place. Again, here I'm probably tightening to about 75 to 80 foot-pounds. That's usually what the specifications. We would recommend that you check your manual for the correct specifications. But again, suspension bolts in general anywhere from 70 to 100 foot-pounds. You can see I'm pulling with that bar, but not breaking tight.
Now I'm installing that front brace with the half inch bolts, tightening it up. Then the next step will be to put your stabilizer link back on. You can see I'm using a new stabilizer link because the old one was pretty rusty and a little thin. Just make sure you put all the bushings on correctly. Now I'm going to do a quick final check. Just go through it in my mind kind of. We tightened the front bolt. We tightened the rear bolt. We tightened the ball joint and got the Cotter pin in and tightened up the strut, and our clips are on the wire loom.
The last step in any suspension project is properly torqueing your wheel lug nuts. Never do this with the impact wrench. Always do it by hand. The impact wrench can tighten them too far, causing stress on your studs and causing your wheel to actually have a catastrophic failure and fall off.
We thank you. We hope this helps you out. Control arms is a project that can be done in your driveway and done by a do-it-yourselfer
Shop Products


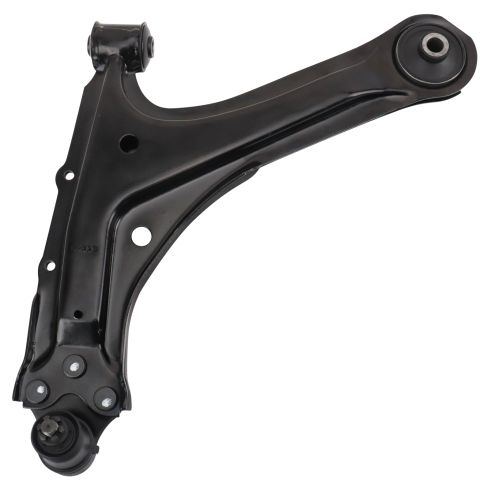
1995-05 Chevrolet Cavalier Pontiac Sunfire Front Driver Side Control Arm with Ball Joint TRQ PSA83884
Part Details:
- Bolt In
- No
- Yes
- No
- Steel
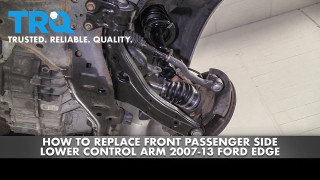
How to Replace Passenger Side Lower Control Arm 2007-14 Ford Edge
Control arms are a crucial part of the suspension system of your vehicle. They carry the load of the vehicle to the wheel and maintain its alignment. Control arms are large and strong. They contain rubber bushings for smoother rides at the cost of eventual wear. How to install a new quality TRQ passenger side lower control arm in your 2007-14 Ford Edge.
