How to Replace Front Brakes on Any Vehicle FULL Guide
Created on: 2016-12-07
How to repair, install, fix, change or replace your own worn, squeaky, fading old brakeson any vehicle.
-
step 1 :Removing the Wheel
- Pry off the center cap with a flat blade screwdriver
- Loosen the 21mm lug nuts with the vehicle on the ground
- Raise the vehicle with a floor jack
- Secure the vehicle on jack stands
- Remove the lug nuts
- Pull off the wheel
-
step 2 :Removing the Brake Pads
- Remove bolts from the brake caliper
- Pry the caliper from the pads
- Pull the caliper aside
- Pry the brake pads off with a flat blade screwdriver
- Remove the brake pad slides
- Clean the slides with a wire brush
- Apply anti-seize fluid or white grease to the slides
-
step 3 :Removing the Brake Rotor
- Remove bolts from the brake caliper bracket
- Pull off the brake caliper bracket
- Pull the rotor off
- If the rotor will not come off, thread the lug nuts and strike the hub area of the rotor with the ball end of a ball peen hammer
-
step 4 :Preparing the New Brake Pads and Rotors
- Clean the brake pad slides with a wire brush
- Apply grease to the caliper slides
- Apply grease to the brake pad tabs
- Clean the rotor with brake parts cleaner
-
step 5 :Installing the New Brake Rotor
- Slide the rotor on
- Thread on one lug nut to hold the rotor in place
- Put the bracket back into place
- Start the bolts by hand
- Torque the bolts
-
step 6 :Installing the New Brake Pads
- Put an old pad in the caliper
- Use a large C-clamp and the old pad to push the pistons back
- Install the new brake pads into the bracket
- Apply grease to the back of the pads
- Put the caliper on
- Thread bolts by hand
- Torque the caliper bolts
-
step 7 :Reattaching the Wheel
- Slide the wheel into place
- Start the lug nuts by hand
- Tighten the lug nuts preliminarily
- Lower the vehicle to the ground
- Torque the lug nuts in a crossing or star pattern
- Reattach the center cap
Tools needed
-
Large C-Clamp
Socket Extensions
Torque Wrench
Hammer
Jack Stands
Brake Parts Cleaner
Safety Glasses
Gloves
Flat Blade Screwdriver
Phillips Head Screwdriver
Anti-Seize Grease
Ratchet
Wire Brush
Floor Jack
Complete Metric Socket Set
Hi, I'm Mike from 1AAuto. We've been selling auto parts for over 30 years! We're dedicated to delivering quality auto parts, expert customer service, and fast and free shipping, all backed by our 100% satisfaction guarantee. So visit us at 1AAuto.com, your trusted source for quality auto parts.
In this video we're going to give you a basic overview of how to replace your front brake pads and rotors. While this vehicle may not be identical to yours, the steps and procedures are going to be very similar, if not the same, throughout a wide variety of vehicles. The only major differences will be the exact hardware used and the torque specs, which you can find through a wide variety of online resources.
If you like this video, please click subscribe. We have a ton more information on general repairs, as well as specific makes and models. And if you need parts for your vehicle, we have a ton of brake parts available from 1AAuto.com. You can follow the link, down in the description.
If your vehicle has a Center Cap, or full Hub Cap covering the lug nuts. Hub caps can be removed by grabbing and pulling, whereas Center Caps usually need a screwdriver or small pry bar to pop them off the wheel. Remove your lug nuts from the vehicle with the appropriate socket and a breaker bar. Make sure the tire is still on the ground at this point to prevent it from spinning when you go to remove the nuts. Just crack them loose, one turn. This will keep the wheel from falling off, but allow us to easily move it, once the pressure is off the car. If you have a wheel lock key, insert it into a lock lug if you have one. Loosen that up the same way. Raise and support your vehicle. We're using a lift in the shop, but if you're doing this at home, it can easily be done with a Jack and Jack Stands.
If you're not sure on where to lift your vehicle, you can check a variety of online resources or the owner’s manual in your vehicle if you still have one. Since we've already cracked our lug nuts loose, you should be able to just spin them off by hand, once the vehicle's raised and supported. Make sure when removing the last lug, you keep a hand on the wheel and tire, then remove them, and set it off to the side.
The average Front Disk Brake System consists of a few major parts. These parts are your rotor, your brake pads inside here, your caliper carrier bracket, and your brake caliper. The caliper has a hose running to it, which supplies the fluid pressure into the pistons, inside of this caliper. In this particular case, there are two pistons in here. When you press your brake pedal down, pressurized fluid fills these chambers and pushes the pistons out, squeezing the brake pads together. Which contain a friction material against the rotor, slowing down the rotation of your wheels.
A few things that can go wrong with your front pads and rotors are going to be the pads wearing down, to the point where there is no longer sufficient friction material to properly slow down the rotor, without creating a grinding or crunching noise. These pads can become glazed from excessive heat, which means they're going to be very smooth and not grab the rotor correctly. Allowing it to slip more than it normally would, which can create a squealing sound, and a longer braking distance, as well as a soft pedal feel. The rotor itself can become rusted and corroded, which has pitting and doesn't create the proper contact area for the pads. Or it can get rust-ridges built up which have a similar effect, but create a lot more noise.
And if the rotor itself gets overheated, it can warp creating a pedal pulsation, and a vibration. From the uneven surfaces going through the pad, forcing the caliper to move in and out with those high/low spots on the rotor. Feeding back into your pedal to create that that in and out pulsation, or vibration feel. Fortunately these components are very easy to change, and can really change the handling and driving characteristics of your vehicle. Remove the two bolts on the back of the caliper. These are usually a regular Hex bolt, but occasionally they're an Allen key with a little rubber cap you'll have to pop off to access them. You may need a screwdriver, or a small pry bar to free the caliper from the pads. Then using the zip-tie, a bungee chord, or some mechanics wire, go ahead and secure the caliper up and out of the way, so it doesn't get damaged while we finish our repair.
Remove the pads. You may have to pop them out with a flat blade screwdriver if they're stuck in there. Remove the two bolts on the back of the spindle, securing the caliper bracket. Make sure that both are cracked loose before removing either one fully. Once the bolt is out, remove the caliper bracket from the spindle. Some rotors may have a Phillips head or Torx screw securing the rotor to the hub. Remove that if necessary. And if your rotor is frozen to the hub, from rust and corrosion, tap it on the face of the rotor. You can hit the outer edge if you're not reusing the rotor. If you are, tap between the studs, free up the rust, and remove the rotor from the hub.
Most brake caliper brackets will have these little metal shims on them, which keep the pads tight and from rattling around and moving while braking. To remove them, use a small flat blade screwdriver and carefully pop them off one at a time. We'll take a wire brush and clean all the dirt and debris out of the part of the caliper bracket that the slide sit into. You may want to wear a dust mask while doing this, so you don't breathe in all the rust and brake particles. Once the bracket itself is cleaned out, you can either replace these slides or, ours are in pretty good condition, so you can just clean them up the same way.
Now, if these are heavily rusted or corroded, you'll want to replace them, but you can see ours is just a little bit dirty. They're still nice and shiny underneath all that build-up. Reinstall your slide, simply presses in. And take some brake grease and put a thin coat on the contact portions. We'll then hold down the boot for our slide, and remove the slide pin from the caliper bracket. Apply some more brake grease here. Pop it back in, make sure that boot sits back onto its collar. Repeat this process for the other slide and slide pin. Install your new rotor on backwards, and spray it off with brake cleaner. Then flip it around, install it correctly and spray down this side as well. If you have screws securing your rotor, you can reinstall that now.
If you're vehicle doesn't have a rotor screw, to make it easier, press your rotor in flat and using some washers or an old Axle nut works perfect. Install a lug nut by hand as tight as you can into that Axle nut. This will keep the rotor upright while we reinstall the rest of our parts, making it that much easier. Reinstall your caliper bracket and the two bolts that secure it. Start both bolts by hand, then tighten them down with the appropriate socket and ratchet. Install your brake pads, and apply a thin coat of grease to the backside of them. Release your caliper from whatever you used to secure it out of the way.
Using a large pair of groove lock pliers, carefully compress each piston, one side at a time. Going nice and slow so you don't push the other piston out in the process. You may have to go back and forth a couple of times if you do have dual piston calipers like these. Once it's fully compressed, slide it back over the pads, push the pins in to allow the caliper back into place. Reinstall your hardware. Once they're in by hand, go ahead and tighten them down with the appropriate socket and ratchet. If you've used the Axle nut and lug nut trick to secure your rotor, go ahead and remove that now.
Reinstall your wheel and tire. Reinstall your lug nuts as tight as you can by hand. Now you're all set to lower your vehicle. Reinstall your lug nuts and torque them in a cross patter to the proper specification. If you don't know what the specification is, you may be able to find it in your owners manual or a variety of other online resources. Once you're done, simply pop on your Center Cap or Hub Cap, and you're good to go.
Thanks for watching. Visit us at 1AAuto.com for quality auto parts, fast and free shipping, and the best customer service in the industry.
Shop Products


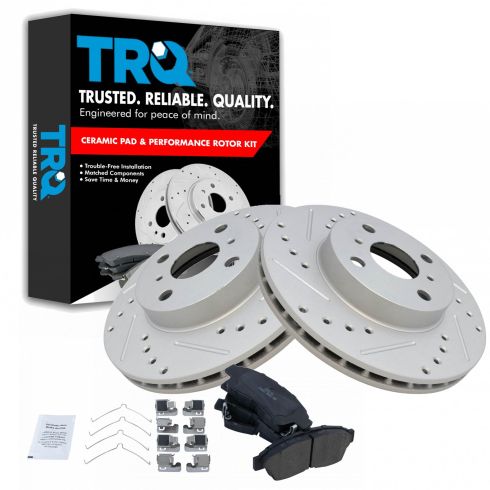
Toyota Corolla Geo Prizm Front Ceramic Premium G-Coated Performance Brake Pad & Rotor Kit TRQ Performance BKA12331
Part Details:
- Ceramic
- Premium Posi
- Vented
- 10.04 in. (255mm)
- 4 Lug
- Performance
- Premium G-Coated
- Slotted X Drilled
- Performance
- (1) Front Ceramic Brake Pad Set
- (1) Front Premium G-Coated Performance Brake Rotor Set

How to Replace Front Brakes 2001-06 BMW 325Ci
How to repair, install, fix, change or replace your own worn, squeaky, fading old brakes on 06 BMW 325Ci
