How to Replace Front Brakes 1997-2005 Lexus GS300
Created on: 2019-05-01
Watch this 1A Auto video to learn how to replace the old, rusty or warped brakes on your 97-05 Lexus GS300. The process is similar to many Toyota vehicles.
-
step 1 :Removing and Cleaning the Brakes
- Loosen the wheel lug nuts with a 21 mm socket
- Raise and support the vehicle
- Remove the brake bleeder cap
- Open the brake bleeder with an 8 mm wrench
- Allow a small amount of brake fluid to escape
- Tighten the bleeder screw
- Remove the two 14 mm caliper slider bolts
- Remove the brake caliper and support it with the caliper hanger
- Remove the brake pad anti-rattle clips
- Remove the brake pads, using a pry bar and hammer as necessary
- Loosen the two 17 mm caliper bracket bolts, then remove them
- Remove the caliper bracket
- Remove the brake pad tins that are set into the caliper bracket by prying them out
- Remove the two caliper sliders
- Clean the caliper sliders and caliper slider holes as necessary
- Clean the pad tins and surface on the caliper where they mount
- Apply brake grease to the caliper surface where the pad tins mount
- Replace the pad tins
- Apply brake grease to the caliper sliders
- Replace the caliper sliders and rotate them to spread the grease
- Remove the brake rotor
- Clean the wheel hub as necessary
-
step 2 :Installing the Brakes
- Install the rotor
- Open the caliper bleeder screw and connect to a drain hose or have a catch pan available
- Depress the caliper pistons with a brake caliper compressor tool
- Close the bleeder screw
- Replace the caliper bracket with the 17 mm mounting bolts
- Torque the 17 mm bolts to 87 ft-lb
- Install the brake pads into the caliper bracket
- Replace the brake pad anti-rattle clips
- Optionally apply a small amount of brake crease to the brake caliper surfaces that contact the pads for additional sound dampening
- Replace the brake caliper with the 14 mm caliper bolts
- Torque the 14 mm caliper bolts to 25 ft-lb
- Spin the rotor to check for any interference or improper installation
- Pump the brake pedal slowly to seat the brake pistons against the pads and the pads against the rotor
- Open the 8 mm bleeder screw to allow fluid to drip until there are no air bubbles
- Close the bleeder screw
- Replace the bleeder screw cap
- Replace the wheel and lug nuts
- Lower the vehicle
- Torque the lug nuts in a star pattern to 76 ft-lb
Tools needed
-
Socket Extensions
Torque Wrench
14mm Socket
Hammer
Pry Bar
8mm Wrench
17mm Socket
Jack Stands
10mm Wrench
Brake Parts Cleaner
3/8 Inch Breaker Bar
21mm Socket
Flat Blade Screwdriver
Brake Caliper Hanger
Brake Caliper Compressor Tool. Quad Piston. Ratchet Style.
Wire Brush
Floor Jack
Hey, everyone. It's Len down at 1A Auto. Today we're going to be working on a 2001 Lexus GS300. We're going to be doing some front brakes. You can get these and any other quality parts at 1aauto.com.
All right, one of the first things that we're going to want to do is after having the vehicle semi-supported off the ground, you want to make sure the wheel is still on the ground firmly. So, you take your 21 millimeter socket, and if you have a long ratchet or a breaker bar. One, just a little bit. You don't want to go too far.
As we take off this one last lug nut, you want to make sure you hold that wheel on. You don't want it to fall off, go bouncing off, hit you in the knee, and hurt yourself. Safety is key. Let that down nice and easy.
So, now that we're doing the front brakes on this, what I want to do first is I want to make sure this caliper bleeder screw, right here, located at the top rear of the caliper breaks free. First you need to take off the protective rubber cap. Very simple, sometimes they stick but got lucky, this one didn't. Put it aside where you want lose it.
Next, you're going to take an eight millimeter, six point, or if you have to use a 12 point wrench, six point will be best. You can even use a socket or whatever you're into, get it on there, and this is going to be weird because righty tighty, lefty loosey, right? But this is coming from the backside, and you're coming from the front side of it. So, you need to think backwards. So, in turn, we're going to turn this to the right. Break it free, breaking free nice and easy. You see a little bit of fluid dripping out. Close it back up. You don't need to tighten it up very much, just a little snug, just so the fluid stops coming out. You tighten that up too much snaps it, buying yourself a caliper.
Next thing we're going to do is we're going to take off the caliper slider bolts. These are the bolts that hold the caliper to the sliders. 14 millimeter heads, so I'm going to use a six point, 14 millimeter. I'm going to put... make sure my ratchet is on reverse or off. Break these free. Get that one going a little bit. Get this one going. They feel like they're nice and loose. I could probably do it right by hand. Hold on to your caliper just in case anything happens. Shouldn't go anywhere but you never know. Safety first.
Put your two caliper bracket bolts, or caliper slider bolts aside. Try to work this. All right, now that we have that off, perfect timing to take a look at inside here. You'll see that this is a duel piston caliper. It means it has two pistons. You want to check to make sure there isn't any moisture or brake fluid coming through right here, or right there. Make sure there isn't any cracks, any debris, anything like that that might cause an issue. If you see fluid, there's fluid right here, don't worry about that. It's just my spray.
Hang this and put it aside. So, now I have it hanging so there's no pressure on that brake flex hose. Any pressure you put could cause a bind, could cause a little tear, really it could cause anything. Brakes are high pressure systems. So, if you have any type of bubble or a tear inside your brake hose, always replace your brake hose no matter what. Don't risk it. Safety first.
Next what we're going to do, I would remove the pads from the bracket, so you can make sure those don't fall out and hit you or hurt anybody. You can grab a small pry bar or whatever you want to call it. Remove your anti rattle clips. Put those right out of the way. Hold on to them just in case.
Next, we're going to take the brake pad out of the bracket. This is your caliper bracket. This is your brake pad. Inner brake pad. You can stick it in and then pry it between your rotor and your brake pad. Very carefully, move stuff around, things are always going to want to fight with you like I always say. But odds are, if you're lucky you'll win.
All right, I'm just going to go grab my hammer real quick. I've got my pry bar and I've got my safety glasses--safety first. I'm going to try to put my pry bar up in here, and I'm just going to give this a couple little taps and try to pop the brake pad out of the bracket. I'll show you the reason why safety glasses are important. These pieces can go flying. You don't want any of this coming up, debris going in your eyes. This one pries right out nice and easy.
Next, we're going to take off the caliper bracket. I'll just grab my tool. Using a 17 millimeter, six point socket, we're going to take off the caliper bridge bolts. As always, you want to break these free. Don't take one out without starting the other one loose first. Give it a couple bonks. Should break free. Like I said before, when you're working from the front of something and the bolts are on the back, you're going to have to work in reverse. So, something that normally is to the left to take it out, when you're working at it from the opposite side, you're going to turn it to the right.
Now, I'm going to remove the lower bolt. Give it a bonk. Breaks it free. Now, with that upper bolt loose but not completely removed I can take out this lower bolt. Holding onto my caliper bracket, make sure it doesn't fall and hit the ground, or my toe or anybody else. Now I'm going to remove the upper bolt. There we go. Now your caliper bracket is off.
So, next what I'm going to do is I'm going to take off these tens, and the importance of the tens is to keep the pad away from the bracket, because a lot of times in between, if you didn't have the tens, in between the pad and the bracket you'll get moisture buildup. Then you'll have your pad sticking inside your brackets, worse than what we already saw when I was trying to take this off. They also work great for anti-vibration. Gives it a little bit extra cushion between the two so, every time you step on the brakes you don't hear a squeak.
Just take your little screwdriver, whatever you might have, even a little pry bar, being careful not to put your finger in a point where if you slip you're going to hurt yourself. You can hold it back; you can hold it forward. Wherever you're comfortable with. Watch your eyes, and just pry that puppy off. One, two, and let me get the last one. Pretty much the same as the other three. Being careful not to hurt myself--safety first. Remove all those.
Next you want to look inside here, and you're going to see where all the build up is. And this is where the magic happens. Water gets into everything. It's going to do it. That's just the circle of life. It's the magic in nature. So, water creates rust on metal, especially around in New England where we get water mixed with salt, and lime or whatever they put down in the roads in the winter time, builds up. When that builds up, it takes away the space in between where the pad, the ten, and the bracket meet.
So, once that happens, the pad can't move freely. If your pad can't move freely inside your bracket--not a lot, you don't want rattle, you just want it to be able to move and slide freely inside the bracket. Your pad will get stuck. Your caliper will do its job. It'll have a lot of pressure. It'll squeeze those pads up against your rotor, and then, when the pads are supposed to release, when you release the brake pedal, they'll be stuck against your rotor. You'll find out that you're getting brake warping, you'll hear brake noise, overheating brake conditions, all sorts of bad stuff can happen.
If you have any of those issues it could be because there's buildup under here, or could be because of these sliders right here. These sliders, this is their intended job. Sliding. They can get stiff. They can even freeze up inside there to the point you might have to use a little bit of heat and get them worked. But these seem like they're moving all right.
So, what I'm going to do is I'm going to stop with the caliper bracket ten part. We'll get to that in a second, and I'm going to show you the next part.
Now assuming we got this caliper slider out. What I'm noticing here is there should be a little rubber boot. You can look inside here, and sometimes you might find the boot in there. If it did makes its way inside there it probably stretched out, and you know, it's going to be garbage anyway. You'd want to replace that. I already took a peek in there--it's not in there. This should have it, but since it doesn't we're just going to move along.
I'm going to mark the fact that this is where this caliper bracket pin should go because this is the one that should have the rubber dampening bushing. Next, I'll take out the other side and look at them. They are both different. About the same size, there might not be too much of an issue, an exception of just the fact that one is supposed to have a rubber and one isn't, for when you mount it all back up. But, if you take it apart one way, just put it back together the same way. There's a reason behind it.
So, what you'd want to do is you'd want to clean up these sliders. You're going to want to also clean up the inside of these holes. It's very simple to do. If you have a can of brake cleaner, or any type of cleaning material that you can spray inside there. If you have one of these little honing brushes, these work great.
All right, so here we have our caliper sliders. Something that you want to pay attention to is right along inside there, this is where the boot's going to ride. This is supposed to be a nice seal. If it doesn't make a nice seal because there's corrosion or rust build up, you'll get moisture getting inside there. You'll find your caliper slider pins or rusted or even frozen in there.
So, firstly what I would do is clean off any grease that's on here, which there's a little bit. Should be a lot more, but like this one, there's a lot. Clean off all that grease. Then I'm going to take a little wire brush. I'm going to get inside there as much as I can. Try to get out as much of that debris as I can. That'll keep the moisture out and keep the lubrication in. Should keep things going for a long, long time.
Very basic, you can just take a rag, clean up the lube, and get as much of it off as you can. The other one. Once it's a little bit cleaned off you'll be able to really get a grasp of what we need to do for using the wire brush, cleaning off any rust and stuff that might be inside there. So, this one, as you can tell, the groove's in much better condition than the other side. It might just need a little touch up there. But it shouldn't be an issue. This one right here could possibly be an issue down the line, so we want to make sure we clean that up.
So, I'm just going to take a little wire brush right here, fairly soft. I'll go right over my bucket, wearing my safety glasses to make sure I don't get any little pieces of metal or anything inside my eyes. Safety first, as always. I'm just going to try to get in here and clean that up. If you notice that maybe it isn't really doing such a great job, maybe the wire bristles aren't as strong as you were hoping, you can take it to a wire wheel, which I might end up doing only because I'd like for this to get done fairly quick manner here. So, maybe we'll take it over to the wire wheel real quick. I'll clean up in there, I'll clean up the head of this, get it nice and clean, and pretty.
Right in here is where I'm going to try to get. And I'd also like to try to get around the bolt head, try to clean it up. You can see the build up on there. That's going to cause a little bit of issue trying to get your socket on. Keep a firm grip, but also keeping your fingers out of the rotation area. Get it in there. Oh, I can't wait til you guys see this. This is going to be nice. If you have access to one of these, this is the way to go. I've got to tell you. Look at that in there. It's beautiful.
Now I'm just going to take it along the outside. You can see the buildup. Try to get the majority of that off, just for good measure. You don't have a wire wheel don't worry about it. But, why not?
Now I'd like to show you what this caliper pin looks like. Practically brand new. Yeah, there might be a couple little, you know, imperfections. It's old, but there's no reason to replace this. It's in good condition. If there was a lot of build up in here, or if that boot that you happened to see on the caliper bracket was torn, you might notice that there's a lot of rust and build up on this right here, at which point you could take it to the wire wheel, try to clean it up. It's still going to be pitted. It might still cause problems down the line. If you've got a couple extra bucks it couldn't help to get new ones. But this right here, I would say it's darn near perfect. It's a keeper.
Now that we have our caliper sliders nice and clean--those came out great. We're going to move right along to the caliper bracket. Here's the caliper boots. They appear to be in good condition. You can check them for cracking. You can check them for rips. You can check along where the seal is for where they ride on the sliders. These look as though they're in great condition. I don't see anything wrong with them. I'd like to keep them in there. But what I do want to do is clean this up.
The slider will ride inside here basically. If you could picture it on the inside of the caliper bracket, it's going to sit right here. It's going to go in and out, in and out. Well, I guess in and out, opposite. Anyways, it needs to ride smoothy. So, if you don't get out your existing grease or whatever might be inside there you could have binding problems, there could also be moisture in there that you don't realize. So, what I like to do, hold it over a nice debris bucket, something safe where you can recycle any type of oils or cleaners that you're using into a safe environment. Definitely not into the ground or anything like that.
This is an aerosol type of spray. So, it's under pressure. So, you have to be careful. When you spray this in something is going to want to come out. Anything you put in is going to want to come out. So, just stand back a little bit, aim it away from your face. See, you can see it coming out. Just put in a little bit like that. It's not bad. Same thing, keeping your eyes safe, safety glasses please. Put a couple of little bit like that.
Then, if you have one of these, it's just a little bore brush. You can put it on a little drill, any drill you've got, doesn't have to be anything special. Just put it right in. Go as fast as you want. You don't have to worry about scuffing anything up, it's just the metal of the bracket is stronger than the metal of the bristles of the brush. Just go in and out, in and out. Work it around, and I'm going to show you why in a second here.
That one is pretty much done. Come over to this one. I'm going to hit it again. Pretty much the same thing. Just trying to clean up the inside sides where that caliper slider is going to ride. I'd say that that should do it. Just pull this right out. Put it off to the side.
Now what I'm going to do is I'm going to dump this out. You'll be able to see what we're looking at. See how black and disgusting that was in there? Whether that grease was black, or it was clear or white or whatever it might have been, there also could have been dirt, debris, moisture, anything.
So, we got whatever might have been stuck inside there out. Now, we're just going to give it one more little blast, once again pointing it away from your face. That look like it came out pretty clear. Let's hit it again. Clear. This one, away from your face. Clear. Clear.
I like to do these first before I clean up the caliper brackets. That's because it's going to take a little while for this brake cleaner to dry. And you don't need to be putting lubrication in there with wet brake clean because it's just going to be counterintuitive. So, that's how you clean out where the caliper sliders ride.
Now when you put some lubrication on this, assuming you had the bushing on there, you would just slide this in and it should be good to go.
So, something that I noticed when I was taking off these tens is you'll notice that this one has a little rubber pad on the back there. This one doesn't. It does have a lot of rust buildup, corrosion, all sorts of crude there. But it doesn't have the rubber pad. That means that it must have went somewhere.
So, taking a better look at the caliper bracket, I notice that there's rust buildup here, rust buildup there. Looks kind of like garbage, whatever. Rust buildup here, but right here, you can see this looks like a large pile of rust buildup but it's not. It's actually the little rubber piece that should be part of the ten, in which case you would definitely want to replace these tens and not just clean them. Just get another kit. It's easy enough, they're cheap enough. It's for your own best interest.
Next, what you would want to do is you'd want to clean up all this area. You want it to be nice, clean, shiny metal because this little bit of buildup right here, with this pad and with this ten and everything like that under there, and then you try to squeeze the pads in it could take up that little bit of area that you need for the pad movement.
So, clean this up the best you can. You can use some type of scraper device if you want. You can use a brush if you want. I've got to tell you a brush is probably going to be ineffective. Something like that you're going to be there for three days. We can give it a try. This one right here wouldn't be too bad, but as you can tell, that one right there, you're probably going to need something a little bit more like this. But we'll get into that in a second.
I'll show you what to do with this little brush, if this is what you have you have what you got, and you know, we'll just do the best we can with it. So, I'm just going to hold the bracket firmly, make sure that everything is safe. It can't get away from me, fall, and hit my toes. I'm just going to take it, get in here like this. Give it a couple nice scrubs here. See? That didn't come out too bad. We could give it a little bit more if we wanted to, maybe a little bit up here. So, I'll probably just give those a little skimming, a little bit more. A little bit harder to get the brush to stay there. Try to get up along this edge right up here. That's also important because the pad doesn't just sit on this level right here. It sits in between here, and it sits in between here.
So, if you have buildup here could cause an issue. You have buildup here, could cause an issue, and buildup here could also cause an issue. Make sure all these areas are clean, it's very important. Take your time. It's not worth rushing. This is your safety.
Not too bad. Then, what I'll do is I'll just take the little wire brush, I'm going to hit it again and make sure I get the backside there. It's a little harder to get to with this because you can't get in there. What do you think of that? Looks new, beautiful.
So next, what we're going to do is we're going to work on these tens. As I showed you before, the little pad on one of them worked its way off. That could be an issue. I believe what the pads are for is to help with pad slap when you're braking. If for some reason you've already got your brakes apart you can't obviously drive your car down to the parts place and get your self some new tens. You have to put them back together.
Best thing to do if you weren't going to replace them is to just make sure they're clean. Cleaner the better. So, what we'll do is we'll just take our little brush again. We'll take a little screwdriver and we'll try to pick off all these crustys as you can see, that there's big rusty, crustys there. Being careful not to poke our fingers. Safety first.
Look at that. Boy, that would have caused an issue. Man oh man. There we go. I got the majority of the big crustys off. I'll use my brush on that in a second. I'm just going to grab my next one. This one I'll just leave the pad right on it. I don't think that that'll be an issue. It doesn't look as though there's any buildup on it, or under it. It's not lifting up anywhere. I would like to just leave this one the way that it is and we'll go from there.
So, now we've got our little brush. You can use any brush that you've got. Big, small, whatever. Whatever you're in to. You just want to try to clean it up as best you can. It's just brake dust on here, so it should be easy enough. It's not super integral that it's 100% clean, but you know, just do your best. It's your car, and it's not really going to affect the safety so much as just you know--it's your way of doing your work. You like to do it 100%, do it 100%. But, try to get it as clean as possible. You can see the difference there just with that two seconds. It's totally worth you time.
Do the backside where it's going to connect to the caliper bracket. Clean that up as well. Looks pretty good. Not too bad. Going to hit this side right here. Can see there's buildup. Not too bad. I'm going to do the same thing to all the rest of them.
We cleaned up our tens. Those look practically new. We're going to assume that you couldn't get down to the store and get the new tens that had the little pad on there. That's okay. We'll just go with what we've got.
Now that we've got this cleaned up, you can see that that's bare metal. It's very important to remember the fact that water loves metal. It's going to suck right into it. It's going to get into all the pores, metal is pourus. And it's going to cause more rust and more buildup, and you're going to have more braking problems down the line. A good thing to use is a product called brake lube.
They have this product right here, and they also have silicon paste. You can use anything you want that is a brake lubricant. So, basically what you want to do is just put it on the braking surfaces where the tens are going to go. You don't have to put on a lot because if you put on a too much it'll squeeze out and it could possibly get on your brake pads and/or rotor, cause a friction issue, and you might have lack of braking on that one particular side of your vehicle. So, a little bit will do you. All you need to do is just make sure that the metal is pretty much covered.
Do both sides of it. You can do them both at the same time, you don't have to do one and then the ten, and then the other, and then the ten. You don't have to go Picasso either and spend three days trying to paint it up and do a little red and a little green or anything like that. Just put it on there. That looks pretty good for my taste.
Next, we're going to put on the tens. Something that I wanted to point out is that there are different tens on this. There's four different tens on it. But basically what I wanted to point out is although there's four different tens, because each goes on one side and then the other side. There's two different types of tens in this instance where this side of the tens doesn't have this extra little flippy piece right here, which is a tensioner. And this side does.
The reason for that is when your caliper bracket is on the vehicle, you're on your left side of your car it'll be sitting like this. You're going to have the one with the ten, or with the little flippy part of the ten so that... this goes on this side, sorry. Drop it. This is going to go like this, right in here like this. You'll put your other one in, matches up. When you put your pad in, you go to use the brakes your pads are going to want to go with the motion of the rotor, which is forward, assuming your going forward when you're stopping.
So, it'll pull the pads forward. You want to make sure that this right here is going to be able to keep tension on that pad. It's going to help prevent pad slap noises for you. It's going to help prevent squealing noises at some point. And, that's just the way that they made it. So, I would also recommend putting it back the way it came. If you can't remember, just check on our video, or if you only took apart one side of the vehicle at a time, which makes the most sense, you can also refer to the other side of the vehicle.
So, I'm just going to go ahead and make sure I put these on correctly. Continuing with the side with the little extra flippy pin. Want to make sure that you see that this goes on like this. These little ears, these don't go facing in. You don't want them going facing in. Now, if I put this one on here facing in, what's that going to do? This is where your rotor rides. You put the little flippy pin in. It's going to cause big issues for you. You're going to be like oh Lynn, I can't get my brake rotor on. Well, that just means goes on the other side. You can figure that out.
So, I want to move what I just said, got my little flippy ear facing on the outside. Squeeze that puppy in there. Same thing with this one. Squeeze it in there. Make sure all four are in as tight as they can go. Now, one last thing that's a good thing to do... remember I told you about slapping on too much paste, right? Squeeze it. If you see any paste coming out the sides right there, clean it up. Luckily for me, I've done it a couple times and I don't really have very much paste coming out because I'm not too much of a wasteful guy. But yeah, just pay attention for that.
Next what we're going to do... we marked our caliper, although the crayon is starting to come off a little bit. I can still see it. I remember that that's where the caliper slider that's supposed to have the rubber bushing is supposed to go in. Then, the other one goes in the other side. So, I'm going to take a little bit more of our caliper brake grease, or brake caliper grease. Put a little bit on. You could be a little bit more liberal with this one if you want. That's completely up to you. Just put it on both of them, approximately equal. You can go all the way around if you want, but you don't necessarily have to because when you put them in, just give them a twist.
Another good thing to try to do is, if you can, at least get a little bit up into that ring. You don't have to go all the way around the ring and get it all over your fingers, but at least a little bit up in that ring. So, just get it up in there.
Now what's going to happen is I got the one that's supposed to have the bushing on the bushing side. Everybody is watching. Twist it, twist it, twist it, twist it, twist it. Put it in, twist it some more. That grease that I just put in that ring right there is working its way around the boot. What's that going to do? Help keep the moisture out. Moisture in, bad. Moisture out, good.
Next, slide it in. Twist it, twist it, twist it. Get it in there and give it some twists--couple pulls, couple pulls. This puppy is ready to get on the car.
All right everybody we're back at the rotor end of the vehicle. So, got the rotor nice and loose. Kept a lug nut on there a couple threads just to make sure if I walk away and doing the caliper brackets it's not going to fall off, hurt somebody, god forbid anybody gets hurt. Keep a little lug nut on there a little bit just in case this rotor decides it wants to go for its own little ride.
You can see under here--this is going to cause a lot of brake pulsations. You've got rock build-up here. All these spots right here are called hotspots. So, as this brake rotor is going around the brake pad on the inside, as you saw, was stuck against the rotor. It heats this up super hot. Each one of these will actually rise because heat makes things expand. They'll rise, you step on the brake you're going to feel duh, duh, duh, duh, duh in your steering wheel. That's because of this right here.
Also, you'll notice that there's a lot of rot here. This is where the wheel bearing hub rubs, or sits into. So you want to make sure. I mean, we're replacing this, so you don't have to clean this, but you do want to make sure that your hub is clean. This is going to cause an issue.
You put a new rotor on this you're going to find a brake pulsation like you wouldn't believe. I can feel the raised areas. So, what I like to do is I'm going to get this cleaned up for you guys. I'll give you a quick showing on what I would do, and we'll go from there.
With this hub being as dirty as it is, with the buildup that you can see probably even just with the camera, we're going to want to clean this up. If you had... if you're dealing with just a wire brush it's going to take a little while. You can probably get in between here, as you can see. It'll do a pretty fair job. It'll get right down, but this is going to take you a little while. You're going to be ready for a snack after 10 minutes of doing this.
So, what I would do is I would just use my little cookie machines over here, right here. I'd just clean up as much as I can along the hub. Then, I would take my brush and just clean up whatever is left that I can't get to. That way there I'm not wasting anytime trying to clean up the whole thing. I can just clean it up, get it over with.
Last thing that I want to mention before I move on to actually cleaning it, is getting behind the hub. It doesn't seem like it's something that you would normally think about or that it should even be that important but, it is. Up along the top right here you'll notice that there's also buildup. So, you could take this and you could go up along the top because any little flakes that are up here could work their way down in between the rotor and the hub. You want to make sure that's done, but also back here. There's a lot of flaking and rust buildup back there.
So, if you can get some of this stuff out of there it's only going to help you out in the long run. It takes an extra couple seconds but what will happen is if you have a flake and it gets caught in behind there, you're going to finish up your front brake job, you're going to do a great job because I showed you how. You're going to drive it down the road and you're going to hear a noise. You're going to say, "Lynn, what did you do? What didn't you show me?"
I'm showing you now. Look everywhere. Just be 100%, do the best you can. Safety is number one. Brakes are top safety on a vehicle. So, I'm going to go ahead and get this cleaned up. Then, we'll show you where to go from there.
All right, now it's time to go ahead and put this rotor on. I've got the hub nice and cleaned up. I'll come over here and grab it. Oh, I don't know. I don't know about wanting to put this rotor on. Maybe it's time to get one of these quality parts from 1aauto.com.
All right, so here we have our old parts. I just took these off of our Lexus. I want to go over a couple good points with you. Our new rotors--they're cross cut. If you zoom in close, you can see that along the cutting the way that it's cut isn't just circular like a record. It's a lot of cross-cutting. That makes for extra braking friction. With better braking--you'll get better cooling. You'll also notice that they're slotted right here. This is slotting, and they're also drilled. These are very important for cooling and also dust and air dissipation. You'll notice the cooling fins on the new rotor, these are very clean inside. There's a whole bunch of them. You'll notice the cooling fins on the old rotor. You're not going to get very much cooling from that surface.
Another thing to notice is that with the rot that's inside the inside of the cooling fins on this, you'll get a lot of this. This is garbage. This is going to cause overheating conditions, and you can tell that it did. You have a lot of hotspots all over this rotor.
Lastly, I want to show you the condition of these pads. These were definitely ready to go. This is down to probably the minimum of about maybe one, possibly two 30 seconds. Worn at an angle, you can see you're at about three to maybe four there, probably closer to three. Definitely worn at an angle. When I did this job I had to use a hammer to get them out. So, they're definitely needed.
You can see the difference in the thickness between old and new. When it comes to brakes, you want to make sure you can stop. Safety first. You can also get these, or any other quality part at 1aauto.com.
All right, we've got our quality part from 1aauto.com. I'm going to go ahead and put this on here. Fits on perfectly. I'm going to take one lug nut, while holding the rotor so it doesn't fall off, nobody gets hurt. Safety first. I'm going to try to screw it all the way on. Hold the rotor right to the hub, so hopefully it won't move too much in case there is any debris or dust or dirt or rust for some reason, it won't get in between the hub and rotor.
I just want to give you a little view of some of the rot and rust that came through. That's from the old rotor. If for some reason you were putting your old rotor back onto the hub, if any of this fell down between the rotor hat surface and the hub you would get yourself a brake pulsation. You'd have issues down the road and you'd say, "Lynn, what did you show me wrong?" Watch out for this stuff. It's bad news.
So, now what we're going to talk about is pushing back these caliper pistons. This is a duel caliper piston, which means it has two pistons. The importance of this is to make sure that when you do push back this caliper you have the bleeder screw open, which is on the backside here. Open it up, make sure you have a trickle of fluid. Have your bucket underneath there, or if you have a bleeder of some sort you can hook that up. You just need to make sure that the fluid gets recycled properly.
I wanted to mention that with the duel pistons, you have to push back both pistons at the same time. If you happen to have one of these tools, which is available at 1aauto.com, this would be optimal. If you have to go with something like this, what you're going to want to do, you're going to have to take one of your old brake pads. Don't use a new one. Why ruin something new?
You're going to put it in here, and then you're going to try to make this work, and push them both back. That's with the bleeder screw open. Never push back calipers with the bleeder screw closed. You'll force fluid in the wrong direction going up your brake lines into your master cylinder, or through an ABS unit if you have that. It's going to cause issues for you. You might get an ABS light, or even worse, lose brakes down the line.
We're going to go with the right tool for the job, which like I said is available at 1aauto.com. Firstly what we wanted to do, as I mentioned, is we want to open up this bleeder screw, which I did at the beginning of the video. We're going to let it trickle out for a second. The reason for letting it trickle out is to make sure that it's not plugged up.
I see a trickle. I'm going to hook up my hose. Now, when I squeeze this caliper pistons in, or these caliper pistons in, it'll force fluid out there here, down into my thing and I can recycle the fluid as needed.
One thing to always make sure of is to wear eye protection. As I'm pushing this back, it's going to create pressure. The pressure could pop my hose off and I could have brake fluid shooting in my face. That's no fun. Eye protection. Let me make sure this is going the right direction. I'm going to put it in here, making sure I'm on both caliper pistons.
What this is doing is it's separating. All right. So, it's pushing up against this side of the caliper and it's going to push both these pistons in at the same time. This is a quality tool. Nice and slow. You don't have to go too crazy. It's not a race.
You'll notice that when you get to the end where the pistons are at their final point of going in, it's going to get really hard to turn in. Just stop. If it gets hard to push in then that means that you're just at the end of it. Right there. I'm going to unscrew it a little bit, relieving pressure. Remove my tool. Now, I can look inside here. I can see that the pistons are both pushed in evenly. The boot right here is pushed out a little bit, but that's okay. Just did that, no big deal. Everything is nice and clean.
Now, I'm going to grab my eight millimeter wrench. Have it ready. Now we're going to watch for a trickle again. Just give it one second. We're going to see a nice pretty trickle. Now, we're going to tighten it up to the right.
Now, we're going to be installing our caliper bracket that we've already pre cleaned, lubed, everything moves perfectly as it should. We have our caliper mounting bolts. The threads are nice and clean. If you wish, you could use some thread locker. For this particular application I'm not going to worry about it.
I'm going to start one bolt in. You could start with the top, the bottom, whatever you want to do. It's your preference. You don't need to get it all the way in yet, because as always you need to move things around a little bit to get the next bolt started, why tighten it all the way down? Both those are started in nice. I don't have to worry about any cross threading.
I'm going to grab my tool, 17 millimeter socket on it. I'm just going to put these in. Now I have my torque wrench set to 87 foot-pounds with my 17 millimeter socket on there. I'm just going to go until this tells me it's ready. Little bit more. Here we are, there's one. Two.
I'm going to go around one more time just to double-check. Make sure everything is settled in as the way it should. Now this caliper bracket is mounted, and we're clear to start mounting on the pads.
Making sure that I put the part with the brake squealer on there, which is just a wear indicator. On the inside and in the downward position. I'm going to come from the inside, place it in, and you hear it snap right in. Moves around pretty good, nice and easy. I'm going to go ahead and put on the outer pad, same idea. Moves around nice and easy, nothing is stuck in the brackets. If you have to hammer it in you did something wrong. Clean up these brackets a little bit more. There could also be other underlying issues but that would be my main go to is check the brackets, make sure you cleaned them up as good as you should have.
Next, you have your anti-rattle clips. These are also clips to help push the pad away from the rotor so that way your pads aren't necessarily staying against your rotor at all times. You'll get overheating conditions. It'll cause premature wear on the pads and warps your rotor prematurely, not that there's really any good time to warp your rotor.
Anyways, moving along, we're going to go ahead and mount our caliper. This is to your discretion if you'd like, normally I do. I usually try to put a little bit of paste along here, some kind of silicon if you'd like, right along your caliper pistons where they meet on the pad. Also, on the caliper where it actually meets the pad as well. This will help with vibration dampening, lessing brake noise inside the vehicle when you're driving. So, when you step on the brake you won't hear your brake friction basically. When you step on a brake your caliper squeezes this as hard as it can up against the rotor, and that's what makes you stop. The friction material with your pad and your rotor is key for stopping.
You also want to make sure you don't put on too much, because if any of that gets in between the rotor and the pad you're going to have stopping problems. This should slide right over, just like this. And this one, just like that. You line up the holes.
Then you're going to grab you caliper bracket bolts. Start both of those in. I'll grab those right now. You can use a little bit of thread locker if you'd like. Generally speaking I do. For this application I'm not going to worry about it. Start both of those in before you go ahead and tighten either of them up.
When we tighten these up the torque specification is 25 foot-pounds. So, now we've got our 14 millimeter six point socket. We're going to go ahead and tighten these up. You can use a wrench, a ratchet, a socket. Whatever you have for tools, but it's a 14 millimeter head. Tighten it up. Don't need to go too tight. Now, we're going to torque it, 25 foot pounds. As you can tell, it's not very much pressure. They're just very small bolts, and now our whole caliper system is mounted.
Something that I wanted to mention is sometimes you're going to put your brakes together and you might get a little bit of noise. Oh no! What are we going to look for? We're going to try to see what this noise is. We've got the rotor pinned down. He can't go anywhere. There's noise coming from somewhere. One of the most probable causes would be your backing plate.
When you're doing brakes, you're moving stuff around or even if you're doing front end work, there's pretty good odds you're going to grab on to a backing plate. So, you want to just go around the backside of the rotor. You can feel if you want. Be careful for pinch points, or you can even do a visual inspection, and see if you see a spot where the backing plate is close to the rotor.
In this case, it looks as though maybe at some point I might have grabbed the backing plate and yanked. So, it's pressed up against. What I would do, and it's fairly simple, be very careful not to hurt yourself. Just grab the backing plate and give it a little shove. There we go. That noise you hear is just the rotor on the pads. It's bound to happen.
All right, now I'm going to walk over. I'm going to pump up the brake a couple times. Nice and slow. The reason for this is because what I'm going to do is I'm going to force brake fluid back down to those caliper pistons and it's going to put the caliper pistons up against the pads and the pads up against the rotors. There we are.
So, now we're going to bring it back up in the air. We're going to open up that bleeder screw, and we're going to wait for a strong trickle of strictly brake fluid and no air to come out of that bleeder screw, and we'll be good to go.
All right, now that we've pumped up the brake, we're going to come back over to the back side of the caliper to where your bleeder screw is. We're just going to open this up with our eight millimeter wrench, and we're going to wait for a solid stream of brake fluid without any little air bubbles. You can keep an eye on it, wearing your... oops, saw a little air bubble there. Wearing your safety glasses as always.
If you want to move it along a little faster, watch out for your eyes because it can shoot out a little bit of brake fluid, but you can do this with the brake hose a little bit. Just gives it a little burp. Now that we have a steady stream of brake fluid, just give it a little tap there. Looks good. Going right down into our waste collection bucket, which will be recycled as properly.
Now I'm just going to tighten it back up, which is turning the bleeder screw to the right. Take a little rag, a little bit of brake clean if you wanted to. In all honesty a spray with the garden hose works much better than brake clean for brake fluid. It's my preference. You can do what you want, or even leave it on there. Put on your little bleeder screw cap. The reason for this is it keeps moisture from getting in there. You get moisture seeping in, it gets all the way down to where your bleeder screw connects with your caliper, you're going to have a heck of a time getting this bleeder screw out the next time and it might even be frozen in.
All right, now it's time to get the wheel up on here. Roll it up on to your leg or your knee. Never lift with your back unless you have to. You really shouldn't have to most times. Go ahead and grab a lug nut. We're going to start one on. Getting it lined up.
Now that we've got our wheel on the ground, you don't want all your pressure of your vehicle on it because if this isn't tightened down snug enough you could off kilter your wheel, and even though you're thinking you're torquing it down to the 76 foot pounds it's specified to be, it might not be. So, with the wheel gently on the ground to the point where it can't spin on you, you're just going to start with one, and you're going to go in a crisscross pattern with your 21 millimeter socket to 76 foot-pounds. One click, crisscross, make a star.
If you're feeling up to it, let's go around one more time. One, two, three, four, five. This puppy is all torqued up. Good to go.
Thanks for watching. Visit 1aauto.com for quality auto parts that ship to your door. The place for DIY auto repair. If you enjoyed this video please click the subscribe button.
Shop Products


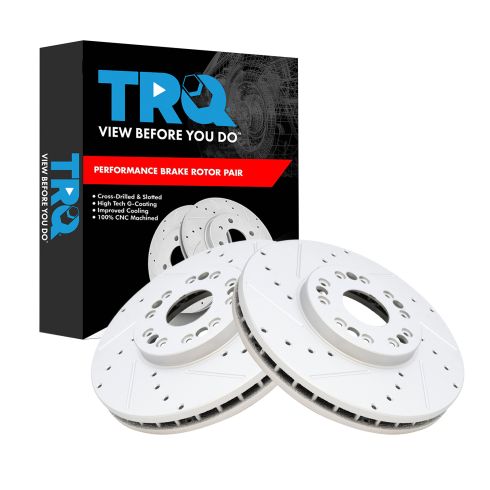
Lexus Front Driver & Passenger Side 2 Piece Premium G-Coated Performance Brake Rotor Set TRQ Performance BRA74633
Part Details:
- Performance
- Premium G-Coated
- 2 Piece
- 5
- 296 mm
- Vented
- 0.57 in
- Cast Iron
- 32 mm
- Slotted X Drilled
- 114 mm
- 51 mm
- 1.26 in
- 30 mm
- 1.18 in
- Yes
- Performance
- (1) Passenger Side G-Coated Performance Brake Rotor
- (1) Driver Side G-Coated Performance Brake Rotor
- 4.49 in
- No
- No
- 11.65 in
- Conventional
- 2.01 in
- 2.45 in

How to Replace Front Brakes 2001-06 BMW 325Ci
How to repair, install, fix, change or replace your own worn, squeaky, fading old brakes on 06 BMW 325Ci
