How to Replace Front Brakes 1997-2003 Ford F-150 4x4
Created on: 2017-06-23
Watch this 1A Auto video to learn how to replace the front brakes on your 97-03 Ford F150.
-
step 1 :Removing the Wheel
- Loosen the 19mm lug nuts with the vehicle on the ground
- Raise the vehicle with a floor jack
- Secure the vehicle on jack stands
- Remove the lug nuts
- Pull off the wheel
-
step 2 :Removing the Brake Pads and Rotor
- Remove 13mm bolts from the brake caliper
- Pull the caliper aside
- Pry the brake pads off with a flat blade screwdriver
- Remove the 18mm bolts from the brake caliper bracket
- Pull off the brake caliper bracket
- Pull the rotor off
-
step 3 :Preparing the New Brake Pads and Caliper
- Remove the brake pad brackets
- Remove the caliper boot slides
- Clean the brake pad brackets with a wire brush
- Clean the caliper bracket with a wire brush
- Clean off the caliper boot sliders and inspect the boots
- Apply grease to the caliper slides
- Insert the slides into the caliper
- Press on the brake pad brackets
- Apply grease to the brake pad slides
-
step 4 :Installing the New Brake Rotor
- Slide the rotor on backwards
- Clean the rotor with brake parts cleaner
- Turn the rotor around
- Clean the rotor with brake parts cleaner
- Put the caliper bracket back into place
- Start the bolts by hand
- Tighten the bolts to 136 foot-pounds of torque
-
step 5 :Installing the New Brake Pads
- Apply grease to the brake pad tabs
- Put an old pad in the caliper
- Use a large C-clamp and the old pad to push the pistons back
- Install the new brake pads into the bracket
- Put the caliper on
- Thread bolts by hand
- Tighten bolts to 21-26 foot-pounds
- Clean the rotor with brake parts cleaner or mineral spirits
-
step 6 :Reattaching the Wheel
- Slide the wheel into place
- Start the lug nuts by hand
- Tighten the lug nuts preliminarily
- Lower the vehicle to the ground
- Tighten the lug nuts to 83-112 foot-pounds in a crossing or star pattern
-
step 7 :Testing the Brakes
- Pump your brakes repeatedly until they feel firm
- Test your brakes at 5 miles per hour and then 10 miles per hour
- Road test the vehicle
Tools needed
-
13mm Socket
Large C-Clamp
Torque Wrench
Jack Stands
18mm Socket
19mm Socket
Block of Wood
Brake Parts Cleaner
Safety Glasses
Flat Blade Screwdriver
Drill Bit Set
Paper Towels
Bungee Cord
Anti-Seize Grease
Ratchet
Wire Brush
Floor Jack
1/2 Inch Breaker Bar
Hi, I'm Mike from 1A Auto. We've been selling auto parts for over 30 years. We're dedicated to delivering quality auto parts, expert customer service, fast and free shipping, all backed by our 100% satisfaction guarantee. Visit us at 1AAuto.com, your trusted source for quality auto parts.
We're going to start this project. We're going to go ahead and loosen the wheel, the lug nuts here. We're going to use a breaker bar with a 19 millimeter socket. Next, we're going to go ahead and raise and support your vehicle. You can use a jack and jack stands. In this case here, we're using a lift to make it a little bit easier. We'll just go ahead and remove the lug nuts here just by using that socket because we've already loosened those. With the lug nuts removed, we can now go ahead and remove the wheel and tire.
Okay, let's go ahead and we're going to start by removing the caliper itself. And doing so, we need to remove these two bolts. These are both 13mm. You can use a simple socket and ratchet. All right. What we want to do is separate the caliper, this will leave the pads on the rotor itself and you want to support this caliper with a strap of some sort so it doesn't just hang on the brake line. Next step is to go ahead and remove the brake pads right here, outboard pad and the inboard pad.
Next, we're going to use our 18mm socket and breaker bar to loosen these bolts right here. There's two of them, upper one and what this is going to do is going to help us to remove this caliper bracket right here, which we need to do so in order to replace the rotor. Going to switch over here to a regular ratchet, to speed things up a little bit. You're going to get to a point where you can just go ahead and spin those out the rest of the way by hand. Now you're going to see we can go ahead and remove the rotor.
Right here is the original brake rotor and pad set. Over here we have the new brake rotor and pad set from 1A Auto. If we take a look here on the back side, these do come with the shims on the back of the pads. You don't want to get these confused with the sliders. The sliders are available in a new kit from 1A Auto in a caliper bracket repair kit. These are direct installation with no modifications.
Here we have our brake caliper bracket. You can see we have a slide here. These are all pretty nasty, right here and a pad slide right here all gummed up and everything. Here you have your slide boots. You can see that this side here is a little bit smoother than this side. This side here is a little bit tougher to push in but it is working. What we're going to do is a quick clean up and a rebuild on this here. We're going to start, simply, by popping this little component off here.
Now, it should just pop right off. Use a flat head screwdriver, and be gentle with it because it's not very thick metal. Pop this side off here. Slide that right there. Now, these rubber boots themselves, they do just wrap on and the pop right out. These are your slides. Have those right there. Now the boots themselves pop right off, like so. Now you have the bare caliper bracket. We're just going to use a little bit of a cleaning agent here and a metal brush or bristle here. Clean this up, getting the scaly rust off because you want a nice smooth seating patch here for that slider to fit back into. Flip this back over. Another thing I like to pay attention to is inside these holes here, is obviously where the slides are going to fit in. You want to grease these up. Now, one thing, over time if these boots get torn or you start to get moisture or water inside here, you can actually build up rust inside. So, this will actually stick and will not retract so your brakes might actually drag. Just as a habit, I just take a drill bit that is pretty close to the size of the port and just run it in, just to chase it. Just to kind of clean out any scaly rust that might be inside. Once that's done there, just chase it once again with some cleaning agent.
Next step, you want to go ahead and clean up your sliders. You simply just spray these down, use a towel or a rag, whatever you have lying around. Clean those up. You want to do an inspection on them, and make sure there's no rust or corrosion buildup. These here seem to be really clean. Make sure you get both of them. See, both of those, those are good. You want to do a visual inspection on the boots. Make sure there's no tears or anything in those. Those seem to be pretty good, just a little bit of dirt and grease on there.
Next we want to go ahead and clean your slides. These are the slides where your brake pads actually move back and forth on. If you happen to be cleaning these here, and you see that yours is bent or damaged or rusting—you do want to go ahead and replace these. They do play an important role with your brake pads. Make sure you're wearing safety glasses, also, while doing this. You don't want to get sprayed in the face by accident or get any of that, while using the bristle brush there, any little nuggets of grease in your eye. These are identical. They're not side specific or end specific, so it's okay if you get them mixed up.
Let's go ahead with the reassembly. This is the part where you'll want to use some lubrication on here as far as a regular barring grease or something to that effect. I'm going to start with the slide pins. You're going to take your rubber boot, slide that up and over. Go ahead, slide it and just push it in. That's that. These boots do pop on. I find they're a little side specific so you can look at the design of them when you remove that. Just press that in. Give them a quick test. Nice and smooth. Next is your slider brackets. We're going to go ahead and install these here. You can just do a visual inspection on here. Make sure that the tab is all the way down inside. Press that down. Flip it over. Do the same over here. Key point right here. You see where the sliders come right to the edge of the bracket, it is possible that while installing this you can install it a little bit off centered so when you actually install your breaks, and your rotor rotates, it'll squeak because it'll be rubbing on the inside of your shim right here. So, make sure that the shim does not protrude past the inside of the bracket.
The rotors themselves are going to come inside a plastic bag and they usually have some type of coating on them to keep them sealed. Basically like some type of coating on there that you want to go ahead and clean off. In this case here, we're just going to use some brake clean. Now, you can see I just stuck the rotor on backwards, we're not leaving it on the vehicle like this. Make sure you spray it all down. You're going to flip it. Set that on. You want to make sure you clean this because you don't want the new pads to absorb or get that chemical, that lubricant, on the pads themselves. At this point here, you're going to let these air dry. It's going to just take just a couple minutes for that to do that. To make it easier, you just want to grab this here and you want to turn this here. You're going to do so by having the key in the on position, that way you can manipulate the steering. You can go ahead and get that bracket installed. Line this up. We have our two bolts right here. Just get those caught. Thread them in as far as you can by hand. This here is an 18mm. I'm going to tighten these with the ratchet and then we're going to go back and torque those down. We got the torque wrench and the 18mm, we're going to tighten these up to 136 foot-pounds.
We have the original brake pads right here and the new pads. What we're looking at here is if you notice, there is a squeal tab here and a squeal tab here, but what the previous installer installed them both on one side of the vehicle. You're supposed to have one on each side of the vehicle. We're going to go ahead and install ours properly. Squeak tab will be mounted on the inside, inboard and then the standard pad that does not have a squeak tab will be placed on the outside. Next step is, we're going to go ahead and apply a little bit of grease to the slide area here. Just a little bit, you don't want to smear it all over the place because then you're going to get it on the rotor and that is going to hinder your braking performance. Inboard pad with the squeal tab, slide that right into place. Then we have the outboard pad. Line that right up. You push the rotor on, you can see it squishes right in.
Our next step here is actually we have to go ahead and compress these pistons back in into the caliper itself. You can use the old brake pad or you can use a block of wood as a shim for your C clamp. So in this case here, we're just going to set this in here. That way there, when we compress this here, it pushes in the distance together. Just going to use a regular C clamp to go ahead and compress this. You're going to have to go back and forth from one side to the other. What you're doing is you're pushing the brake fluid back up into the master cylinder. This is going to give you more clearance with the new pads and rotors.
You want to pay attention here. We're going to pop this right out, just to show you. There's two flat sides. Same on the bottom. So, you install this here, push it and that little boot will slip on. There's a reason for that. When you slide this together, there's a flat side on the side of the piston here, same on the bottom. That way when you go to tighten up the bolt, this actually stops the shaft from spinning and locks it into place. Make sure that slides in there and bottom slides in. Go ahead and line this one up. Get that lower one lined up and installed. The torque spec on these here are 21 to 26 foot pounds. We're going to go right in the middle. You can see I used the deep socket here, so I could get clearance from the brake line.
All right, we're going to go ahead and reinstall the tire. We're going to go ahead and reinstall the lug nuts here. You want to get a few threads caught on all of these here. These lug nuts are a 19 millimeter. So we're just going to snug these bottom and out. Bottom of the wheel out to the rotor. We're going to lower the vehicle down onto its own weight and then to a final torque. With the vehicle on the ground, we're going to do its final torque of the wheel which is between 83 and 112 foot-pounds. We're going to do it in a star pattern. Before test driving the vehicle, you want to start the engine and pump the brakes a few times. This will reseat the brake pads and compress the calipers.
Thanks for watching. Visit us at 1AAuto.com for quality auto parts, fast and free shipping, and the best customer service in the industry.
Shop Products


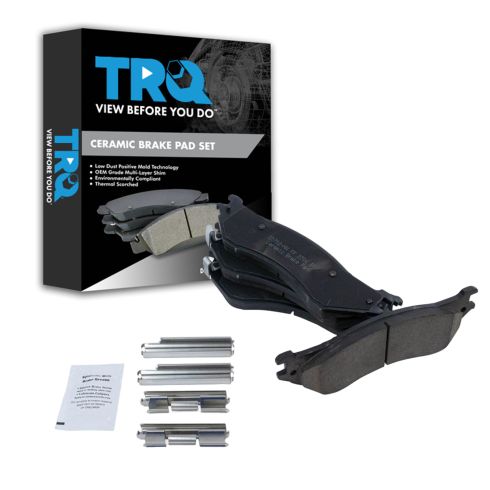
Ford Dodge Lincoln Front Ceramic Brake Pads TRQ BFA73136
Part Details:
- Premium Posi
- Ceramic
- Contact Point Grease
- Hardware
- Ceramic
- Yes
- 16 mm
- 10 mm
- 2.20 in
- Black
- 2.20 in
- 189 mm
- 0.39 in
- Yes
- 10 mm
- 16 mm
- 56 mm
- 56 mm
- N
- 189 mm
- 0.39 in
- Fiber
- Mechanical
- Yes
- 0.63 in
- Yes
- Yes
- Yes
- 0.63 in
- Yes
- Integrally Molded
- No
- No
- 4
- Yes
- 7.44 in
- 7.44 in
- Black
- Yes
- Steel

How to Replace Install Front Brakes 2003-08 Honda Pilot
Fading or worn out brakes? Learn from our experts in this video how to replace and prepare the front brakes yourself, including torque specs
