How to Replace Front Brakes 1994-2003 Chevy S10 Pickup Part 2
Created on: 2011-11-10
Check out this video to learn how to replace the front brakes on your 94-03 Chevy S-10. 1A Auto shows you how, step by step.
-
step 1 :Reassemble the bearings.
- Use race installation tools or a block of wood to assemble the inner bearing.
- Pack the outer bearing with bearing grease.
- Inspect the spindle and clean it with a paper towel.
- Mount the rotors and insert the outer bearing.
- thread your washer and bolt on.
- Tighten the bolt some with your ratchet and then loosen it; this will seat the outer bearing.
- Put the nut and dust cap on.
-
step 2 :Install the new brakes
- Clean the brake rotors with brake cleaner.
- Clean the caliper sleeves with a wire brush.
- Apply anti-seize grease to the edges of the brake pads where they slide into the calipers.
- Compress your caliper pistons with a large C-Clamp
- Put the brake pads into the caliper.
- Mount the caliper.
- Clean up your caliper bolts and apply a little anti-seize grease to them.
- Torque the caliper bolts to 45 ft lbs.
-
step 3 :Put the wheel back on
- Thread the lug nuts on
- Lower the vehicle
- Torque the lug nuts in a star pattern to 100 ft lbs
Tools needed
-
Large C-Clamp
Torque Wrench
Hammer
Jack Stands
19mm Socket
Block of Wood
Brake Parts Cleaner
3/8 Inch Allen Wrench
Bearing Grease
27mm socket
Race Installation Tools
Paper Towels
Anti-Seize Grease
Slip-Joint Pliers
Wire Brush
Floor Jack
Brought to you by 1AAuto.com. Your source for quality replacement parts and the best service on the internet. This video is part two of a two part series. We will pick it up and replay a couple of scenes from the first video. We are showing you how to do a brake job, a front brake job, on this 2001 S-10, and this is a two-wheel drive truck. Here we'll go through just a quick review of the tools that you're going to need.
Now I'm going to take my seal and drop it on like that. You can use a piece of wood, or something like that. I'm just using a larger block of metal, a larger bearing installer. Just make sure that that's nice and evenly installed. Take our rotor, keep it on the plastic, flip it over. We're just going to take some grease and, just like on the back side, just kind of pack it in there a little bit. Let a light coating stay on the rings itself, but not a lot. Take some paper towels, wipe off your spindle here. You want to check for any - You can just run your finger on here with a little grease on it. I can see some markings here, but there's no real wear on the spindle. The two surfaces, one here where the inner bearing is, and here where the outer bearing is, there's no real wear on the spindle, so the bearings weren't spinning good. Take control with the grease on the outer bearing. Pack it into that crevice on the back.
Put our rotor in place. Notice I'm just trying not to touch the rotor a lot with my greasy fingers. We've got our bearing in place. Clean the ugly grease off of our washer. Put the washer on. Put our bolt on. We're putting it on there. We got to take our ratchet and we're going to pull it a little bit tight, and we're going to spin the rotor around a little bit. We're going to loosen this up and we're going to pull it tight again. Just barely, probably like two or three foot pounds, not a lot. Next, we'll put our nut back on. We're going to pull it kind of tight. We're going to just rotate the rotor a little bit that seats the bearings, and then you're going to loosen this. Then we're going to bring it so it's just starting to seat, and you pull it just a little bit, probably two or three foot pounds. Put this on through and then grab the end, bend it over, and it's not going to come off.
We're going to put our dust cap back on and make sure there's no harmful dust in it. Now use mineral spirits or break parts cleaner, make sure you don't have any grease on the rotor surface. Also do the inside. Now we're going to take our calipers and we're going to push these sleeves out. Wire brush them, make sure there's no deep grooves, or any grooves on them really. All we need to do is push this piston back in. As you can see, I've got a big C-clamp on there, using my old brake pad and push on the piston. As I tighten the C-clamp, the piston goes back into the caliper. This should do just - This will require a little bit of pressure, but it should do it pretty easily. That's the way you know that the caliper is still in good shape. Here's my inner pad, comes with a little clip. Install that into the hole, and then pull it down and on, like that. Make sure you don't get any grease or anything on the pad. Install your pad into the caliper. We've got some pretty good scale on these, so I'm just using a screwdriver, scraping it off first. Then I'll go back with the wire brush. Your outer pad. There's a wear tab on this inner pad. You want to make sure that wear tab goes to the bottom. Put the caliper right down on, it's going to grab hold of the pads.
We've got our caliper bolts all cleaned up. Use some medium grit sandpaper if you need to. You just want to make sure you get all the stuff off them. Then put a nice fine coating of anti-seize on here. You could also use some grease or something. We're also going to put it on these collars here. These should go in. I'm just going to fast-forward here as I put those bolts in with my 3/8 Allen wrench. Then I use my other larger combination wrench for some extra torque when I'm tightening them. These bolts should be tightened between 45 and 50 foot pounds. I use the wrench. Put it on the Allen wrench for some leverage and pull it pretty tight, and then straighten the wheels out so I can put the tires on. Keeping the speed going, I've installed the wheel and tire back on, put the lug nuts on by hand first, and then I'll use my impact wrench just to tighten them up preliminarily.
I'll torque these to 100 foot pounds using a star pattern. Speed up as I finish torqueing. When I say use a star pattern, I just trace the bolts in a pattern like a star. Basically, like you would draw a star, and then put the center cap on, and install the plastic lug covers. Use your socket just to tighten the lug covers up until they click. Very important, pump your brakes and then do a trial stop from 5 miles an hour before you road test your vehicle.
We hope this helps you out. Brought to you by www.1AAuto.com, your source for quality replacement parts and the best service on the internet. Please feel free to call us Toll Free, 888-844-3393. We're the company that's here for you on the internet, and in person.
Shop Products


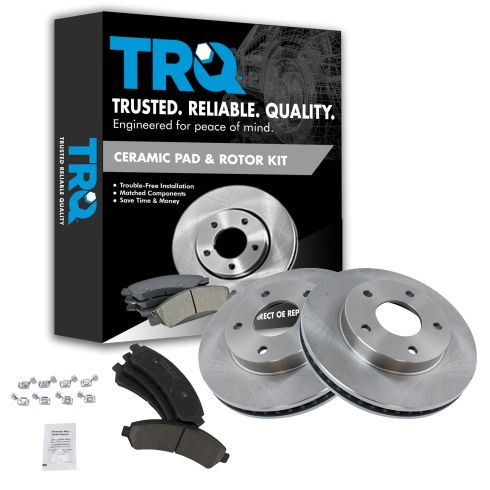
Chevrolet GMC Olds Isuzu Front Ceramic Brake Pad & Rotor Kit TRQ BKA10728
Part Details:
- Ceramic
- Premium Posi
- Vented
- 5 Lug
- 10.79 in. (274mm)
- (2) Front Brake Rotors
- (1) Front Ceramic Brake Pad Set
How to Replace Front Brakes 2013-20 Mini Cooper
Brake pads wear out over time, much like tires, and need replacing, on average, every 50,000 miles, with variations depending on driving habits and environment. Brake rotors may also need to be replaced if they are warped or grooved. Often, it’s safer and more cost effective to replace pads and rotors at the same time. Squealing or grinding noises, or wheel vibration are all symptoms of worn brakes. How to install new, quality TRQ brake pads and rotors on your 2013-20 Mini Cooper.
